Happy November and DIY Costumes!

It’s November already, although it hardly feels like it. My weather app says it’s 85 degrees. I’m still wearing my stinky summer OTBTs and my closet is still in summer mode. This is the worst time of the year to attempt to dress with the season and not sweat to death. Monday was Halloween, and below is my trio in our (mostly) DIY Costumes. My 10 yr old’s costume was a 2:00 day-0f purchase from Target (Santa pjs) and I made the beard from a piece of white felt, jumbo cotton balls and too many glue sticks to count. Oh and a piece of elastic! It was in shambles before we hit the first house and was no where to be found 20 minutes later. He also wore a Santa hat so Skinny Santa had a great night of trick or treating. Bonus: PAJAMAS!! He can wear them to sleep in too! Side note: his friends were a snowman and an elf, so they were a cute trio!

My 8 year old knew a week or two in advance that she wanted to be Larry Culpepper (see Dr. Pepper commercials). Luckily the 10 year old played Larry last year so all we had to do was pour out some DPs and hot glue them to the lid of a shoe box and attach a cooler strap. By the end of the night I think 1 can was left, but she was adorable in a sea of girly costumes and loved every minute of it.

The 13 year old. This was our Sunday afternoon painting-in-the-driveway project. If you live in the Southeast, then you know who Alexander Shunnarah is or have seen a billboard or two (or 380). He wanted to dress normal and be a “bottle flipper”, but one day while driving to work last week I saw a billboard and decided this would be much funnier. His costume was a hit in the neighborhood and on Facebook! Plus it only cost me about $13 in alphabet stickers.

IMG_8247

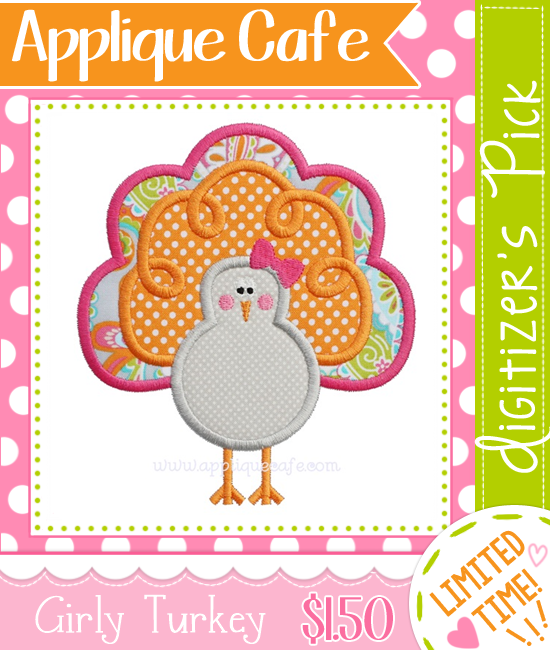
In other November news… did you see our Girly Turkey aka Digitizer’s Pick? I sewed this on a little t-shirt Monday and it’s one of my all time favorite Turkeys! Plus only 3 fabrics. It’s $1.50 for a ltd time!

digitizers pick

Here are a few of our new designs also! The Holly & Wreath are both raggy, and I used 1) red gingham on bottom, 2) white flannel in the middle, and 3) green polka dot on top. Check them out at Applique Cafe for a better photo! These designs plus all the others are 40% off through Tuesday, November 8th, which happens to be ELECTION DAY!! Won’t we all be glad when that’s over!?!?

new designs 11216

Enjoy the rest of your week!

Applique Cafe Christmas List!

Just a quick post to share with you all the things we offer at Applique Cafe that should be on your Christmas list! 🙂

  1. GIFT CERTIFICATES!! We sell them in $10 increments and they can be printed and mailed to you or to your mom/friend/cousin/neighbor. If time is of the essence, I can also fill in the info and email it to you to print!

Applique Cafe gift cert 400

2) Monogram Wizard Plus!! I’ve sold 2 this week, so a couple of people are getting new font software for Christmas! There is an actual installation CD for MWP which is shipped to you. I usually mail same day, so it will arrive in your mailbox within 2-3 days (we ship USPS Priority Mail). If you are new to embroidery and are frustrated with the fonts that came on your machine, or with merging letters together, then check out MWP! It’s a GREAT investment for your embroidery business. Below is an example of your screen and it’s super easy to use!

mwp3

Look at all the possibilities! It comes with all of the font options you see below, plus you can add to your font collection with a few clicks at the Needleheads store.

mwp4

3) Needleheads Store Gift Cards!! You bought or already have Monogram Wizard Plus, and you want to add to your font collection? We sell $25 Needleheads gift cards for $19.99, so you’re saving $5.01 off the bat! Needleheads often runs sales and specials too, so you can save more by using our gift card on top of their sale! We have physical gift cards we can mail you, OR, most people just want the code to get the discount (which we can email to you). Needleheads gift cards are redeemed at the Needleheads Online Store.

Needleheads gift card sale

4) Sew What-Pro Embroidery Software!! SWP is a top seller at Applique Cafe month after month. Not only is it super affordable ($65), it’s easy to use and honestly I couldn’t survive without it! I use it for merging (adding a name to an applique design), minor editing (deleting a part of a design) and for the most part, just to SEE the applique design I’m working on. It shows me the size I’m working on, each step in the process and I can play around with colors (thread) to help me choose my fabrics!

Here are a couple of workspace examples, and I just updated my SWP last night so the screen now looks a smidge different! By the way… the names you see are done in Monogram Wizard Plus, then merged in to Sew What-Pro!

swp4

SWP ad1

5) Durkee Cap Frame!! OK so we don’t sell cap frames, but if you saw my recent post on the “new” Durkee Cap Frame, then you might want to add it to your list too! Check out my blog post from earlier this week to learn all about it – HERE. If hats are on your product list, then consider investing in a DCF to make life easier! 🙂 They have frames that are compatible with multi AND single needle machines!

Durkee Cap Frame

6) Mighty Hoops!! Again, not something we sell here at Applique Cafe, but again, check out my recent blog post on the super easy magnetic Mighty Hoops! The hoops can be used alone, or with a fixture to help with centering and easy hooping. Check out that blog post HERE. Below is the 6.5″ square Mighty Hoop and Fixture, and I’m giving it a workout this week monogramming towels!

IMG_6487

And here is my 7.25″ square Mighty Hoop that I use without a fixture! It’s great for items like bibs and bags that are a little harder to hoop.

photo 3 (11)

7) Applique Cafe Christmas & Holiday Designs!! Lastly….. all of our Christmas & Holiday designs are 40% off, so if you are still working on Christmas shirts, towels or even winter (this category includes snowmen, ice skates, mittens and other winter designs), then they are on SALE!

cmas sale

Mighty Hoop It!

Happy November blog readers! Once again, it has been a while since my last post! Fall is so busy… blah blah blah…. 🙂 Back in February I did a blog post about Mighty Hoops. They are the fantabulous magnetic secondary hoops that you can use with various brands of multi-needle embroidery machines. I have had the 7.25″ x 7.25″ mighty hoop for a while now, and I’ve just used it solo without any stand or fixture. I was contacted recently by one of the co-owners of HoopMaster about trying a smaller hoop and the fixture. I have seen these things demonstrated over the years and have always been intrigued, so I was excited to give it a try. So now I have the 6.5″ mighty hoop and fixture/stand. I’ve used it quite a bit over the last week or so and I.LOVE.IT! It’s an investment, but like any embroidery investment (like software, that bigger machine, etc.), it’s worth it if this is what my job is!  If this is what I’m going to do, why not spend the money on the things that make my job easier! Monogram Wizard Plus seemed like a lot of money to spend on font software back in 2008 (or whenever I got it), but when you put in to perspective that I’m still using it in 2015, it makes it seem so worth it and not such a huge investment! Might Hoops will be that same great investment!

Here is the Fixture/Stand. When I first put it together, I will admit I had no idea how to work it. Luckily there are several videos out there so I got the hang of it very quickly. Here are a few things to note:

The -0- is the center of the hoop.

The T-bar is used when you are monogramming something like a hand towel. I will post a photo of that later.

It’s really hard to understand the whole Fixture/Stand without having one in front of you, so hopefully my pictures and explanations will kind of help you get it!

IMG_6508

I monogrammed some baby blankets recently and took some pictures along the way. See if you can follow me! The bottom of the hoop, which typically goes on the bottom of the garment, is placed neatly in the fixture. It fits like a puzzle. It simply keeps the bottom of the hoop in place until you can get your garment centered and ready to hoop.

IMG_6479

Next, you lay your stabilizer on top of the bottom of the hoop. I’m using a waffle weave tearaway on the bottom of my baby blanket. Note: the black corners and top piece flip back (see the hinges) and can hold the stabilizer in place. Pre-cut stabilizer would come in handy here. I just laid mine on top which worked great too.

IMG_6480

I marked my center of the blanket which was about 6.5″ from the bottom. The lines on the fixture count up from -0-, which is the center of the hoop. If I want my monogram centered 6.5″ from the bottom, I line the end of the blanket up with the 6.5″ line on the fixture. I also lay a piece of water soluble stabilizer on top of the blanket because it’s a minky material and I don’t want my monogram thread to sink in to the blanket. Note: the clear part on top bounces up and down, and is used for the top part of my hoop. Note 2: I did not use the T-bar for this particular blanket, but will show a photo later of when I did use it on a hand towel.

IMG_6472

Next I rest the top part of my hoop on the clear part of the fixture. It fits perfectly in between the clear arms. Now I am ready to actually hoop the blanket with the Mighty Hoop!

IMG_6474

I pressed down on the top hoop/clear arms and the top of the hoop snaps to the bottom of my hoop because of the MAGNETS in the hoop. You can also see my center mark on the blanket is centered in the hoop below. You can also see closer that the edge of my blanket is lined up with the 6.5″ line on the fixture. If I wanted the monogram centered 10″ from the edge, I would line the edge of the blanket up with the 10″ line.

IMG_6475

As you can see below, my tearaway stabilizer is in the hoop also on the bottom. I am now ready to monogram the blanket! So my layers are: bottom hoop, tearaway stabilizer, blanket, water soluble stabilizer and then top of the hoop on top.

IMG_6476

Below is the hoop on my machine, and as you can see, my center dot is already lined up with needle because my blanket is hooped (almost) perfectly centered!

IMG_6478

Wouldn’t you know I didn’t take a photo of the finished monogrammed blanket! Sorry!

Here is a hand towel and maybe this will help with the T-bar explanation. (From the HoopMaster website: “The T-square is to assist you in measuring the horizontal distance from the edge of a garment to where the center of a logo is to be embroidered.”) The hand towel is 15″ wide, so if you adjust the T-bar to line up the center of the fixture with the 7.5″ mark ON the T-bar, your towel will be centered if you line up the corner on the right where the T is. I didn’t have any way to hold it AND take a picture, so I used a clip. I know this is hard to understand!! Trust me… if I had 15 hand towels to do, this would REALLY come in handy! No measuring tape and marking the center. It’s all done on the fixture!

IMG_6509

I also used the hoop/fixture/stand today to hoop the back of a jacket! I had marked the center where I wanted my monogram, but used the fixture to keep it all in place so I could hoop it. The magnets draw the 2 pieces of the hoop together, so it’s SUPER EASY and there’s no hoop burn!

IMG_6516

You can find more information about Mighty Hoops on the HoopMaster website – click HERE! They have several videos you can watch also. Click HERE to see those! There’s one on setting up the T-square that might explain it better than my 1 photo.

I posted a photo of this on Instagram last week and got lots of comments and questions! Please let me know if you have any questions! You can also email info@hoopmaster.com if you have any questions that I might not be able to answer! I know this is hard to comprehend without the Hoops in front of you! Or maybe you DO have the hoop and fixture but aren’t sure how to use it? Several people commented that they had the hoops and/or station and LOVED them! I’d love to hear from you!