Umbrellas and Hats

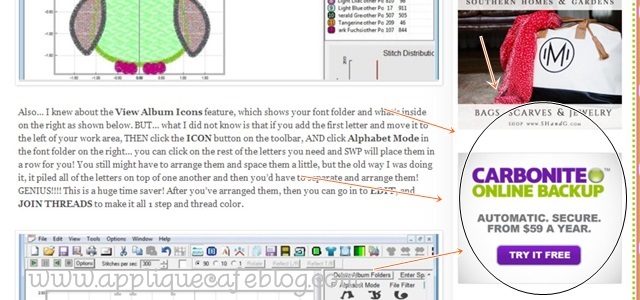
Good afternoon friends! Yesterday I opened the mail to find a copy of Creative Machine Embroidery magazine and was pleased to find that my BLOG was noted in the magazine as “One to Follow“!! While sometimes I struggle to find the time to blog, or struggle to come up with anything to blog about, it has always been my passion to share what I’ve learned with all of you! I know sometimes it’s boring (WAKE UP!!!) and sometimes I go a month 2 weeks with nothing posted, but please know I’m here and hope to bring you helpful info as often as I can!! Thanks for reading and thanks for the comments and encouragement! 😉

photo (27)2

Now, as promised…. I monogrammed a hat Friday using FAST FRAMES and took some pictures to show you. I posted the other day about doing a visor on my BROTHER PR650 using the cap frame. You can do hats with the cap frame also, but if you don’t have a cap frame or want to unpack it from the box, you can use fast frames. I’m not promising this will work on all hats, but the ones I’ve done have been NOT-stiff and easy to work with.

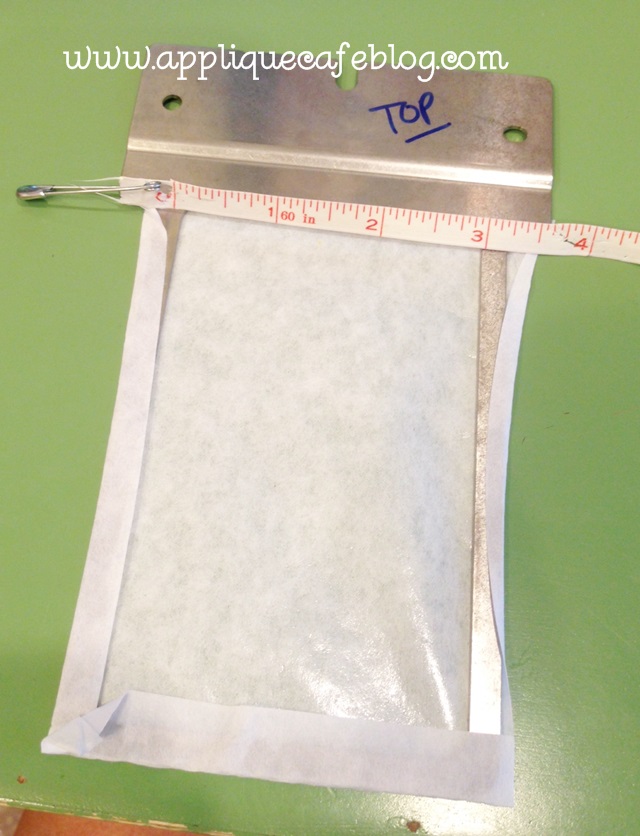
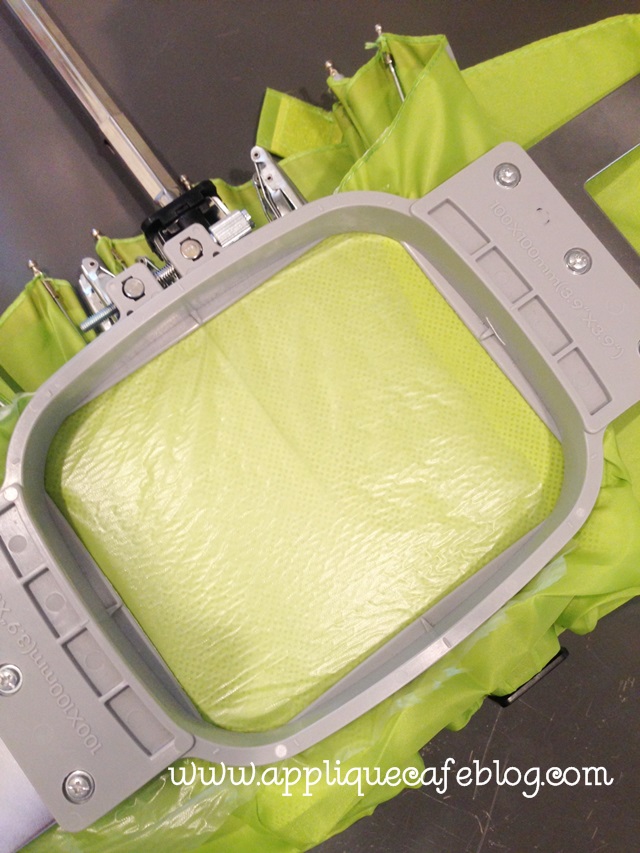
I used the below frame, as the monogram for my hat was around 2″ tall and wide. You could always do your monogram bigger. I did this hat for myself. A) I rarely wear hats but thought it might come in handy this summer {I typically wear a visor if anything on my head}. B) Being someone in the business of monogramming, I never wear anything monogrammed!!! As you can see I’ve used sticky stabilizer on my fast frame and wrapped it around the edges. Am I the only one who stares at my frames to determine which side is the top and bottom….

photo 4 (5)

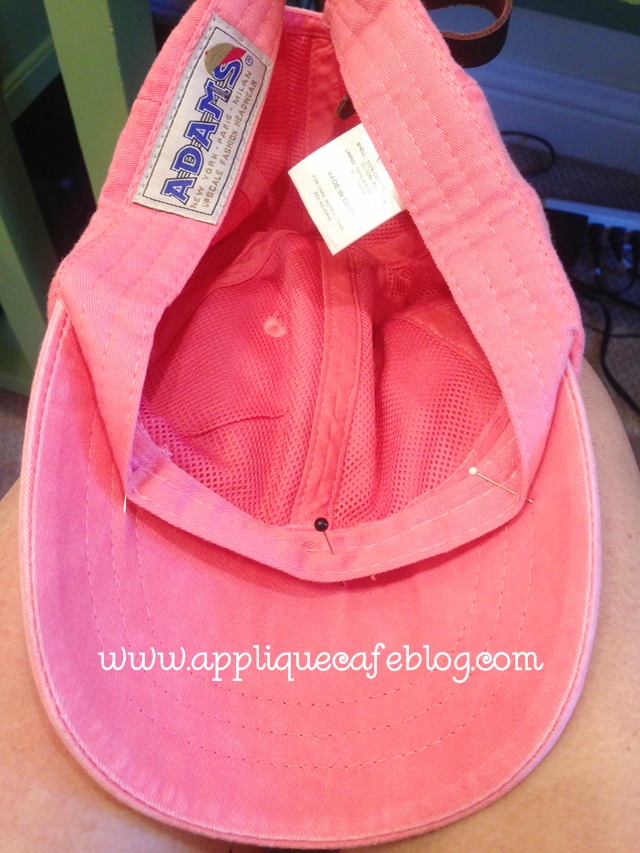
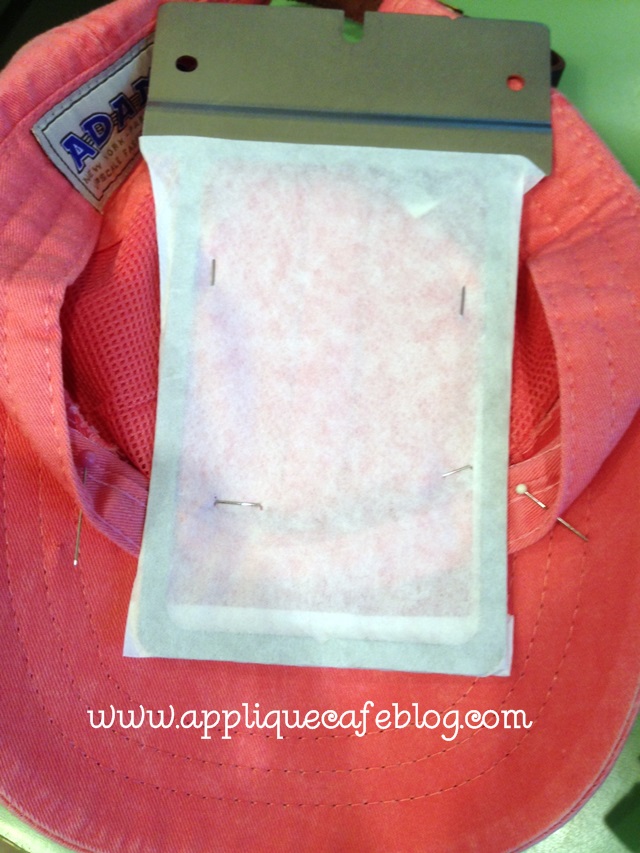
The first thing I did was get the liner out of the way so I don’t monogram it. I simply pinned it out of the way! As you can see, this is one of those cute “pigment dyed” hats that are so popular right now (like the Comfort Colors tees). It’s ADAMS brand and I got this from a friend, but have recently discovered Apparel N Bags website where you can buy the Comfort Colors tees, these hats and other cute things!

photo 3 (10)

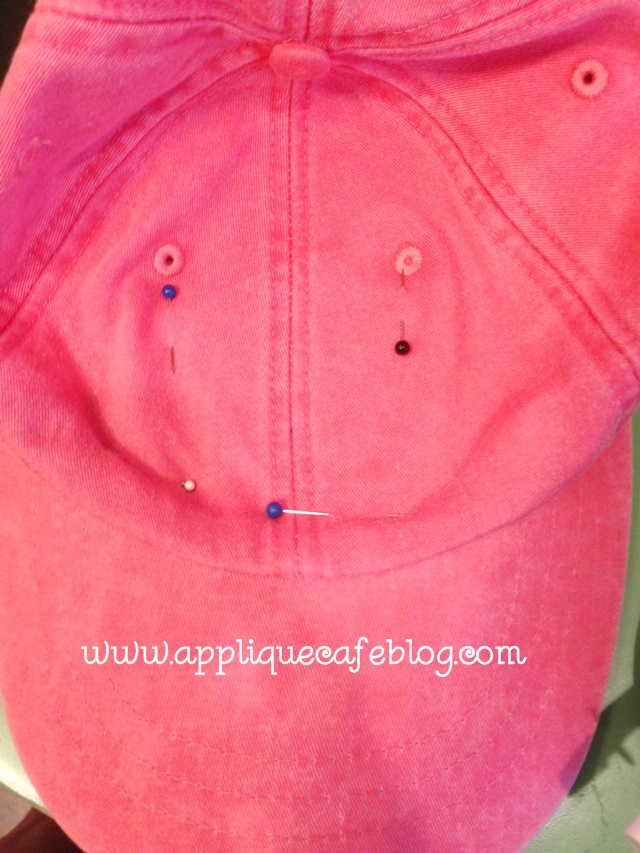
I flattened the bill of the hat out so that I could attach the face of the hat {where the monogram will go} to the fast frame and sticky stabilizer. As you can see below, I pinned my monogram area in place and tried to line up the center seam of the hat with the center of the fast frame. This takes some practice and I had to adjust and move the hat several times to get it right. As I said, my monogram is only around 2″ so I didn’t need much space.

photo 5 (4)

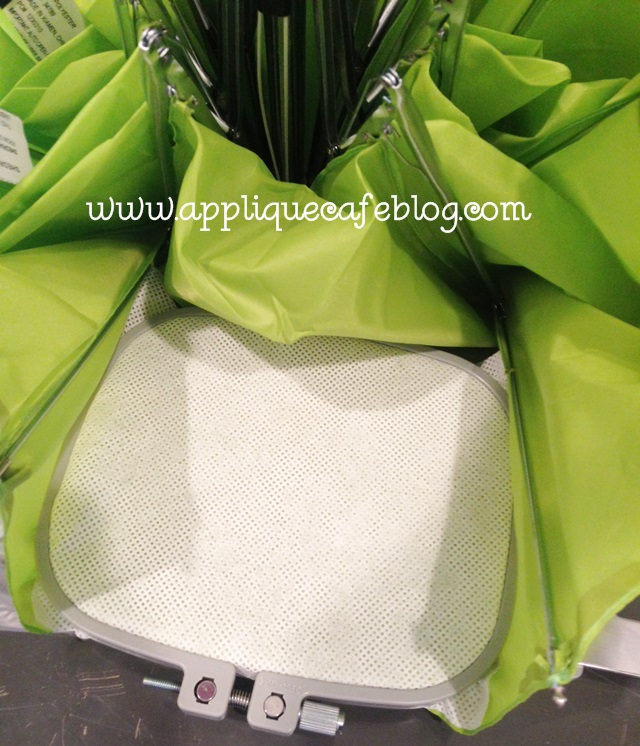
This is what it looks like underneath. My lining is pinned down, and the face of the hat is also pinned in place.

photo 1 (15)

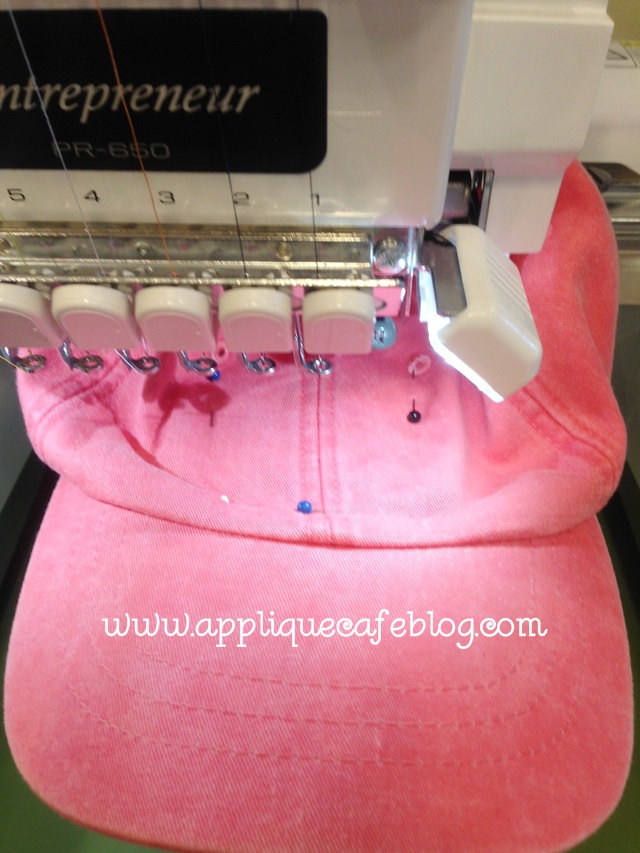
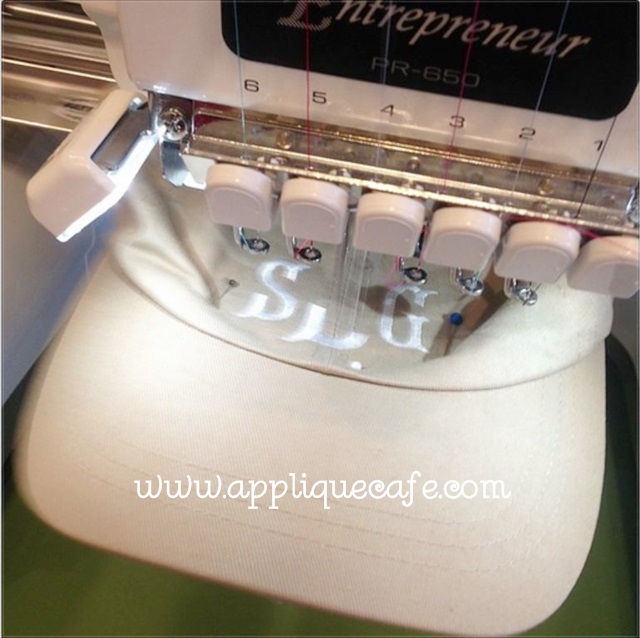
My hat is on the machine now ready to sew. Just make sure the excess hat is out of the way on all sides! Also, since this is a FAST FRAME and my machine doesn’t recognize it as any particular hoop, I checked my borders to make sure my monogram would fit INSIDE the area on the face of the hat. You don’t want your needle to hit the frame on either side!! I lined my lead needle up with the center seam on the hat.

photo 2 (14)

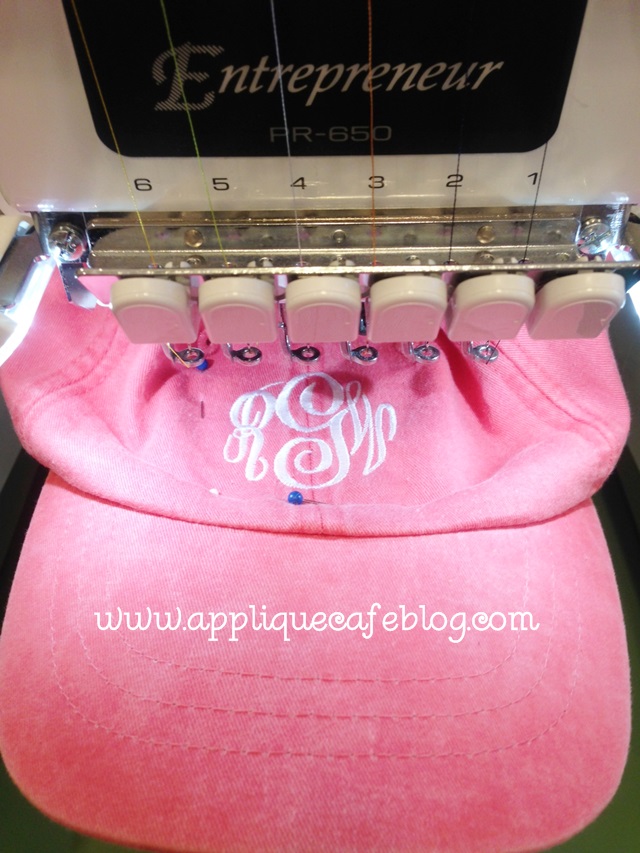
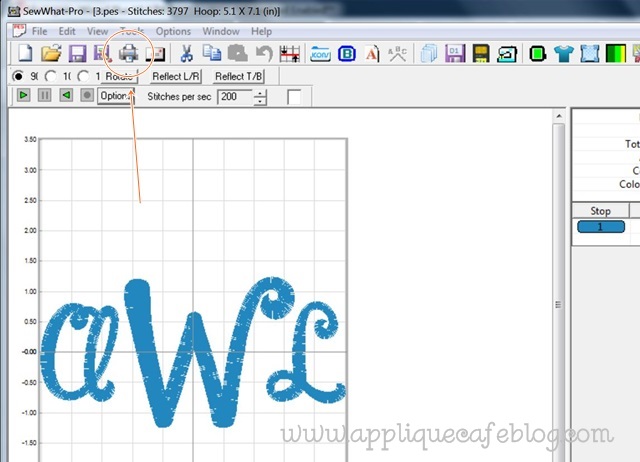
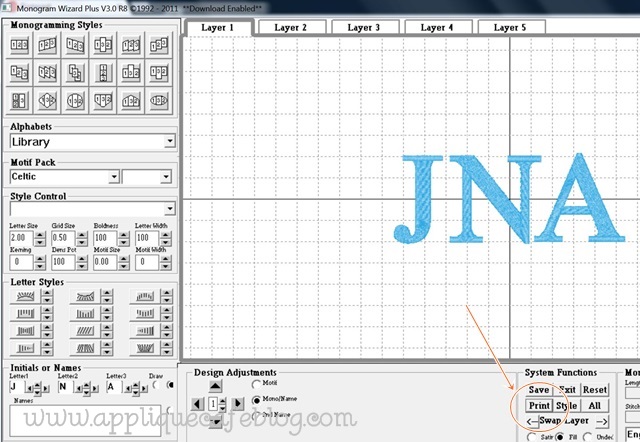
My monogram is complete. I used Monogram Wizard Plus “Master Circle” font.

photo 4 (9)

When done I remove the hat and frame from my machine, unpin it and remove the hat from the sticky stabilizer. I then remove any sticky stabilizer from inside the hat, unpin the liner and it’s ready to wear! Again, some hats have seams like the one below which shows you where to center the design!

photo 5 (9)

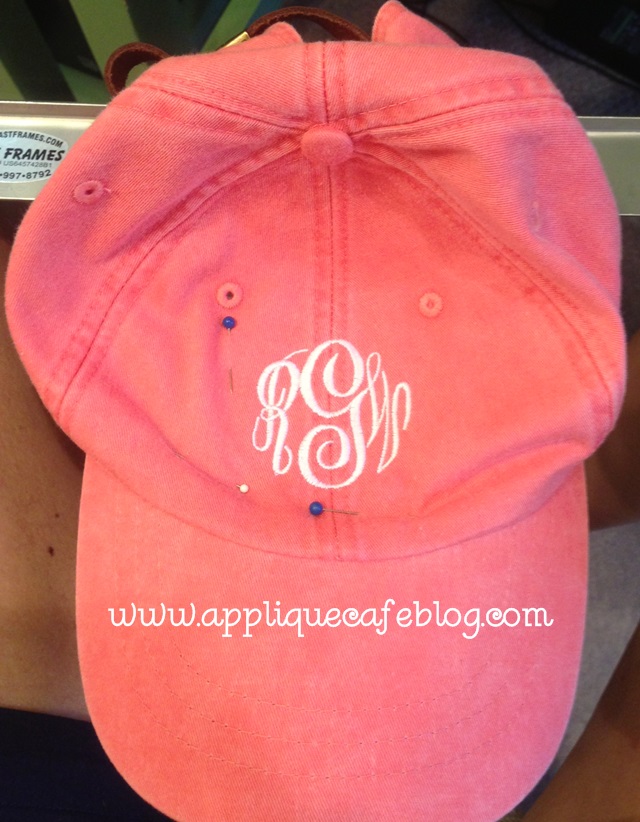
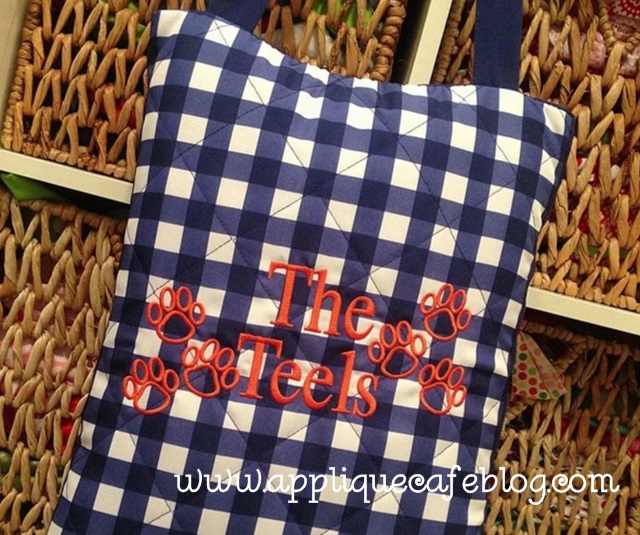
Here’s the finished product!

photo 1 (14)

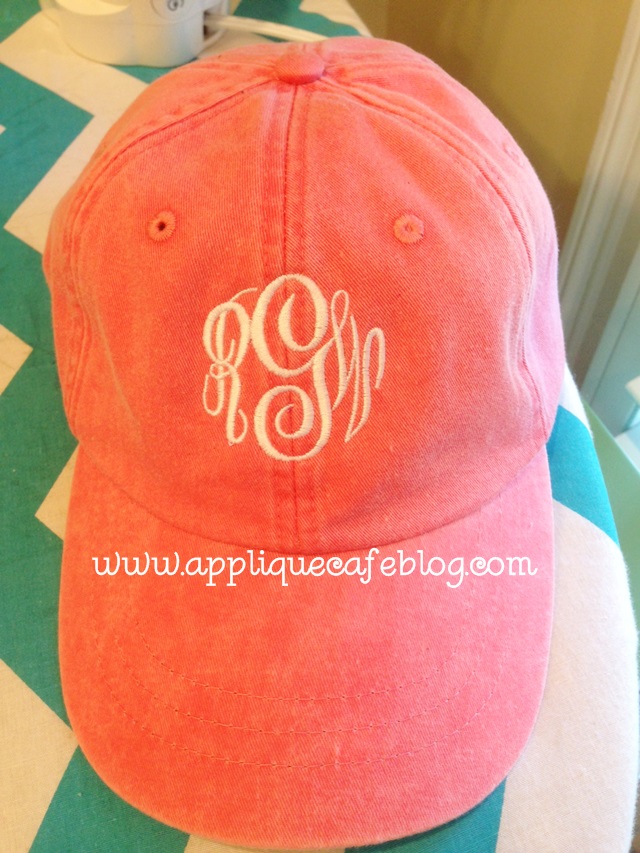
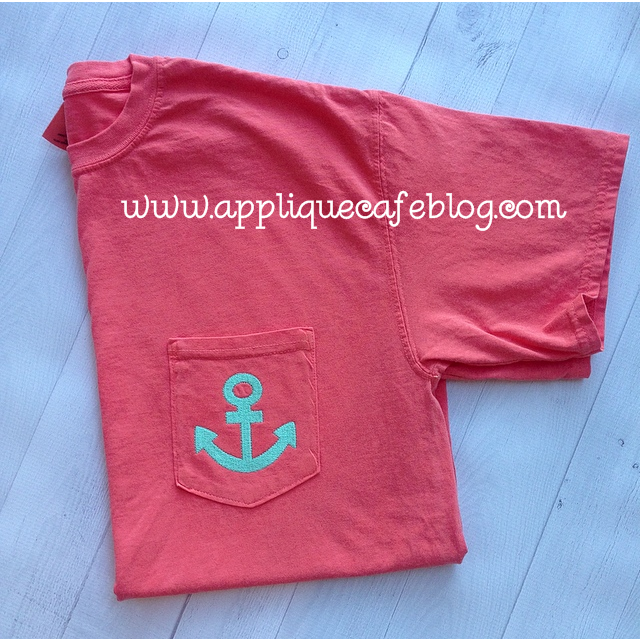
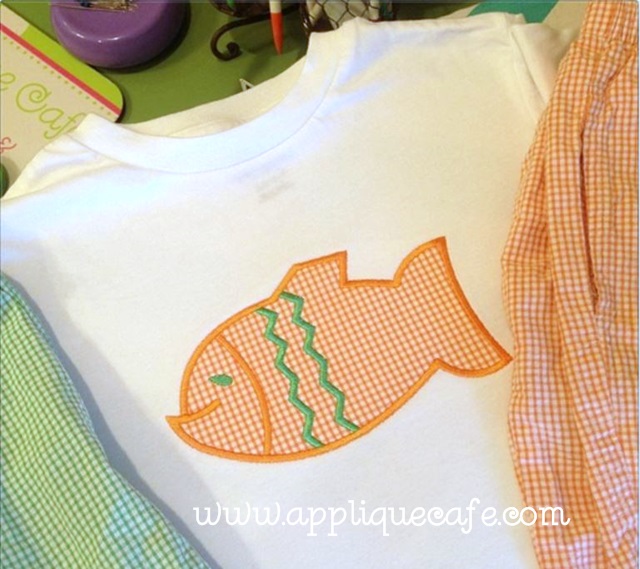
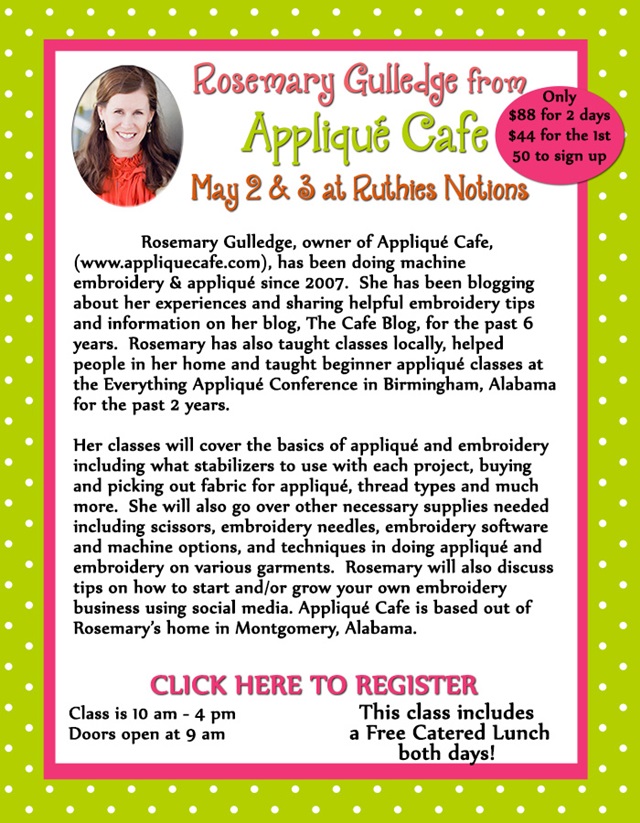
I am a little obsessed with the color of the hat and the below T-shirt, which is Comfort Colors Bright Salmon! The hat may be Poppy or Nautical Red (Adams brand)? These are all samples for my upcoming class at Ruthie’s Notions {this coming weekend!!}. In lieu of initials, I put our 3″ Mini Embroidery Anchor on the below Comfort Colors tee. I’m also using my vinyl backdrop I got recently from Bubble Gum Backdrops on Etsy! This is a 36″ X 36″ pale wood vinyl backdrop. It really makes the t-shirt pop!

photo 2

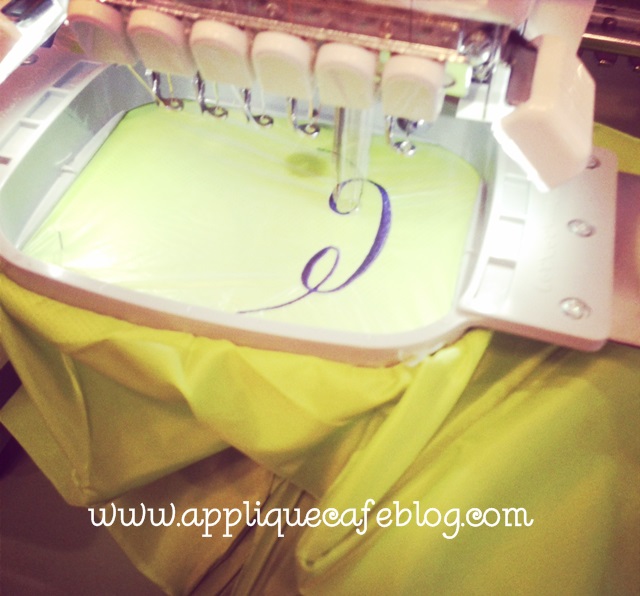
Also this week, I monogrammed a few UMBRELLAS! EEEekkkk!! Scary I know! They were really pretty easy to do and I took pictures along the way! First of all, I did use my 4×4 hoop as opposed to fast frames. The material of an umbrella is so thin that I was afraid sticky stabilizer would not come off easily or cause the umbrella fabric to tear in the process of removing it. I used waffle tearaway and water soluble “solvy” stabilizer on top.

photo 5 (10)

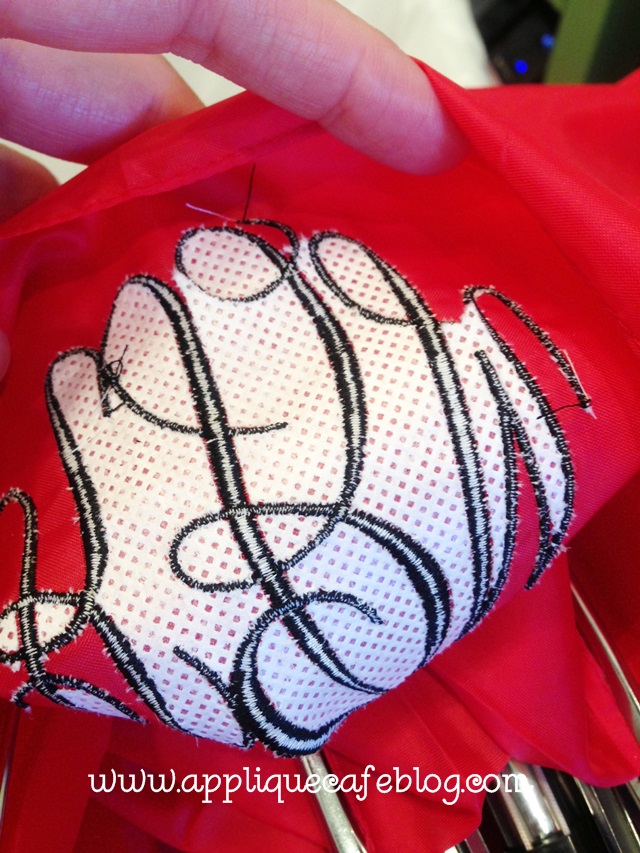
Here’s what it looks like from the inside. I love the waffle tearaway when I need a little more substance than regular iron on tearaway! I “stuck” it in place with a little temporary spray adhesive (Sulky KK2000).

photo 4 (10)

I put the hoop on the machine and rotated the design upside down so it would sew correctly. Again, I used Monogram Wizard Plus “Master Circle” font.

photo 1 (16)

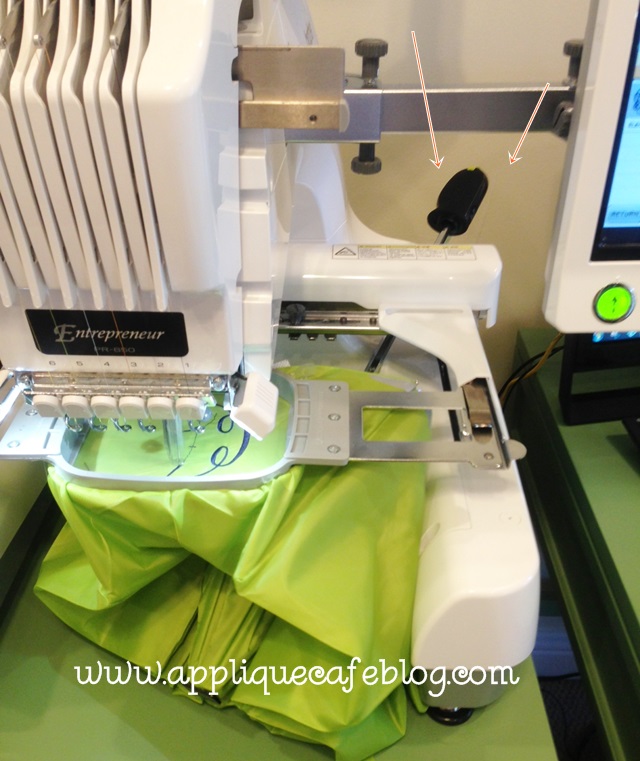
As you can see below, the handle of the umbrella simply rested underneath the arm. I kept an eye on it so it didn’t hit anything causing the machine to mess up.

photo 2 (15)

This is what it looked like when I was done. I did 3, so these pictures have different initials on them. I removed the hoop and stabilizer from both sides, including inside the letters.

photo 1 (13)

The waffle stabilizer is very easy to pick off. {I think I need some lotion!!!!}

photo 2 (13)

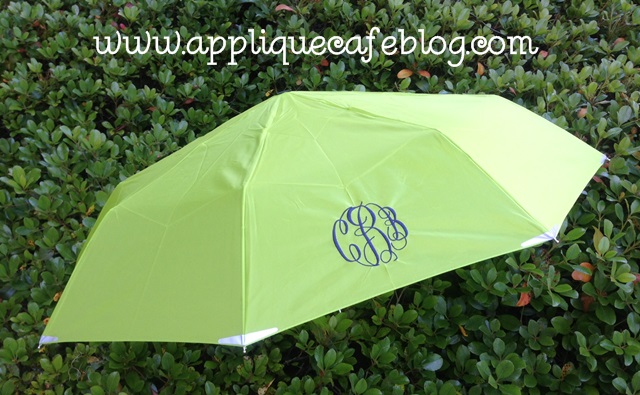
Finished product! This would make a great personalized gift!!

photo 3 (12)

I hope this is helpful! Please have a blessed week and live each day to the fullest!

Print it!

It’s a rainy day in Alabama. I love a good ole rainy day, but we seem to have them every Monday which gets old because Mondays are hard enough. That, and the fact that little Maggie does not like to go to the restroom out in the rain, which makes for an interesting day when it’s raining and the back yard is flooded. Who can blame her? Here is a photo of her last Friday on a dry day. She’s a Lab trapped in a little furry body. She loves to dig and bark at every bird, squirrel, bee and mosquito she sees. This was taken 5 minutes before we were to leave town Friday…. Needless to say we were delayed.

mags

Blog readers…Pay attention to the “ad buttons” on the right! These are a few of my favorite places or products. I blogged about Pic Monkey recently, which is a fun editing photo program I use a lot. “New” to the blog are Southern Homes & Gardens, which is a fabulous home & garden store here in Montgomery. SH&G is owned by some family friends (or some friends’ family) and they are selling a lot of items found in their store online now. Check it out! I’ve been discussing a giveaway with SH&G so stay tuned for that too.

Now, pay close attention to the CARBONITE button! Being in the web business with digital products, if I’ve heard it once I’ve heard it 2,356 times {and usually on a weekly basis} from customers…. “MY COMPUTER CRASHED AND I LOST EVERYTHING!!!!!!!” Most of these emails are urgent and dramatic b/c said customer has just lost thousands of dollars worth of digital embroidery files! Applique Cafe now has the Your Account feature where you can log in and access any purchases you’ve made since 11/8/11. However, this system is not foolproof! There are also like 2,356 applique websites out there now. It may take you a while to email them all or to log in to access those designs you spent your hard earned money on!

carbonite

There are a variety of options depending on how many computers you have and if you are a business or just a home user like most people. Click on the link and check it out! You can also try it free which is always good. We’ve been using it for years! It’s money well spent.

PRINT IT!! This is not rocket science and I’m probably not telling you anything you don’t already know. However…. I have been using this feature a lot lately so I thought I’d share. Old age maybe?? Do you ever wonder how big to make a monogram or where to put it? As you all know, I use Monogram Wizard Plus and Sew What-Pro software and both allow you to print what you are working on which is GREAT.

Below is Sew What-Pro.

PRINT2

And Monogram Wizard Plus.

PRINT

I’ve done several “polo” type shirts this week, so I formatted the monogram in MWP as best as I could (meaning I guessed on size), then printed a copy of it and cut it out to lay on the shirt. This helps me to see if my size is right, and it also helps with placement! Sorry these pics are a little fuzzy. I guess all the rain has my camera fogged up.

photo (17)

photo (18)

I’m also doing 5 towels for graduation gifts. These are for guys going off to college, so we decided to do their initials straight across and I used MWP “Library” font. I wanted to make sure this was going to look right, so I guestimated the size of the initials and printed it so I could make sure it would look right.

photo (16)

Here’s the finished towel! Looks great!

photo (19)

Again, not rocket science, but I thought I’d share in case you ever get in a bind or are undecided on a monogram or design! I also discussed recently how printing your design when trying to cover an old monogram helps out too. You can read that post HERE!

Have you noticed anything new on Applique Cafe? Yes, Easter designs are 1/2 off! There are also a few new buttons on my website. I am constantly looking over my website and making sure it’s as user friendly as possible, and not confusing, and “neat” looking. Like my designs, I like to keep things SIMPLE. I added a few buttons to help better navigate to those important areas ~ YOUR ACCOUNT (your purchases saved under your email address), GET NEWS (subscribe to our newsletter which goes out usually once per month with new design and sale info) and of course MY BLOG! That’s where you are now! Check it out!

web page

Sew What Whaaa???

Today I have been dreaming of summer. The weather has been glorious and I long for the days of NOT getting up at 6:30 to get the kids off to school. I dream of no homework, packing snack or lunches, waking up with no where to be, and taking the kids to the pool every other day if they want to go.  6 weeks!!! I’m taking bets of how long it will take me to complain about the 100+ degree temps and the fact that the kids are driving me nuts! 🙂

If you were on Facebook today then you hopefully liked my post of this A-D-O-R-A-B-L-E t-shirt from Sassy Kid Blanks. This is our Lollipop Trio design with bright, fun and adorable fabrics! Melissa does a great job with the blanks, but she also sends me photos from time to time of my designs that she has sewn! Love….skb-tile2

Y’all…. I have been pushing Sew What-Pro for YEARS!! It’s simple to use and it’s affordable (ONLY $65). What else do you need to know? While dreaming of summer today, I’ve also been working on my website and blog and newsletter trying to tweak things here and there to make shopping and browsing easier but also helpful and informative. Well…. I stumbled upon some videos from the S & S Computing website and my life may be changed regarding Sew What-Pro. Helllooooo TUTORIALS!! I watched a few of them, and the 2 that caught my eye were…..

Adding “fabric” to your applique design on screen. Granted there aren’t a ton of choices and it looks like digital fabric of course, but it’s a pretty cool feature if you are trying to pick out colors or visualize fabric.

swp fabric

Also… I knew about the View Album Icons feature, which shows your font folder and what’s inside on the right as shown below. BUT… what I did not know is that if you add the first letter and move it to the left of your work area, THEN click the ICON button on the toolbar, AND click Alphabet Mode in the font folder on the right… you can click on the rest of the letters you need and SWP will place them in a row for you! You still might have to arrange them and space them a little, but the old way I was doing it, it piled all of the letters on top of one another and then you’d have to separate and arrange them! GENIUS!!!! This is a huge time saver! After you’ve arranged them, then you can go in to EDIT, and JOIN THREADS to make it all 1 step and thread color.

alphabet mode

Check out the VIDEOS and I will too, and let’s all figure out what else is FABULOUS about Sew What-Pro!! I am so glad that I have started selling it and have enjoyed answering questions and sharing this great and inexpensive program!! It’s perfect for beginners and old timers like me! Now I have even more reasons to recommend it to my applique friends! Update: I forgot to mention – watch the Pull Compensation video FOR SURE!! I had no idea… 

Are you on Instagram?  I love IG for many reasons. I used to love Facebook, but scrolling through all of the ads and blog posts people want me to read (not to mention the cray cray things people post), I love IG more. Granted I still like Facebook and spend wayyyy too much time on there, but IG is great for JUST photos! I like to post on there the random things I’m working on in my sewing room! It’s not all Applique Cafe designs. I still take customer orders, so I monogram a lot and do all sorts of things. Here are a few photos of what I did today….

This is a C-U-T-E picnic blanket from none other than Target. It folds and zips up so it’s easy to tote. This is for a friend for her friend’s wedding gift. Hopefully these people are not reading my blog. I used our Paw Prints design (4×4 on each side – right one I flip flopped for a mirror image in SWP). The font is Monogram Wizard Plus “Library” font and I narrowed up the letters so they would be tall and big. These folks are Auburn fans! #wareagle

picnic

I also monogrammed this HAT today and I used my fast frames. Several followers on IG asked for a blog post or tutorial on how to do this, so I will work on that asap! Font: MWP Cotillion (Fishtail)

hat

I also had a friend bring me a couple of shirts to do, and for this one she wanted to match both of the shorts shown. I happened to have the orange fabric, so I used that and tied in the green with the accents of the FISH design. This is actually our Two Fish design, and I used the 6×10 file and deleted the top fish! That left a fish that fit nicely in my 5×7 hoop and I did enlarge it a little after I put it ON my machine. {Most machines will shrink or enlarge 10-20%} We may offer this as a single fish design and might come up with a girly version too. Did I mention that I edited the design in Sew What-Pro?

fishshorts

Lastly, my friend asked me to do the Cool Dog on this gray t-shirt. She specifically said use red and navy, so I pulled these fabrics together and it turned out cute. I love red on gray!

cool dog

In case you missed it, I will be at Ruthie’s Notions down in Baker, FL on Friday/Saturday May 2-3. I rode down there yesterday and spent several hours with Ruthie and am excited and extremely nervous about this class! Ruthie is a Babylock dealer and sells tons of “notions” and all of the fabulous Babylock machines. My machine is a Brother PR650 and it was basically the same as the Babylock. I believe they are manufactured by the same folks. Anywho, if you are interested in learning about applique and embroidery and are in the area or willing to travel, check out the details HERE!

ruthies

If you have suggestions of topics I could cover, please comment or email me! My target audience is a beginner, or someone who’s just learning about embroidery & applique. I plan to also discuss starting or growing your embroidery business (which I have never taught before). This is the longest class time-span I’ve ever taught, so I have a lot of work to do! I’ve already had someone email me with ideas so if you have any, please let me know ~ rosemarygulledge@appliquecafe.com or comment! THANKS!!