Monogramming Nike Shorts

So…. it has been raining here for 2 solid days. All of the snow and ice is north of us, so all we have had is rain and cold and cold and rain all.day.long. yesterday and today. I’m over it and ready for SPRING! and Nike shorts! I had a customer bring me some Nike shorts to monogram this week, and after asking around to see if anyone had done them before, I “figured out” which stabilizer to use. After I was done, I realized it might be handy information for those of you out there who haven’t done any yet.

I used water soluble “solvy” on top. Yes, it’s water soluble, but I just pick and pull it off when I’m done.

IMG_8781 IMG_8782

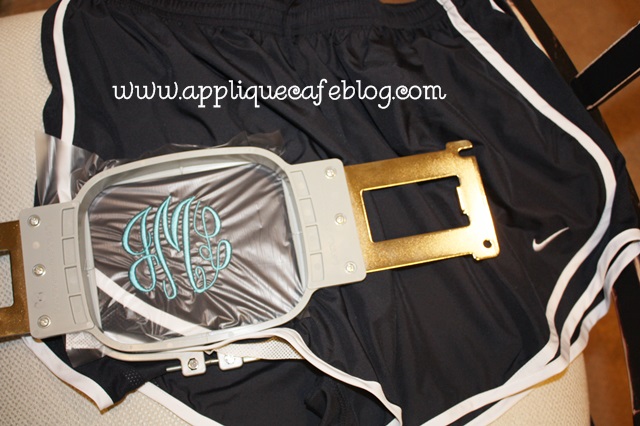
I used Waffle Tearaway on the bottom. As you can see, I hooped it all together and also used a little Sulky KK2000 spray adhesive to “stick” the tearaway to the underside of the shorts to keep it in place. This type of tearaway is a little thicker than the standard iron on tearaway, which is like paper, which I normally use on towels and bibs. Nike shorts are made of a thin polyester type material, and I wanted to avoid any puckering with the weight of a monogram. I considered using cutaway (medium) but went with the tearaway and it did fine.

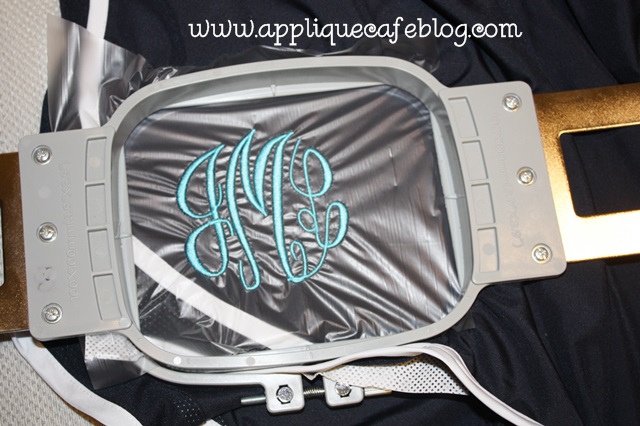
Do you notice anything “off” on my monogram below? There is no bobbin thread showing, which means my tension is off. This doesn’t affect this particular monogram, but it might if you were working on another project. I will show you in a minute how to check your tension on a 6 needle machine.

IMG_8783

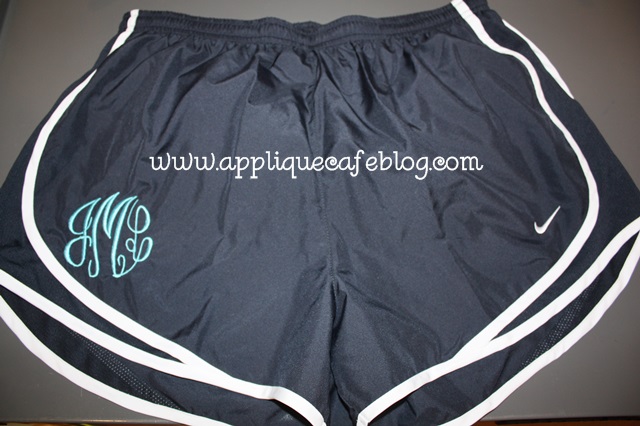
Before I actually did the monogram, I wasn’t sure what size I should do. I looked around on Pinterest and saw a bunch of monogrammed Nike shorts in a variety of fonts and size monograms. I was between a 2.5″ and a 3″ monogram, so I printed both and cut the monogram out to see which size looked best, and also it helped with placement. I used Monogram Wizard Plus “Master Circle” as my font. MWP has a print option which comes in handy when you are deciding size and placement.

IMG_8784

I went with the 3″ monogram after consulting with my customer!

IMG_8785

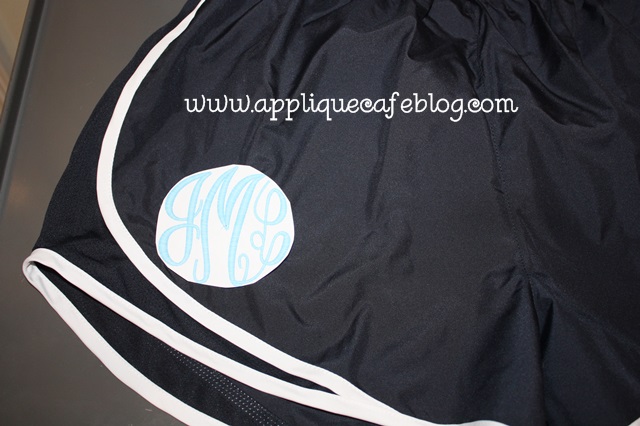
Here’s the finished product! As I mentioned, if you search “monogrammed Nike shorts” on Pinterest, you will see all kinds of fonts and placement. I love the way these turned out! These are navy with a turquoise monogram. Hot pink would have been cute too!

IMG_8786

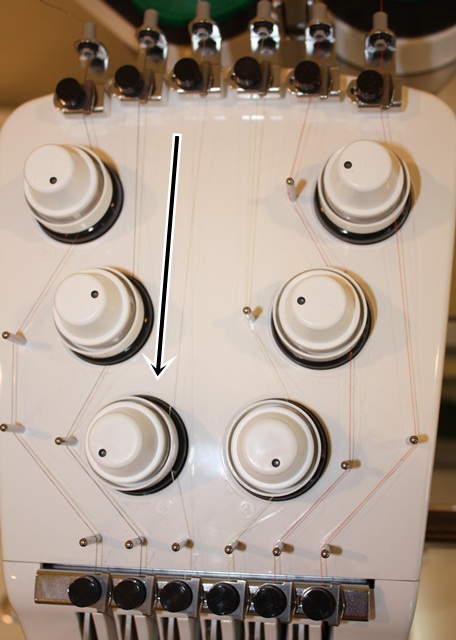
Now on to my tension issue. I have a Brother PR650 6 needle embroidery machine, which comes with a handy dandy tension test feature. On machines such as mine, your tension is controlled by knobs on top of the machine.

IMG_6970

Looking at your Home screen, select the button with the bird on it.

IMG_8788

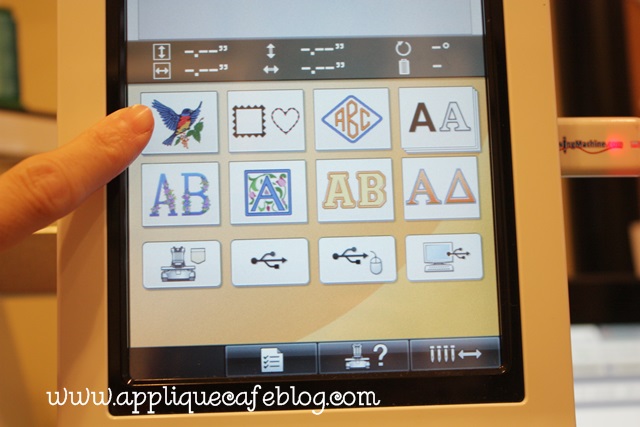
It will pull up some embroidery designs built in to your machine. Go to page 2 and you will see the tension test.

IMG_8789

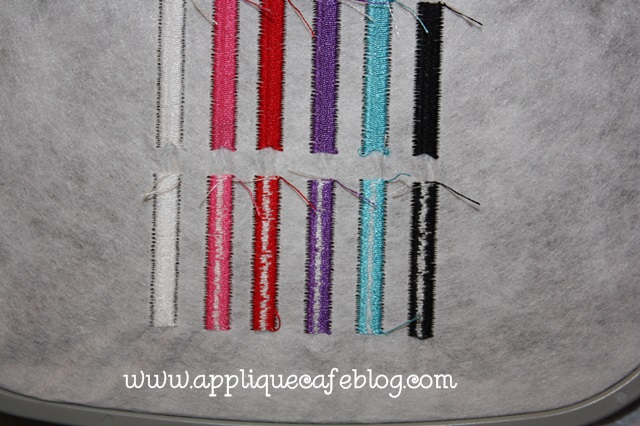
6 color bars or lines = 6 needles = 6 thread colors.

IMG_8790

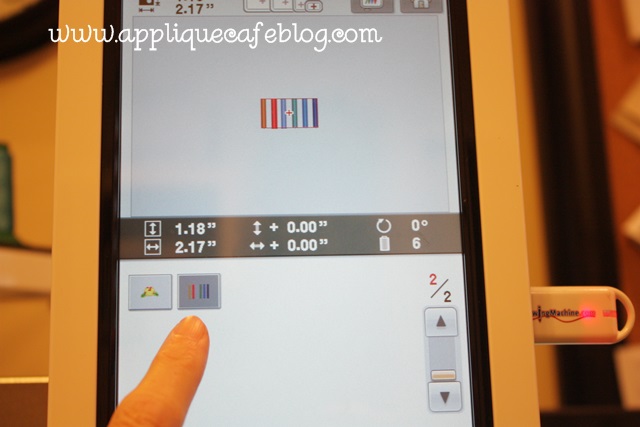
I go in and program each step according to the colors of thread on my machine. Huh? I assign black for needle 1 because black thread is on my machine for needle 1. Etc…

IMG_8791

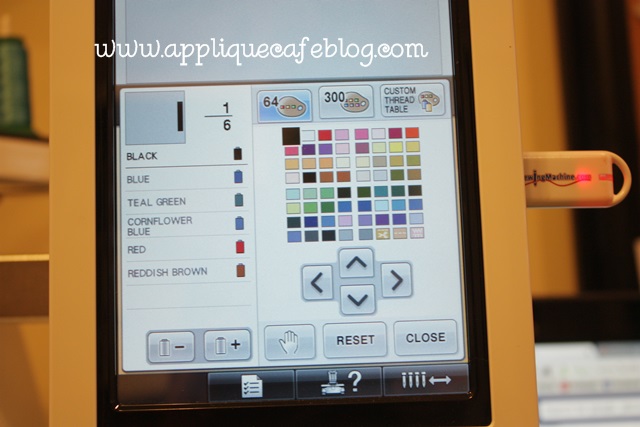
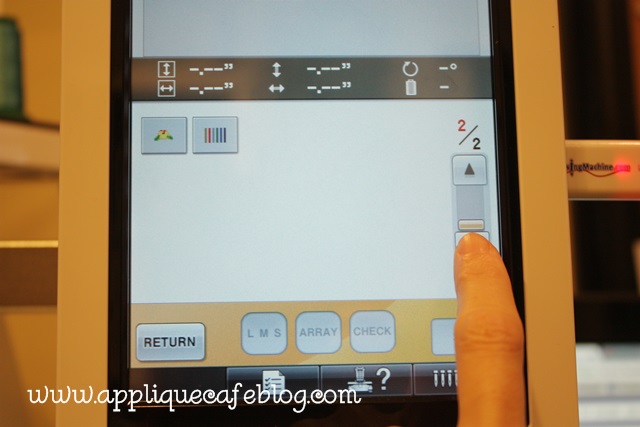
As you can see below, I’ve assigned my colors and it shows the 6 steps with needles sewing in order to test each needle, 1, 2, 3, 4, 5 & 6.

IMG_8792

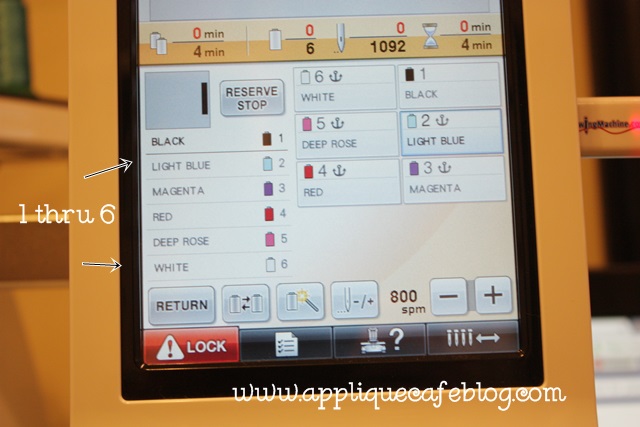
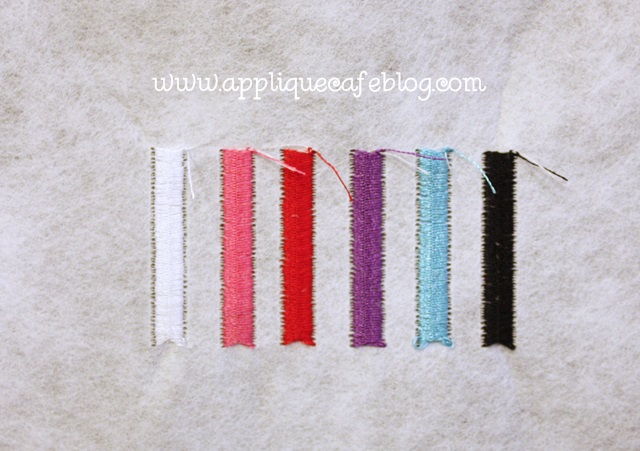
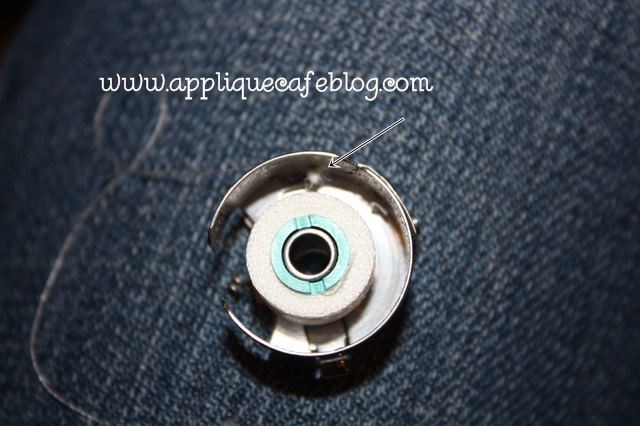
Here are the results of my first tension test. Again, no bobbin thread showing. Since all 6 rows are lacking in bobbin thread, I have to assume there’s an issue with my bobbin! Had it been only 1 needle, then I could assume there was an issue with that 1 needle and the rest were fine with no bobbin issues.

IMG_8793

After taking my bobbin case out, I quickly found the culprit. It looks like the thread is caught and is balling up before it can come out of the bobbin case.

IMG_8794

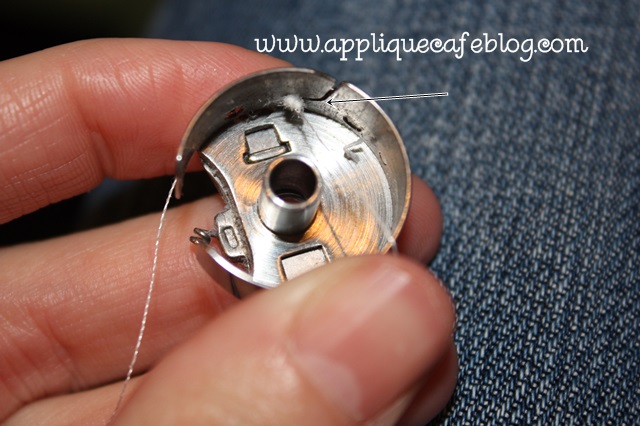
Bingo! I removed the “knot”, re-threaded and put my bobbin case back in. I use Magna Glide Prewound L bobbins.

IMG_8795

Tension test #2 results are below, and you can see the bobbin thread. A good rule of thumb per Steve at Sewingmachine.com, is 1/3-1/3-1/3. 1/3 colored thread, 1/3 bobbin thread in the middle and 1/3 colored thread on the other side. Mine is not exactly 1/3 each but it looks much better and I can work on the tension up top!

IMG_8796

I hope that was helpful ~ both the stabilizer with the Nike shorts AND the tension test! You can find more helpful videos regarding 6 needle machines at Sewingmachine.com!

Before you go, check out Whimsical Fabric’s latest blog post! I had the pleasure of being their “Featured Customer” for February! Find out more about me and running my own business! WF has great fabric, shipping supplies and sewing patterns for those of you who sew. She also hosts a “Sew Along” each month so check out her blog to find out more. She’s also on Facebook and has a sew along Facebook group if you are interested in joining! Basically she picks a pattern to sew each month and blogs about each and every step. There are discussions on Facebook and lots of photos!

wf

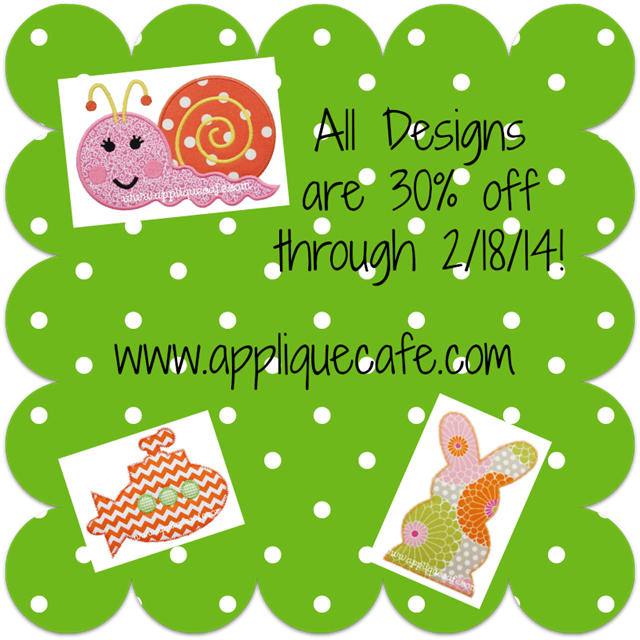
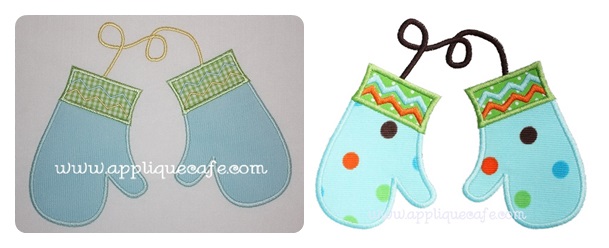
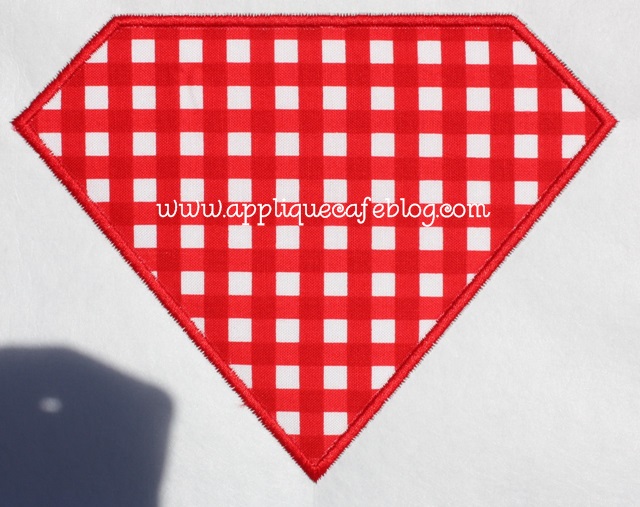
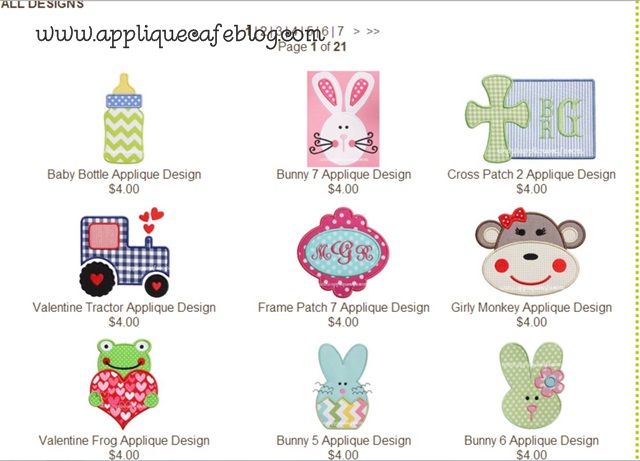
Lastly, all of our designs are on sale through Tuesday, February 18th at Applique Cafe! Below are a few new ones listed last week.

feb sale

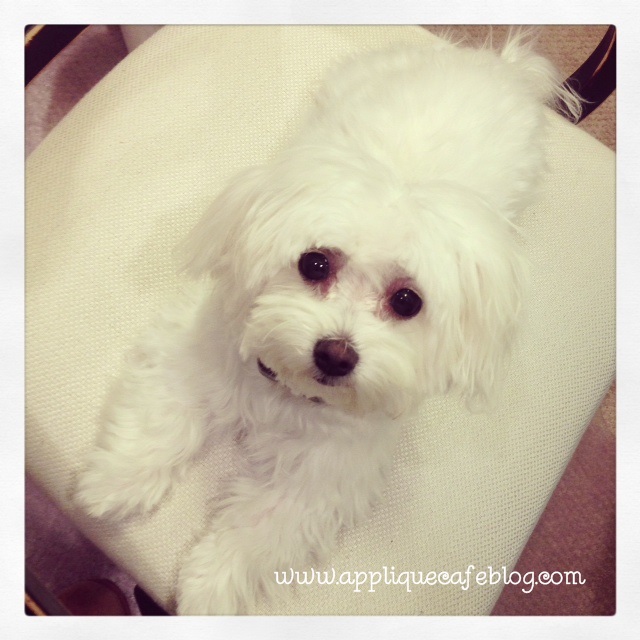
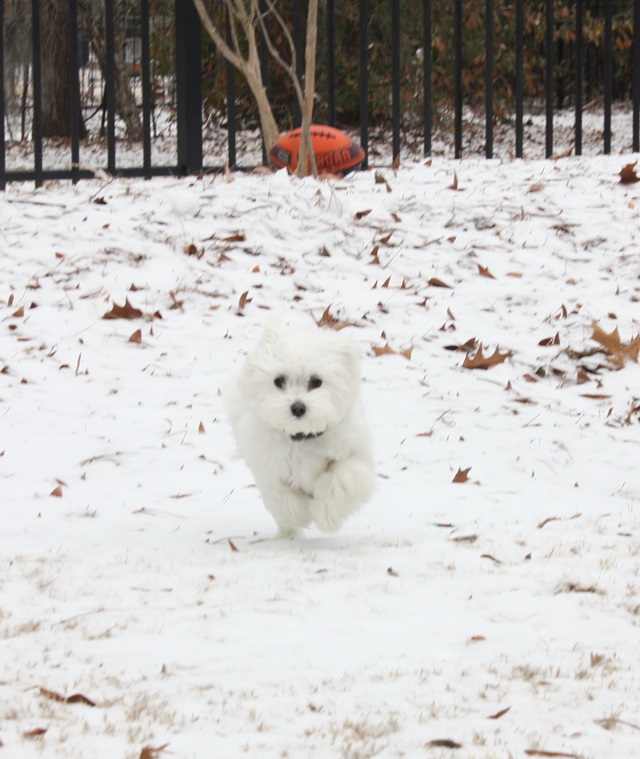
I’m off to snuggle with my Maggie. She is scheduled for surgery in the morning to be spayed!! She has already begun her first heat cycle (eeek!!), so the timing was perfect and we’re anxious to get through tomorrow. Have a great rest of the week! We are hoping for some sunshine tomorrow!

photo (58)

Let it Snow!

Happy Tuesday! As I type this post, it’s 51 degrees in Montgomery (AL). This time last week we were awaiting SNOW. Snow doesn’t happen here very often. The last time it snowed was February 2010. I actually found on my blog that it also snowed a little in March of 2009. Thank goodness for blogs! Anyway, last week it snowed and the kids were out of school for 3 days. We were back in shorts and t-shirts Sunday! Here are some of the photos I took. I think these were taken Wednesday after it finally snowed Tuesday evening (after the kids waited allll dayyyy Tuesday for some flakes). You may have seen or heard of how horrible things were in Birmingham and Atlanta (traffic, people sleeping at work and in schools, etc), but in Montgomery all was well and we were basically stuck at home for 3 days (but all safe)!!

Maggie didn’t mind the snow. At first she tip toed around quickly to do her thing, but seemed to enjoy it.

IMG_8726

The kids had the most fun on the trampoline. As you can see, we here in Alabama don’t really have snow clothes. What you see are layers of clothes on them which got soaking wet and all had to be washed 18 times.

IMG_8727

A little action shot of Mags.

IMG_8728

This is our garage. The icicles came before the snow!

IMG_8732

In the south, we also don’t have sleds or sleighs. These are boogie boards we usually take to the beach every summer. They worked pretty well! Where I live is also pretty flat, but we ventured across the street to the golf course and found a few hills.

IMG_8734

This would be a snowed over sand trap.

IMG_8738

Of course everyone in the state of Alabama made a snow angel!

IMG_8741

Even though all the laundry and mess made me a little crazy (and being cooped up inside for 3 days), I know the kids loved every minute of it and will probably never forget the snowball fights with Jeff or “sledding” on the golf course. Yes, that is snot running down Mallory’s nose.

IMG_8744

“G”

IMG_8745

Browder

IMG_8746

All is back to normal now and the snow is long gone! Not a lot else going on around here other than school and the usual stuff! Valentine’s is next Friday, so we put our Valentine Designs (as well as Mardi Gras and St. Patrick’s Day) on sale. Check them out at Applique Cafe! Have a great week ~ new designs coming soon!

vday designs 400

Removing Photo Background

Happy hump-day! In my previous post (Before and After), I explained how I took some of my old design photos from Applique Cafe (which were pretty bad…  eek!) and some I re-sewed, and some I just removed the background. One person commented asking how to remove a background of a photo, so here it is. Again, I use Photoscape photo program (free) for minor edits like cropping, rotating, and adding text (i.e.: my watermark www.appliquecafe.com). I also use Photoshop Elements, which is the cheaper version of Photoshop, to remove the background on my design photos. Why use 2 programs, you ask? Because I am not savvy enough to figure out how to do everything in PE {and because I was using Photoscape wayyyyy before I got PE so it’s just easier for me}. Here’s an example again of BEFORE & AFTER of an old design photo. Left photo was probably taken inside and I failed to brighten up the photo (which you can also do in Photoscape). The fabrics were blah too, so I re-sewed it and the right picture is the AFTER after I removed the background! Much improved, eh?

mittens 600-horz

So last night I was editing a re-sew of our Diamond Patch Applique Design, so I thought I’d SNIP (another cool tool) some photos to show you kind of how it works. If you don’t have Photoshop Elements (Photoshop probably does the same thing), then this might not make sense.

This is my photo edited in Photoscape. I rotated the design to make sure it was straight, then cropped the design to remove all of the excess background. I use 2 layers of medium cutaway to sample designs usually, so the white you are seeing is stabilizer, and the shadow is my hand taking the photo. I’m removing the white (& shadow) background so it’s fine!

IMG_8713

I open Photoshop elements, then click FILE, OPEN, and open my edited DPAD (Diamond Patch Applique Design) photo which is saved on my computer. Easy peasy!

pe

Next I click IMAGE (3rd from the left above), and then at the bottom of that list is MAGIC EXTRACTOR. It will then pull up this screen below. I’m going to use the top left + button to select the part of the photo I want to keep and it shows up in the lime green (normally red but I changed it to green since my design was red). I normally just click around the satin stitch of the design and it puts dots around the design. You can draw across like I did. Also, you can adjust the size of the dots on the right. For tiny parts of a design I make the brush small. This is telling PE I want to KEEP the diamond patch in the photo. NEXT, I select the – button below the + button, and I again, select the parts of the photo I want to REMOVE. It appears as blue-ish purple-ish dots. You can also draw like I did. Doesn’t matter!

If you mess up and select the wrong part of the photo, the NEXT button is an eraser. You can use it to erase anything you’ve messed up on (like if the “keep” went over in to the part you want to remove – just erase the messed up part). That’s all you do for now.

pe2

I missed this in my photo, but there is a PREVIEW button on the right side of the screen (and shown below). It will then erase the blue parts and show you what is going to be left. As you can see below, it erased all of the background of my photo and kept the red part. BUT, as you can see in the bottom left corner, it got confused since this is red & WHITE check, and it removed the white little part of my fabric. You will get this sometimes with polka dot fabrics, ginghams, or anything with white or light fabric. Not a big deal!!

pe3

Below the eraser from your 1st step in removing the background, there is a paint brush button. This will ADD BACK anything that PE has removed. So I move my mouse/cursor over the area of the fabric that it removed, and it ADDS it back for me! Likewise (and I didn’t show this), there is another eraser button below that. It will remove any part of the photo that didn’t get removed in the 1st step. Maybe my shadow didn’t get removed all the way? You can use that eraser to remove it, and it will “gray” the area out and remove it. Now we are ready to SAVE.

pe4

When you are done with the 2nd round of editing above (and sometimes it removes the background perfectly so there is no editing to be done), you are ready to SAVE, so click OK (which is above PREVIEW on the right not shown. There is also a CANCEL button in case you want to cancel and start over. When you hit OK, your photo will look like the below. The patch is showing and the background appears as gray checks and that is the part that was removed.

pe5

HERE is the panel that I didn’t show above – PREVIEW, OK and CANCEL! Once you click OK you are ready to save your file. Save it on your computer where you know where it is. Update: TO SAVE, YOU HAVE TO GO BACK TO FILE, SAVE OR SAVE AS, AND SAVE IT AS A JPG FILE! 

pe6

I then pull the file back up in Photoscape and resize it to the sizes I need for my website, and I add text (my watermark – www.appliquecafe.com). My photo is now ready to upload to my website. Here is what it looks like below! MUCH better.

diamond patch 500

Here is another example of another design which is a tad bit harder. As you can see, the “ribbon” goes outside of the present so I’m going to use that + to click on all parts I want to keep. It shows as red lines and dots. Blue dots are parts I want to remove. As you can see, I put dots on all parts (including INSIDE the bow and loops) so that PE will remove that part of the photo.

pe7

This is what it looks like after the background was removed and I’ve added my watermark. This is what I upload to my website!

present 500

Removing the background in PE can be an easy and sometimes tedious process. It really depends on the design and colors used. Light colors are sometimes removed with the background so you really have to + and select a lot of the design. Darker colors on a white background are usually easy! It takes lots of practice and a steady hand, but hopefully this post will help! As you can see below, it makes my website look so much better and consistent with the backgrounds removed. I DO have several designs sewn on colored backgrounds (like the Bunny below) which is fine. Most of my designs done that way are white (snowman, etc).

pe8

Let me know if you have any questions and I will try to explain! It really takes just trying it out and a lot of patience!! Some days I remove backgrounds with ease and PE seems to be on a roll and cooperating with me. Some days it removes all the wrong parts and can be very frustrating! Like I said, I am SURE Photoshop Elements will also rotate photos, crop and all that too. I’ve just always used Photoscape so I use both programs for photo editing!

Have a great rest of the week!!

UPDATE: I did some research and I am using Magic Extractor in PE10. PE12 is now available, and I read where it cut out the Magic Extractor feature! Not sure about PE11. I did find another way to extract the background in PE11 – found a video about it. I have not tried it in PE10 to see if it’s in there. So, check your version if you have Photoshop Elements!