Applique Cafe 101

Happy 5th of July! We are going on day 2 of rainy, wet, dreary weather my friends. Yesterday, July 4th, it rained most of the day. We were lazy. Today it hasn’t really rained all day, but it’s been dreary and overcast and is now sprinkling = cabin fever and fussy cooped up kids (and irritable parents). Fireworks were cancelled last night but we did enjoy dinner with some friends! I spent the afternoon cooking potato salad, cole slaw and a corn salad recipe I found on Pinterest. It was pretty yummy!

corn salad

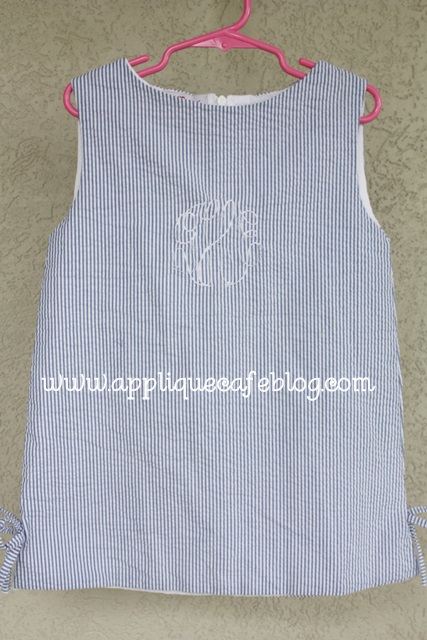
Today I haven’t done much. I’m still in the shirt I slept in + shorts. I did some monogramming this morning and watched a great movie this afternoon ~ Safe Haven. Not sure what the reviews were on this movie but I liked it and was crying at the end! I’m a Josh Duhamel fan too!

Now to this post…. I get asked a.l.o.t. “I’m new to embroidery and I like your designs! How do I order?”, or, “I have X machine and love your designs! How do I get them on my machine?” You get the point. I decided to type up a post about it and then when I get these emails I can quickly drop them the link! So….

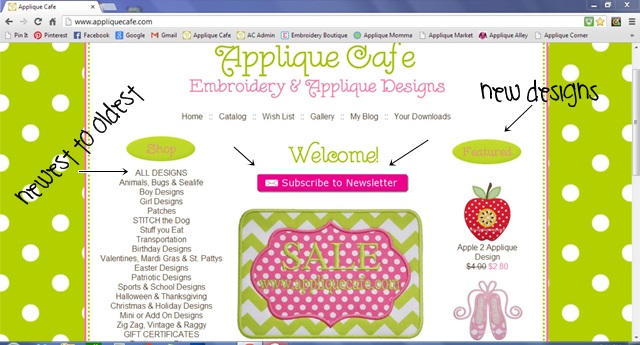
Of course our website is www.appliquecafe.com. I’m SURE it’s in your favorites or pinned to your toolbar! A few basics are:

Featured designs on the right are typically our NEW designs. When I load them on to our website, I click a button to “feature” them and that’s where they show up. Also, if you click on ALL DESIGNS, you will find every single design on our website in order from newest to oldest. So, the first designs you see are our newest! They are not in alphabetical order, but rather in order from newest to oldest. The best way to keep up with new designs and sales is to click the SUBSCRIBE TO NEWSLETTER button! I promise we are not like Old Navy or Target and we WILL NOT send you an email every single day. Our newsletter service is paid and we only get so many newsletters a month, so we only send them out when we have new designs to tell you about or a sale going on!

Capture

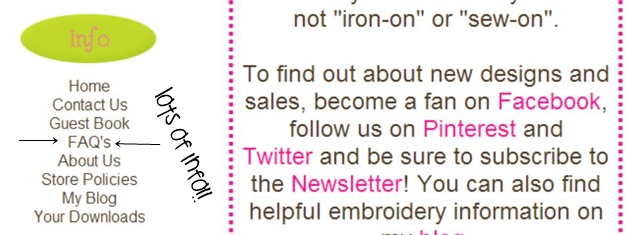
Under INFO you will see Contact Us, Guest Book (feel free to “sign” it), FAQ, etc. If you are new to our site, read the FAQ! It will only take a minute and I have tried to include all frequently asked questions and answers there. I get countless emails asking “Do you offer PES format?”, etc. and guess what? the answer is in FAQ!

faq

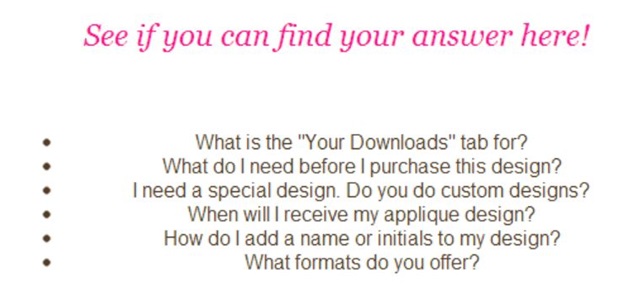
Here are the FA-Questions and if you click on each (on our actual website) you will find the answers. If these answers STILL don’t answer your question, then feel free to use the Contact Us tab. Again, if you take a minute to look over the FAQ you will most likely find your answer!

faq2

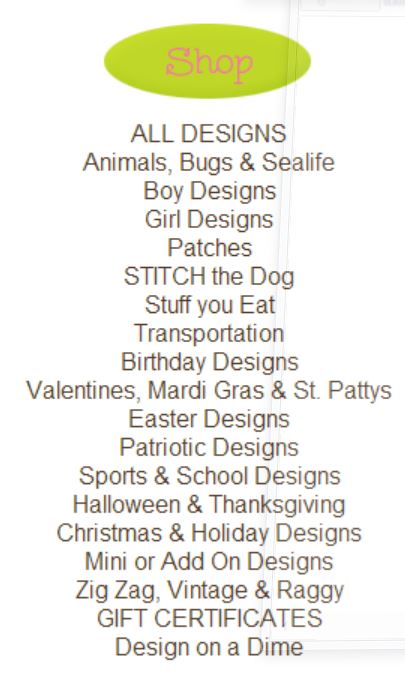
On the left is our SHOP tab with all of our categories of designs below. I try to group designs together so that you aren’t having to look through 50 different categories of designs. Designs are also cross referenced so you are sure not to miss anything! You can also use our SEARCH feature if you are looking for something specific. We also use keywords in our listings to help in searching. Check out our DESIGN ON A DIME category. These are great designs to try if you are just starting out!

categories

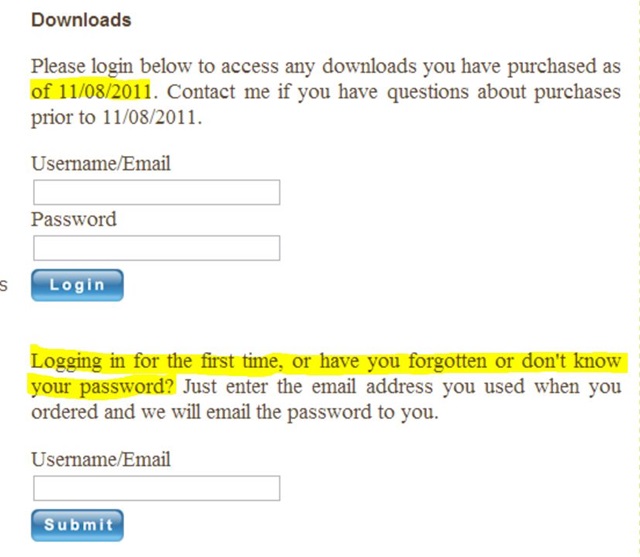
The Your Downloads tab… this is confusing! In November of 2011 (the 8th to be exact), we installed a program on to our website that stores your purchases under your email address. Applique Cafe was launched in August of 2009 and unfortunately we didn’t store purchases when we first started. That means there are a couple of years (August 2009 – November 8, 2011) where you cannot access your purchases using the Your Downloads feature. Don’t worry! I can still manually look up purchases under your name and access those if need be. As of November 8, 2011, your purchases are stored automatically without you having to create an account or log in before you purchase. So long as you enter your email address correctly, you are good!

dowloads

Our designs come in 9 popular formats and when you purchase a design, you will get a ZIP file which contains all 9 formats and a thread chart. Formats included are: PES, ART, DST, VIP, EXP, JEF, XXX, SEW, & HUS. These formats are also listed in FAQ. If you need a format not listed, just contact me!

When you purchase a design or designs, you will go through the checkout process and COMPLETE it. You then have 3 ways to receive your design(s):

1) You will be redirected to a page following checkout (when you click COMPLETE) and it will contain download links. You click on them and the zip files can be saved right then to your computer.

2) You entered your email address when you went through the checkout process. Download links are also emailed to that email address! It’s important to spell your email address correctly, and that’s why you are asked to enter it twice. If you don’t see them in your Inbox, check your spam folder.

3) If you miss the download page following checkout, and you also didn’t receive the email or you accidentally deleted it, you can also log in to Your Downloads and access your purchases there.

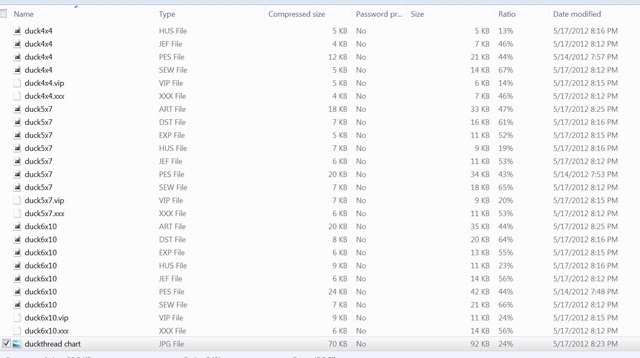
Here is what a zip file looks like when you open it. You can save the entire zip file when you purchase and you can also open it and save out the format you need. I use a Brother machine, so I can use either PES or DST files. As you can see the designs are in a list grouped together by size (4×4, 5×7, etc). Most designs come in 3 sizes: 4×4, 5×7 and 6×10.

zip files

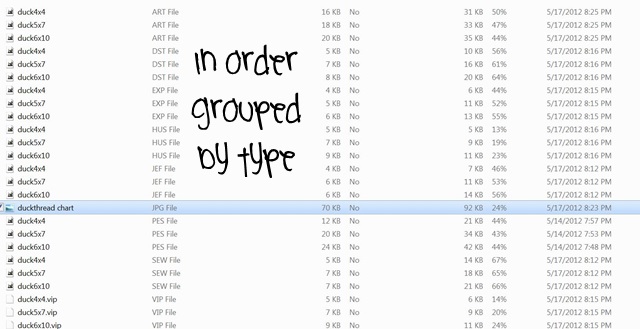
If you click on TYPE above the format column, your computer should rearrange the file list and now each format is grouped together as shown below.

zip files2

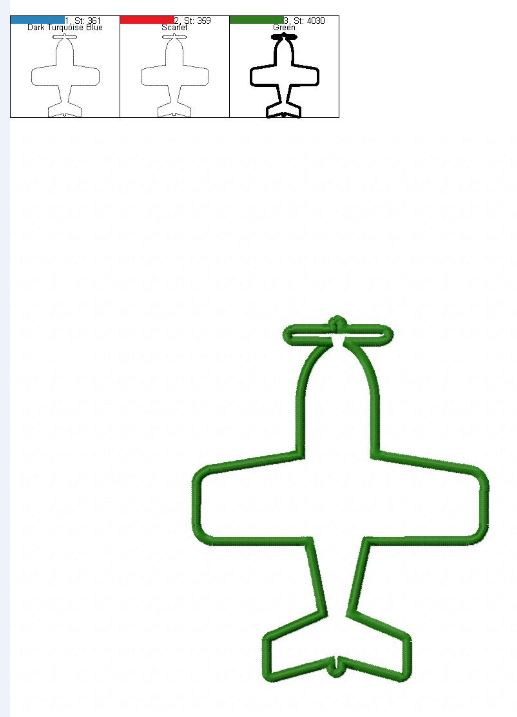
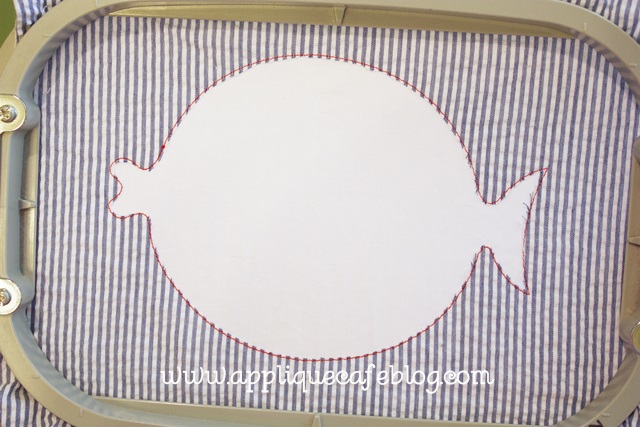
Inside each design zip file you will also find a JPG thread chart. This chart will show you an image of each step in the design. For example, this is a simple 1 fabric Airplane design (found in our Design on a Dime category). This would be a great design to start with if you are new and wanting to try out applique. Always remember, for each fabric you usually have 3 steps:

1. Marking – sews an outline to show you where to place your fabric

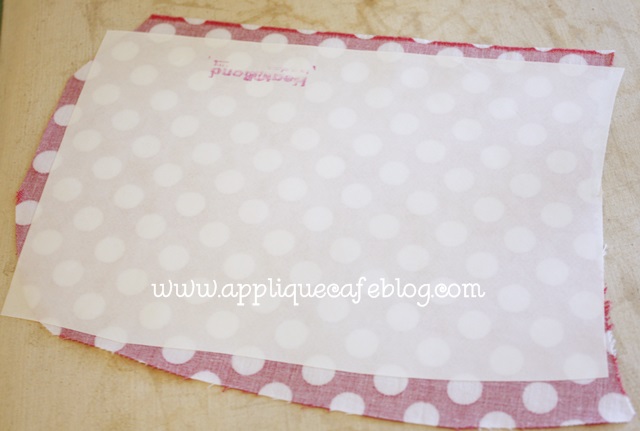
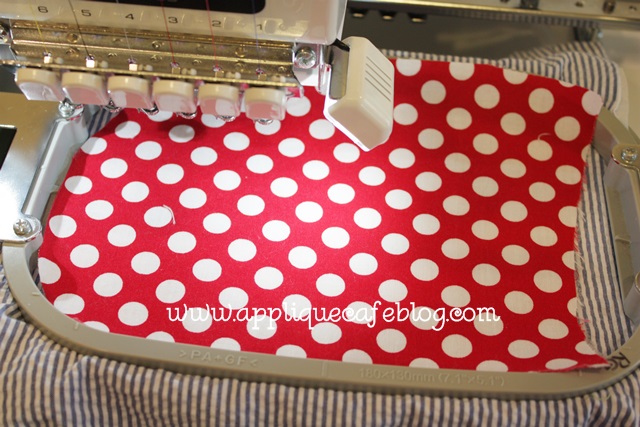
2. Tackdown – after the marking stitch, you place your fabric down and this step will sew the fabric down. After this you trim around the design as closely as possible.

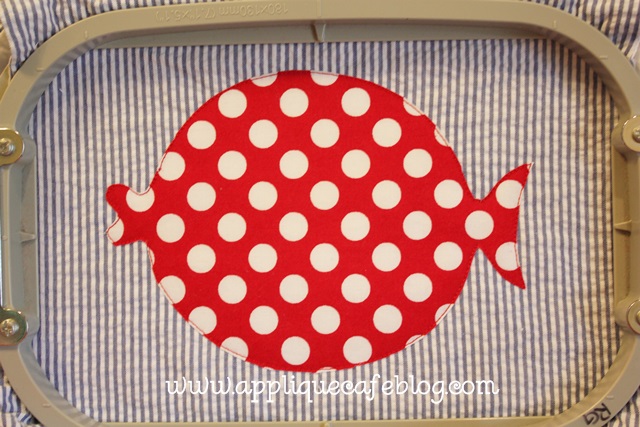
3. Satin – this is the finishing stitch around the design. Not all designs are satin stitch. We also sell designs that are zig zag and raggy.

If you want more info on the above, check out this blog post ~ Better Appliques. There are also other posts about stabilizers, etc. on my blog under Helpful Posts.

thread chart

Here we get a tad more detail. Same 1 fabric design, so you have at least 3 steps. This one also has an eye, mouth & “toenails”, so add another step for that. Sometimes these features can be different colors so they would be added steps. For this design they are all the same color so it’s all done in 1 step. This Dinosaur design has 4 steps total.

dinosaur thread chart

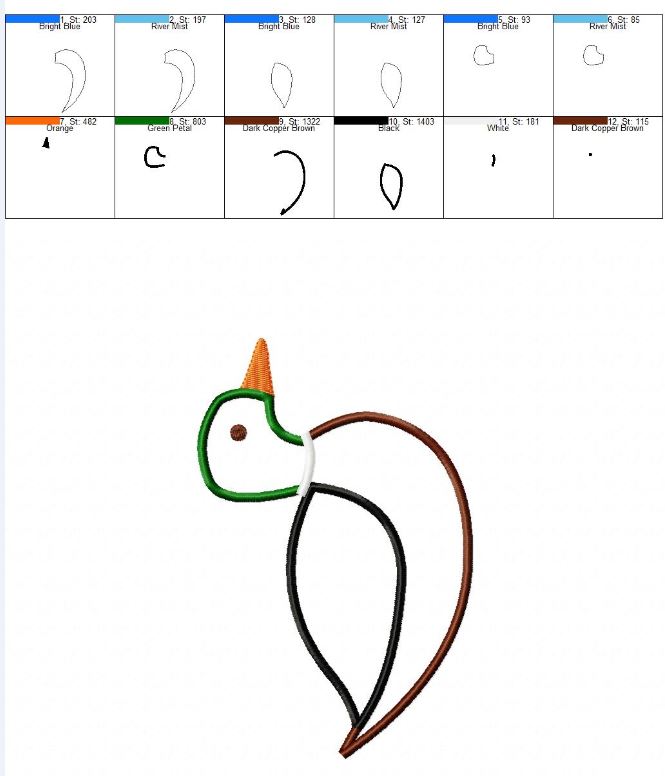
Now an even more complicated design, our Duck! This design has 3 fabrics + a beak + an eye + a “ring” around its’ neck, so a total of 12 steps. Don’t freak out! Again, the thread chart will show you each step. Your machine will probably show you an image of each step on the screen as well.

duck thread chart

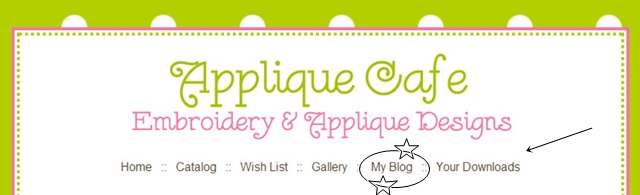
Need more help? There is a link on our website to my blog! Check out Helpful Posts, and you can also use the SEARCH feature or scroll down to Categories on the right hand column. There are also blog post TAGS (popular topics) on the same right hand column.

web

Now, you’ve bought the design and saved it to your computer. What next? Most machines have USB cords or cables that connect from your computer to your machine. Other machines have a USB port and you simply save your designs to a thumb drive, then put the thumb drive in to the USB port on the machine. Other machines use card writers and other software is needed to save designs and then put them on your machine. ALL MACHINES ARE DIFFERENT! My machine has a USB cable AND USB thumb drive saving capability. On my computer I save to my E:/ drive for each of those options. Consult your manual or embroidery machine dealer or store for more info!

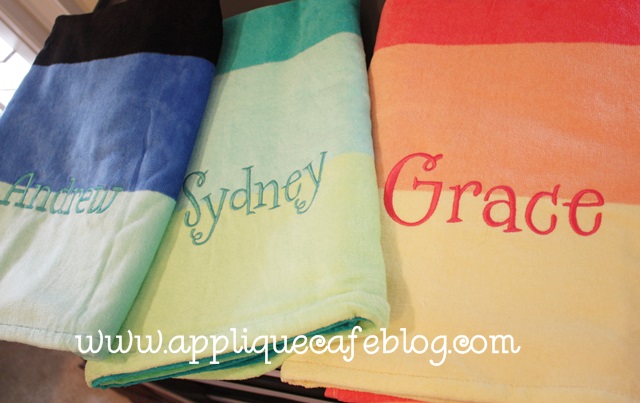
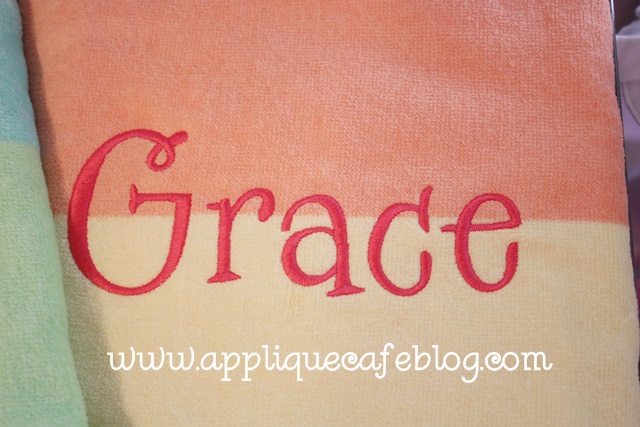
What software do you need?? I use Monogram Wizard Plus for names & initials, and I use Sew What Pro for merging those names & initials in with applique designs. There are tons of other programs out there! These are just the 2 I use.

I hope this helps! I would love to add to this post if you can think of anything not covered! Just comment below. Thanks!

Towels and Fish

It’s June already (and this is my 2nd blog post in the past week)!! It’s going to be a great summer! Yesterday I FINISHED every single piece of “customer work” I had to do, so now it’s time to dig in to some other things. I got some great sample blanks at the Everything Applique Conference, so I want to *do* something with them and post about them (coming soon). I also have a pile of samples from EAC I need to sell and a few things to do for Mallory too.

You know how I always say I like to use FILL STITCH when I do towels? Well, I have an exception to the rule. I had a customer bring me these beach towels to monogram, and she specifically said “nothing too thick”. These are from Tarjet I think, and they are cute little towels and also relatively thin. In this case, I DID NOT use fill stitch. I made sure my font was thin enough to do satin stitch. These names pretty much filled the 5×7 hoop, so close to 6.5-7″ wide. In Monogram Wizard Plus you can adjust the boldness (thickness or fatness of the satin stitch) of a font so I did decrease the boldness on the right 2 girl towels. The font is MWP Specs. On the left boy towel, I used MWP Kazoo font and the name wasn’t too thick at this size, so I don’t think I had to adjust the boldness on it. If this is all confusing to you, stay tuned for my next post on Monogram Wizard Plus and adjusting a font’s width and boldness and all that good stuff.

IMG_7934

Specs is a wonky font, so I did the letters in layers and then arranged them all in Sew What Pro. See this post for more info b/c I didn’t take pictures of how to do it.

IMG_7935

Now on to a project I did today for Mallory. I bought this a-line dress/top at an overstock sale several months ago. It was all of like $8 or $10 and was a sample from Red Beans clothing line. It had a monogram on it, but I got it anyway. When I see something monogrammed, I usually see A) if it will come out easily and B) if I can cover it. I did a little bit of both on this one.

IMG_7938

As you can see below, I took out what I could of the monogram ~ mainly the fat parts that I could easily cut (with a seam ripper or small scissors) and pull out. The dress/shirt was fully lined, so I didn’t have access to the back side and bobbin thread and could only take out the monogram from the front which was a little tricky. Anyway, I took out what I could and decided to move on. You can also see where I marked the approximate center of the monogram. My plan was to cover it with an applique!

IMG_7939

As I said, it was fully lined (covering the back of the monogram) and I didn’t want to mess with the lining.

IMG_7941

I used medium cutaway stabilizer on the back side of the dress and hooped it so that the monogram was pretty centered in the hoop. You want to make sure the applique will cover the entire monogram.

IMG_7942

I chose our Fat Fish Design to cover the monogram. As you can see below, I sewed the marking stitch first. I then had an idea… what if I cut out the seersucker fabric and monogram INSIDE the marking stitch LEAVING the lining in tact. Had I thought of this before, I would not have wasted 20 minutes trying to take out part of the monogram. See my post on Layering Fabrics in an Applique for more info on this.

IMG_7943

As you can see, I trimmed closely inside the fish. The white you see is the lining of the dress/shirt (I’m honestly not sure which it is, dress or top, but we plan to wear this w/ shorts).

IMG_7944

I am using red Ta Dot fabric because I have a pair of little ruffle shorts she is going to wear this with. I use Heat N Bond Lite on the fabric (of course).

IMG_7945

Ready for the tackdown stitch!

IMG_7946

Here I have trimmed the fabric closely. I love my Gingher 4″ curved scissors! It will then stitch the eye and around the fish and I stopped the machine and left off the fin that is shown on this design.

IMG_7947

Here is the finished outfit! I got the shorts from Doodles Boutique. This will be great for the summer AND it’s a little patriotic for the 4th of July!

IMG_7948

I love this fish!

IMG_7949


I also did this Fat Fish last year to match a pair of shorts I got at the same overstock sale! I believe the shorts are from Red Beans too!

IMG_6022

Lastly, I posted on Facebook yesterday that you can make pretty much any design patriotic by using red, white & blue fabric, like in the outfit above. Here is also a pic of our Popsicle Trio design done in RW&B fabrics! Have a great week!

popsicle trio rwb 500

Do you hoop towels?

Happy Summer! My eldest child finally finished school last Friday, so we have been officially out of school for 1 week (as of tomorrow). I didn’t really feel like it was summer until Tuesday. We went to Birmingham and a wedding this past Saturday, spent Sunday at the lake and then Monday at the pool for Memorial Day. Tuesday felt like our official start to SUMMER! Woo Hoooooooo!! Well, summer flashed before my eyes Tuesday night. Both boys had soccer games and during the 3rd quarter of Browder’s game, he (was tripped? and) fell on his arm. It was one of those where the ref immediately called Jeff over and it took me about 45 seconds to run across the field myself. He had fallen and landed on his hand with his arm straight and was crying. His arm was  bent and he wouldn’t straighten it. Trampolines, swimming pools and the beach all flashed before my eyes!! Long story short, we decided to head on over to the ER for an X-Ray which proved nothing was broken and he was FINE!! Praise.The.Lord. Hallelujah too! For some reason, the nurses all thought my middle child, G, was the patient. I wonder why? He likes to make himself at home.

photo (17)

Here’s B after we got home from the ER and by then he was able to straighten his arm and was fine! Now we know we should have waited a couple of hours before heading to the ER. But, we were in and out in an hour and had we not gone, it would have been broken in 3 places. As you may recall, Sissy broke her collar bone last May so we don’t play around with bones. Speaking of Sissy, she left last Friday to spend the weekend with her cousin down at the beach. She extended her stay and is FINALLY coming home this afternoon!! It’s been quiet without her!! Anyway, back to soccer, trampolines and swimming!!

b

Here is what I’ve been up to this past week or so. These adorable rompers are from www.jiffyshirts.com (Apples & Oranges brand). Sonny and Sophia are twins, so they needed to be coordinated. I came up with this using these coordinating Riley Blake fabrics and Sew What Pro. See if you can follow this…

Pink – 5×7 Rectangle Scalloped Patch + 4×4 fish from Fish Patch + Sophia in Monogram Wizard Plus “Kim Single” font.

Blue – 5×7 Fish Patch – fish, + 4×4 fish from Fish Patch + Sonny in Monogram Wizard Plus “Tipsy” font.

Did you get all that? One of the many reasons I love Sew What Pro!

IMG_7894

I got asked several times at EAC this year how I hoop towels, or IF I hoop towels. I am a hooper! When I bought my first machine I learned how to hoop, so I hoop almost everything. I do use Fast Frames with my PR650 when I’m doing things I can’t hoop (lunchboxes, ribbon, backpacks, etc.) but for most other things including towels, I HOOP. If you loosen the hoop enough to get the towel in there, then you can tighten it and it’s secure. I use a water soluble stabilizer on the top, as seen below. It is hooped with the towel.

IMG_7913

On the bottom I use an iron on tearaway stabilizer which will be removed (torn away) when I’m done. It doesn’t have to be iron on. Any tearaway will do, because you don’t want stabilizer left on when you are done. Hence the tearaway!

IMG_7914

I did at least 10 towels this past week for graduation gifts. I put the hoop on my machine upside down so that the excess towel hangs in front of my machine. My machine stand is a file drawer table, so I open the door and let the excess towel “rest” on the drawer.

IMG_7915

Since my towel is on the machine upside down, I also rotate my monogram to where it will sew upside down. As you can see on my machine there is a Rotate button. The font I used is Monogram Wizard Plus “Sydney”.

IMG_7916

Here are a couple of finished towels. I also use FILL STITCH on these towels and the monograms pretty much fill up my 5×7 hoop (close to 7″ wide).

IMG_7917

I posted this on Facebook this week. This is a shirt I did for my Mallory to match some cute Candy Ta Dot (Michael Miller) shorts I got from Doodles Boutique. This is our Bubbles design we just listed in the past week or two. The shirt is an old Just Blanks shirt. I bought a box of them a few years ago from a clothing line that was not going to be using them as blanks anymore.

IMG_7919

Finally, here is a Columbia PFG (Performance Fishing Gear) shirt I did today for my 13 year old niece! She sent me a photo she found on Pinterest. This is, again, Monogram Wiz Plus “Sydney” font and I narrowed the letters up a bit to try to fill up the 5×7 hoop, making the monogram 7″ wide and as tall as I could get it. As you can see below, these shirts have “vents”, so I was able to hoop inside the top layer and monogram inside the “vent”. Not sure you could do that with a single needle machine, but I was able to do it on my 6 needle without monogramming through the mesh lining layer inside.

IMG_7924


This is the inside of the shirt. This is a mesh lining inside the shirt (not Comfort Cover).

IMG_7925

I hope everyone is enjoying their summer! I am working on sampling new designs for Applique Cafe this week. 3 down, 1 to go! I’ve worked hard to get all of my customer work pretty much done (or at a manageable level) so that I can enjoy my kids, sleeping in, going to the pool and just doing nothing. Oh, and more blogging!! Have a great weekend!