411 on Flower Sunglasses

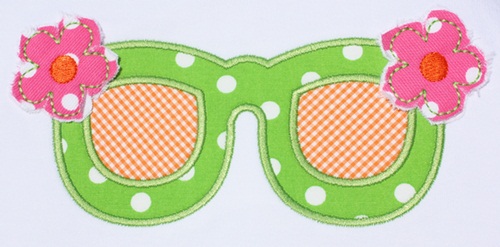
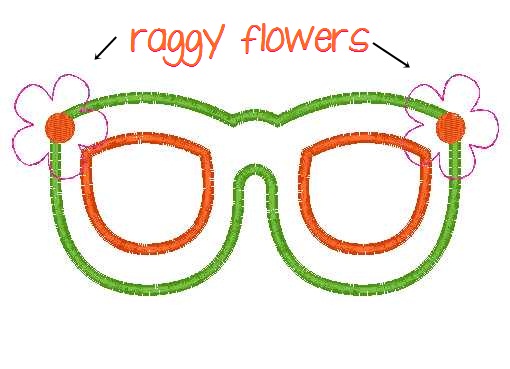
Here is a random post… This is one of those situations where I took some pictures while doing a design the other day and one thought led to the next on a possible blog post. THIS (below) is a preview of a new design. I usually post it on Facebook as soon as we finish it for several reasons ~ to get feedback, to produce a little excitement about an upcoming design and basically just to get the design out there. There are so many digitizers now that we like to throw our designs out there early because you never know when another digitizer is going to post the same design (not on purpose!!). We all get suggestions from the same customers and we also may all look at the same clipart sites. We try to avoid clipart for that reason but sometimes they have such cute ideas that we can’t resist!! Anyway, this one was an original idea we came up with. I try to check a hand full of websites when we come up with an idea to be sure they don’t have the design. We like to do what no one else is doing (whenever possible)! BTW this design is now available ~ Flower Sunglasses.

For you beginners out there, below is a THREAD CHART! It comes as a .JPG file with each design (and is included in the zip file you receive upon checkout). I, personally, determine my own thread colors, so I totally ignore the thread colors on the chart. Basically when we digitize a design, we have to assign different colors for each step so that your machine will know it’s a different color and will know to STOP! On our thread charts you will see a little image of each step in order and then the final product below. From time to time people email me who are contemplating an embroidery machine and I usually send them a few of these so they can see how an applique is broken down!

Here I just broke the steps down a little more…

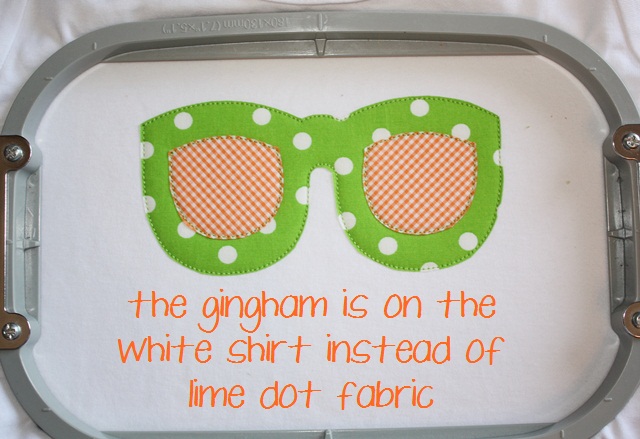
For this particular design you could either layer the inside of the glasses fabric ON TOP of the frame (lime polka dot) fabric, OR…. I trim that fabric away so that the 2nd fabric is on the white shirt and not the brightly colored lime polka dot fabric. This is right after step 2 (tackdown) and I pierce through the fabric with my (dull) scissors at an angle, and then trim away inside the sunglasses.

If you didn’t want another fabric inside, you could stop here and skip to the satin steps (5 & 6). I chose orange gingham for the inside of my sunglasses (because I’m obsessed with orange).

This is after step 4 – I’ve tacked down my gingham fabric and trimmed the excess away!

I did another post a while back on LAYERING FABRICS in an APPLIQUE. This is another example of that! Here below is the finished product. I used a layer of WHITE FLANNEL underneath my hot pink dot fabric. Step 8 is a redwork (thick) tackdown stitch b/c this portion of the design (flowers) is RAGGY. Step 9 is the orange in the center of the flower which is just thread. See HELPFUL POSTS on my blog for 2 posts about raggy designs! Sorry I did not take pictures of each step as I was mainly trying to capture the layering fabrics.

As of NOW, we have sold 127 AWARENESS RIBBON designs!!!! Applique Cafe is matching our first check, so $254.00 will go to Tornado Relief in the next day or so! We got several suggestions on Facebook as to where to send this first check and will let everyone know where it is going when we have a minute to sit down and get it together! Thanks to all of you who purchased it and I hope you put it to good use, whether it be for tornado victims or breast cancer or whatever!
A Cool Find!

I came across a website recently after seeing several posts on the Facebook Applique This & That group page. It’s called Meringue Designs. I asked the owner, Cynthia, if I could do a post and borrow some of her photos to share what she has to offer, which are some super cool applique and embroidery designs. I love funky and modern and different (and VINTAGE too), and these are all of that and more!  Check her out! A lot of her embroidery designs are shown on pillows, which is a great way to give her customers ideas! I can’t sew much, but there may be a pillow in my future. I’m sure you could even buy blank pillows here & there and spruce them up!? LOVE the look of the linen pillows!

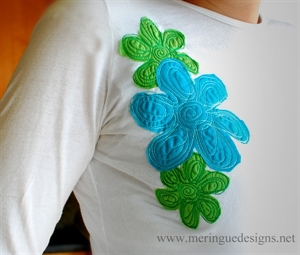
Here is the Scribbled Daisy and this is shown on a women’s adult tee. L.O.V.E IT!!! There is no telling how much this would cost in a store. $30? $40? Do it yourself!! She recommends using solid fabrics and I agree – I love the contrasting stitching too.

Next, Scribbled Vine. This one comes in applique and you can use fabric for the leaves, and also a stitched version which is thread only. This is shown on a little apron – cute!!!

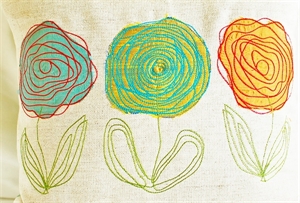
Scribbled Roses ~ This one comes with 8 different designs including the middle “heavily scribbled” rose and the “lightly scribbled” roses on the ends as well as a variety of sizes. You could also just use 1 (or 2) of these on a pillow or shirt or whatever you’d like to put them on. My head is spinning with ideas for these designs!!

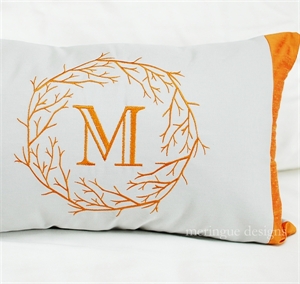
This one really caught my eye ~ Branches Monogram! This is the type thing I see in Pottery Barn and those type catalogs and drool over! Leotine Linens come to mind??

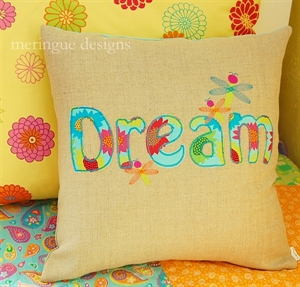
Drifter Alphabet ~ I see people ask all the time about raggy applique alphabets and this falls in to that category. The edges are meant to be raw so trim loosely and see what happens! I love the little dragonflies too ~ didn’t see them on her site but will ask about those! (I asked and she said the dragonflies were coming!)

Scriptina Alphabet ~ Love it! This appears to be on a stocking!

Bird on Branch ~ looks great on the pillow!

This is the design that originally caught my eye ~ I think it was Cynthia’s profile picture on Facebook and it’s so cool! Technicolor Vine – the smaller version comes in a fill stitch and the medium and large are applique.

Last photo ~ Paper Roses. Again, C-U-T-E!!

These are the designs that immediately caught my eye! She has many many more and I could go on and on. It’s unfortunate that we are in between houses and I can’t decorate anything! Making mental notes of what I can do in our next house…

There are gobs of embroidery and applique sites out there (ahemm… Applique Cafe), but I haven’t seen much of this type design and thought they were very cool!  BTW she is also on Facebook so click on over and LIKE her page!

AWARENESS RIBBON news ~ so far we’ve sold 35 designs, which means $35 will go to Tornado Relief! Thanks to the 35 of you who have added this design to your collection whether you already had an awareness ribbon design or not! We hope to sell many many many more! I have gotten some great suggestions as to where to send the donations when we reach $100. After that $100 we hope to sell 100 more and keep on donating!

Lastly, 30% off ends SUNDAY (aka Happy Mother’s Day)!! We’ve sold a few gift certificates this week and there may be still time to mail!

How to Raggy, part 2!

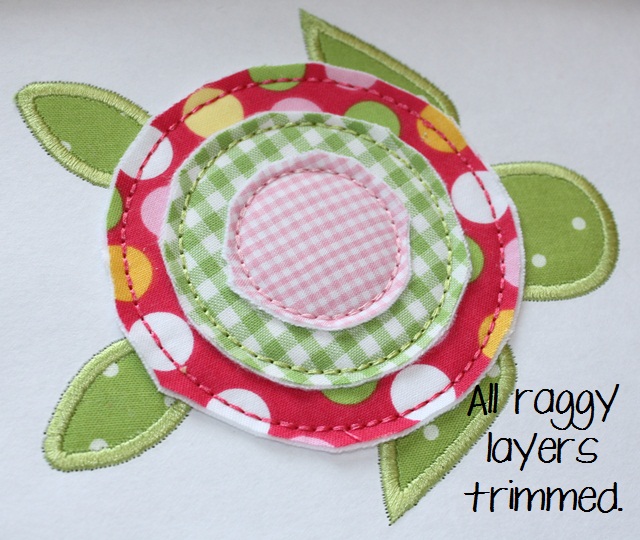
I did a new Raggy Turtle sample yesterday and someone suggested the design have multiple fabrics for the shell, so I took a few photos just now when I redid it! It turned out SO CUTE! You can’t see steps 1, 2 and 3 in this photo but I’ve already done the head, “arms” and “legs” which were done with regular ole marking, tackdown & satin. You will see them later. BEFORE I DID THE EYES, WHICH IS THE LAST STEP, I STOPPED TO TRIM ALL OF MY RAGGY FABRIC INSTEAD OF TRIMMING AFTER EACH LAYER! As you can see below, I first put down a layer of WHITE flannel, then my bright polka dot fabric (that is steps 4 & 5 and it stitched the fabric down with a redwork stitch which is a thick running stitch). Next, I put another layer of white flannel and my fat lime gingham on top of that (steps 6 & 7). Then on the top layer another layer of white flannel and my pink gingham (steps 8 & 9). You COULD trim each layer in between steps, but since this is raggy it’s easier to just let it sew and trim all at once at the end (before the eyes which is step 10!).

So, obviously I start at the top and trim, leaving about 1/8″ of fabric. You can do more or less.

Next I trim my lime fat gingham layer.

Now the bottom layer and as you can see, the head and other parts were done first. Those are regular satin stitch; only the shell is raggy!

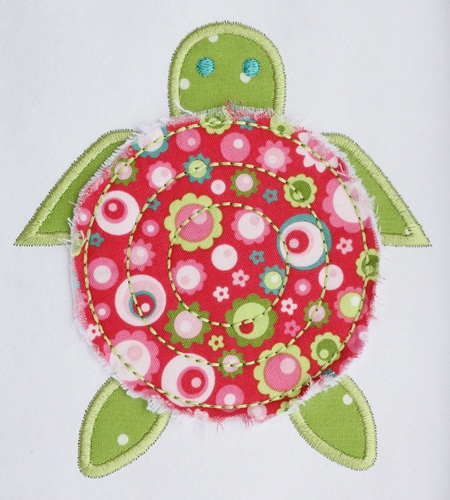
Next I take my (dull) little embroidery scissors and I scrape the edges of the fabric to make it fray. You may notice lots of loose crazy long threads. And, as you can see I did the last step which is the eyes.

Lint brush! It’ll pick up any loose threads. If there are any long threads left, just trim them w/ scissors.

Here is the finished turtle! I love how it turned out!! It’s always fun to coordinate fabrics!

This was yesterday’s sample and if you prefer, you can use just 1 fabric (and a layer of flannel underneath)!!

I bought yet another 3 drawer cart at Target today. I WILL have all of my fabric organized by the end of the day and that will be my next blog post! I’m halfway there!!

This post will be filed under “Helpful Posts” on my menu bar along with my previous Raggy post ~ https://www.appliquecafeblog.com/raggy/. Don’t be afraid to try it! It’s fast and has some texture and depth to it!

p.s. after explaining this I see that it might be easier to have Jeff move the eyes step up to 4 right after the satin stitch for the head and other body parts. That way you can do all the shell layers and trim and be done! Hope this doesn’t confuse anyone! We will get it changed before we list it later today!