Did you think I forgot about ORGANIZATION?? Here is my next (and last) installment of organization posts! Hopefully you caught my previous 2 blog posts on some cool videos I found – Stabilizer Savvy and How to Start an Embroidery Machine Business. Now back to Organization and Part 1 & Part 2 are on the blog…
Tips & Timesavers for doing monograms and appliques
Beth’s answer to this – if she has 10-15 minutes before school, carpool or a sports event, she will sit down and design monograms (in her software) so they are ready when she is ready to sew them. She also may cut fabric and iron on the backing (Heat N Bond Lite) so she’s ready!
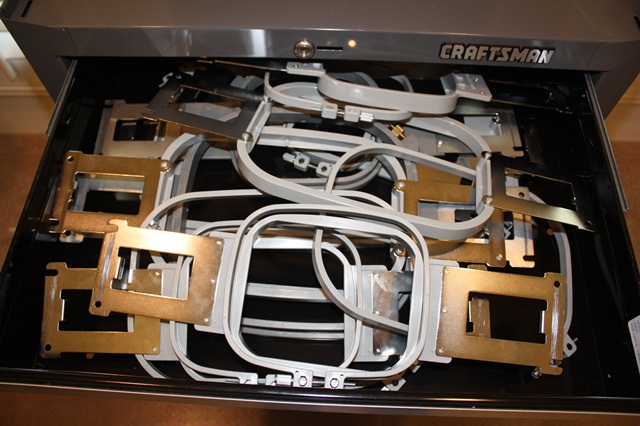
This is also where having extra hoops comes in handy! When I first started, my PE700 came with 1 5×7 hoop. Of course I ordered the 4×4 and 2×3, but also eventually ordered extra 4×4 and 5×7 hoops. That way I could work on hooping the next item while stitching another. I now have 3 4×4 hoops, 2 5×7 and a variety of other hoops – Durkee 9×9 and 6×6. I also have a variety of Fast Frames so I have plenty of hoops/frames to get the next item ready!
INSTEAD of cruising Facebook (or Instagram, or Pinterest…) while that 46 minute monogram stitches, see what else you have to work on and start preparing. Iron, mark your center, go ahead and hoop it or attach it to the fast frame, cut your fabric for appliques, iron them and apply Heat N Bond Lite. Go ahead and set aside thread colors for the next project! There are lots of ways to maximize your time while sewing. Try not to get distracted!
I think I posted this photo before, but while the burp cloth was stitching, I went ahead and ironed the bib, marked the center and ironed tearaway stabilizer on the back. I knew I was doing a small patch applique, so I went ahead and cut that fabric, ironed it and applied my Heat N Bond Lite. It’s ready to hoop and stitch!

I was doing a few of these cute bags the other day from Ikea. While 1 was stitching, I went ahead and got the next one ready – center marked and attached to the fast frame! I didn’t have another frame to get the 3rd one ready, but I went ahead and marked my center. 
Easiest Way to Pick out Fabric & Thread Colors
This can be hard sometimes and easy sometimes! For me, Sew What-Pro saves me A LOT of time in this department. When I am getting ready to sample or sew a NEW design, I always open it up in SWP first and change the colors around to get an idea of what colors I want to use. This gives me a head start in choosing fabrics. Here’s an example:
This is what the design looked like fresh out of being digitized, ready for me to sample. As most of you know, my husband Jeff does the digitizing and he makes each step a different color, but there’s no rhyme or reason to which colors he chooses.
The first thing I do is change the colors to help me visualize what color fabric and threads I plan to use. For boy designs I usually start with primary colors, or my favorites like turquoise, lime, orange, etc. For girls, I usually start with hot pink and then go from there – turquoise, lime green, orange. This is just a starting place!
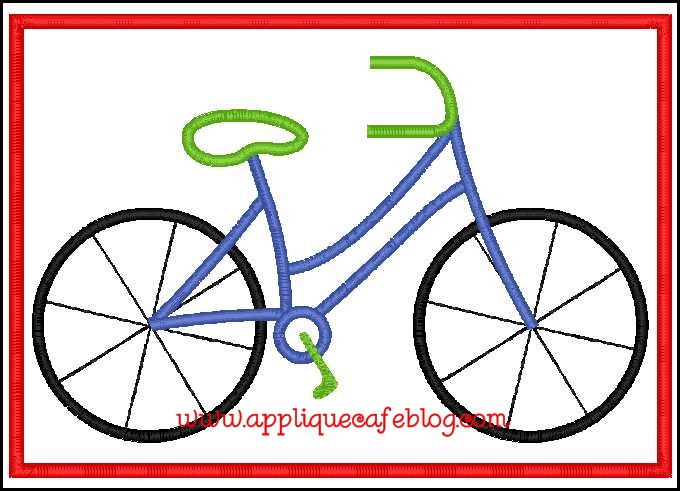
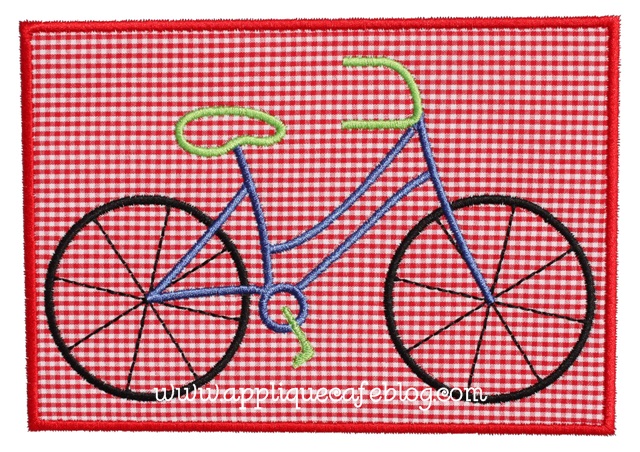
This is one of our single fabric patch designs, so I typically use simple fabrics like ginghams, stripes & polka dots. As you can see, setting the colors I want to use before I sew it really helps!
Sometimes you might be matching a pair of shorts, or matching a monogram to some trim on a bag. Those projects are easy! Sometimes I am sampling new designs and I will sort through every piece of floral fabric I own trying to find the perfect fabric. This is where organized fabric comes in handy! I have mine organized by design – polka dots, ginghams, florals, boy fabrics, textured fabrics (minky & chenille), etc. Keeping your fabric & thread organized is a good start!
If your applique is several fabrics, start by nailing down the main fabric. If it’s a floral, see what goes with it – polka dots, ginghams, stripes, solids, etc. Most of our designs at Applique Cafe are very SIMPLE. Other than Turkey designs and a hand full of others, most of our designs aren’t more than a few fabrics which makes your job easier!
When do you not work or when is it OK to take the day off?
Beth tries really hard not to work when her kids are around! See my last post! 🙂 If her kids are playing outside, she might throw something easy and “safe” on the machine. If she is not in the mood to embroider, she tries to stay away from the machine. I agree! That’s when you make the most mistakes, or your machine will act up FOR SURE. Personally, I try not to work on the weekends. There are some Saturdays when we have nothing going on and the kids are down the street playing, so I might sit down and get some work done. I often have people call and want to come over at all times of the day, including when we are eating dinner. I try to avoid that! You need to keep family time sacred, and as much as you think you need to work for 12 hours a day, you need to pace yourself, be more organized and set a reasonable work schedule!
Another tip or suggestions that I got:
At the end of the day, put everything back in it’s place! Put your hoops away. Make sure your fabric is all back in the right basket. Throw away the scraps and things that need to be thrown away. Finish up the day by leaving your work space organized and clean, then you are ready for the next day!
If you have any other suggestions or tips, do share! Leave us a comment and I will be sure to share!
Appliques can make creating the perfect design so simple. Great information, thanks for sharing!
Thanks for sharing your organization tips. I just bought my second 5×7 hoop, and it makes life so much easier. I’d love to purchase some of the white bibs that you feature in this post. Where did you find that fabulous blank? With a new grand on the way, I need to get some stitching done!
I got the white bibs at Market in Atlanta at Oriental Products & Trading!