Rainbow Looms, Dogs and Soccer

Hola! Happy 11th of October and Happy Friday! My kids were off school today and are also off Monday, so we are enjoying a long weekend. I thought I’d post a few photos of what we’ve been up to lately. Literally….

photo (36)

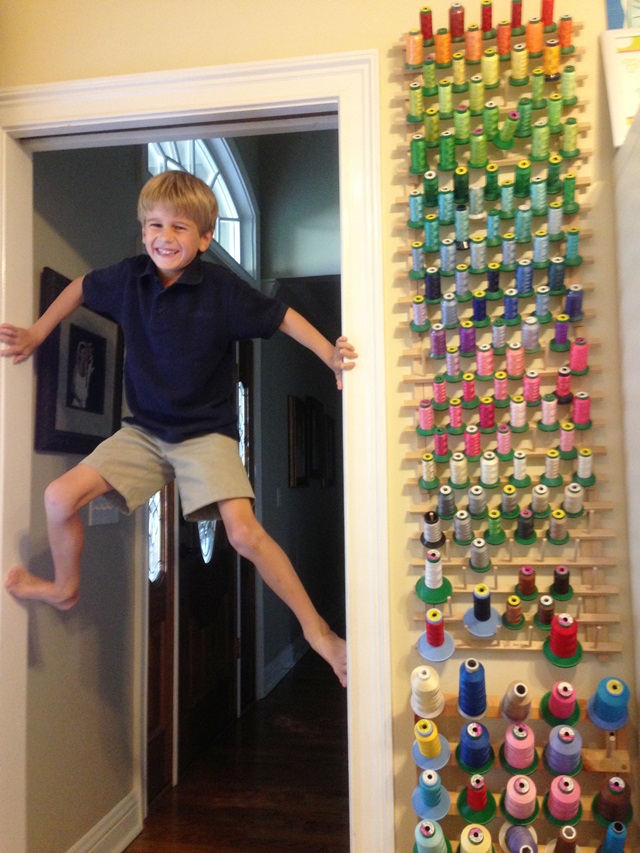
This is the foolishness that goes on every day at my house. ^^^ My oldest child was practicing an interview he did for school the other day. Meanwhile, spidey was scaling the inside of the door frame. Not distracting at all. As you can see, I added another thread rack. Now I have to stand on my tippy toes to reach the top of the rainbow!

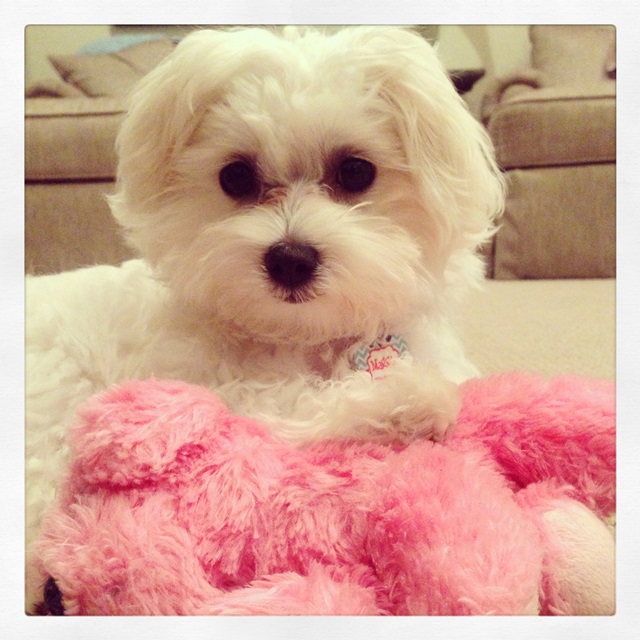
Speaking of foolishness… or preciousness. This is our precious Maggie. Hasn’t she gotten big? She is now a like 4 1/2 months old. This was a sweet picture of her from the other night right after I found a plug in her mouth. Unfortunately the rest of the cord was still attached to my Pottery Barn lamp. This is her pink “baby” that she sleeps with every night. Every morning she drags her out of the kennel {her bed} to play.

photo (37)

This was Maggie a few weeks ago. One of many reasons my hair is getting grayer and grayer by the second. She LOVES it outside. She also doesn’t mind sprinklers, cat poop or wandering the neighborhood with me chasing her for an hour.

photo (38)

Maggie & I can be found at Petsmart every week for an hour for Puppy Class. So far she’s learned to *LOOK*, sit, walk on a leash and eat cat poop. We got our underground fence hooked up yesterday, so Maggie & I can also be found out in the yard a lot learning what all the little white flags mean.

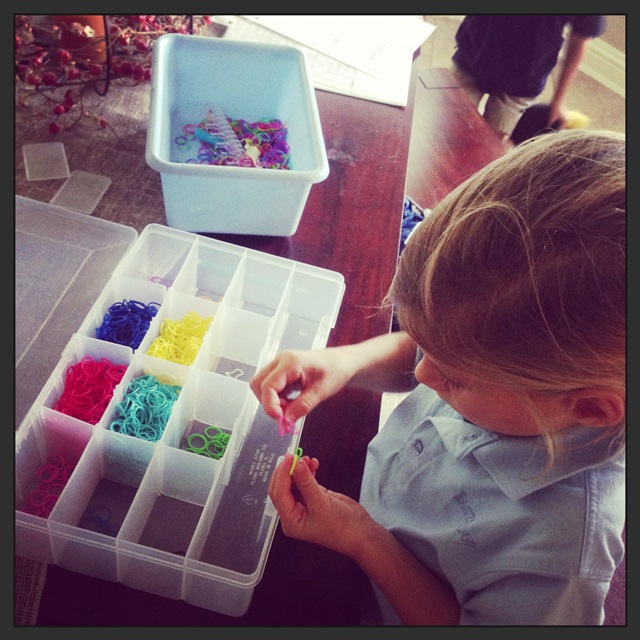
We are also “up to” Rainbow Loom bracelets. We are up to 2 looms (and need a 3rd) and 593,490 rubber bands. See our cool organizer below? Don’t waste your money unless your child is OCD. They are all mixed up now and it’s driving me crazy!! Keeping the rubber bands out of the dog’s mouth is fun too.

photo (39)

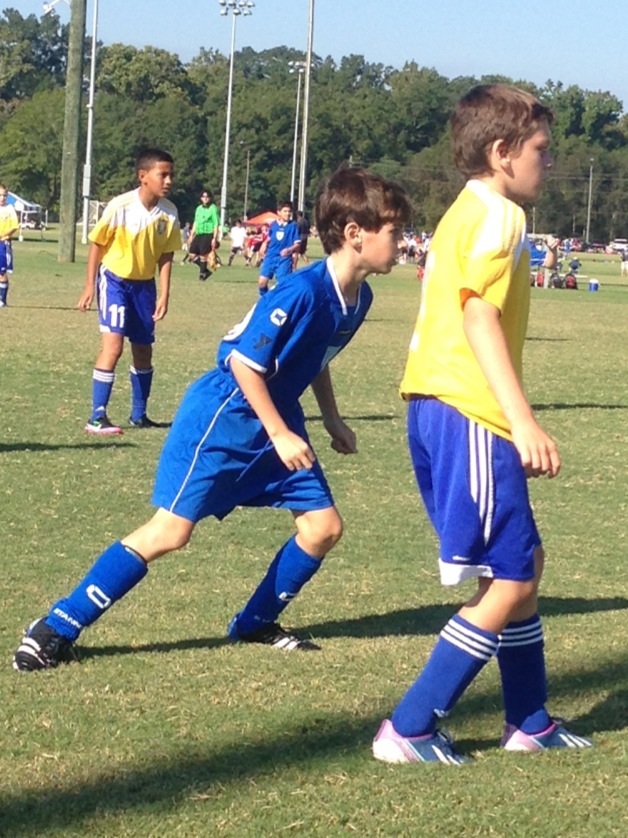
Lastly…. we are up to SOCCER at our house. My oldest plays travel “club” soccer in town and my middle child plays rec league soccer (and we are headed to a game as soon as I finish this post). Lots of soccer! Little Sissy does gymnastics. That means she does cartwheels all over the soccer field.

photo (40)

That’s about all we have been up to!

This week I created an Instagram account for Applique Cafe! We already have some followers so if you are on IG, find me and follow! Click HERE to get there!! I love Instagram and have been using it for a while now, but haven’t been posting “work stuff” until now. One more thing to keep up with, right??

photo

I hope you enjoy your weekend! My next post will be on beginner machines, so stay tuned!!
Fast Frames and Backpacks!

School is back in session! My kids started back on the 14th of August and it’s been a blur since then. Everyone said “Ohhhhh they will all be at the same school this year {my youngest started Kindergarten}! It’ll be SOOOO much easier and you will have more time!!!!” I don’t know if I agree with this? I feel crazier than ever. As my M-I-L says, I meet myself coming and going. Throw a puppy in the mix and it’s a recipe for chaos! Did I mention I will be 29 41 this month? I have found that if I don’t write it down, it is NOT getting done. Is this ADD? Old age? Yesterday at Target I picked up this handy dandy “NOTES” notebook for 3 bucks. I might go back and stock up. Today I neatly wrote down everything on my to do list, and low and behold it all got done in a timely matter! Success!!
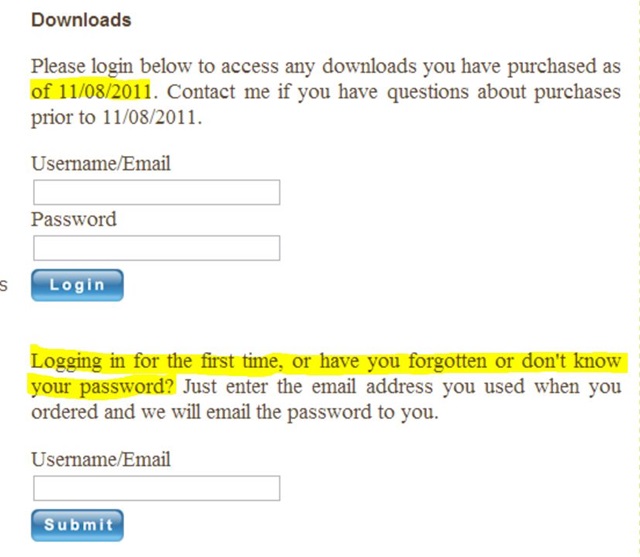
photo (18)

Which leads me to this post…. I took all of these great pictures back on August 9th during my back-to-school-backpack-a-thon. Today is September 5th and I am JUST now sitting down to share them. Sorry school is back in session and you needed this info a month ago. Tuck it away for next year. Or as they say on Pinterest, Pin Now, Read Later.

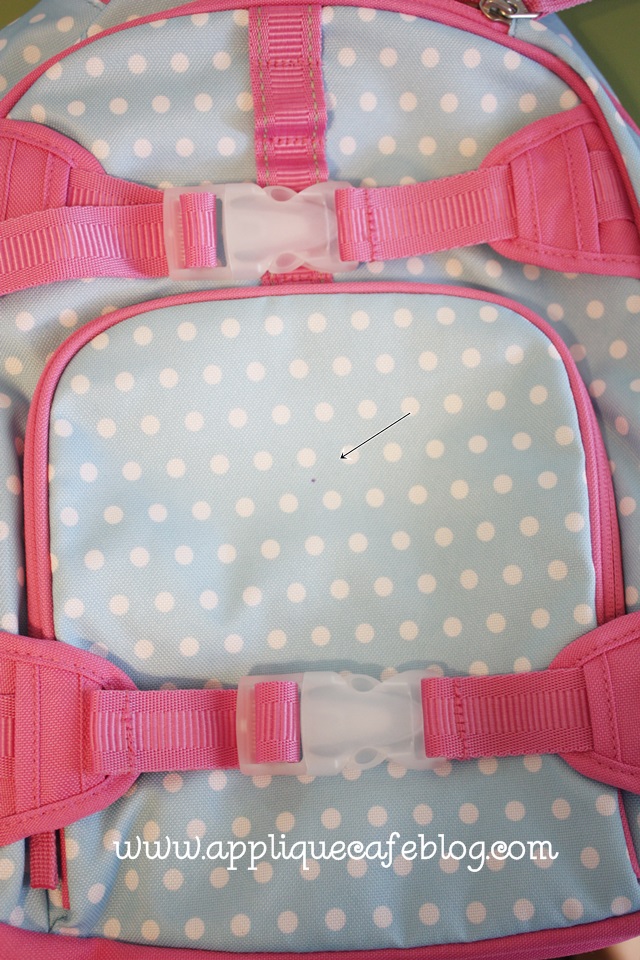
Here is a backpack I’m going to monogram. The perfect place to monogram it is on the front pocket, and as you can see below I’ve marked (after measuring) my center with my handy dandy air erasable pen.

IMG_8199

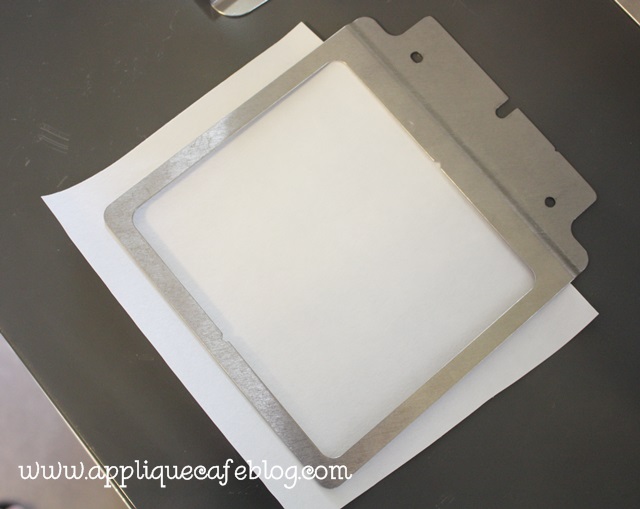
I have a Brother PR650 6 needle machine and Fast Frames, so that’s what I’m going to use (no hooping required). If you have a single needle machine and no fast frames, you could still follow along but hoop a piece of sticky stabilizer instead. Here I have cut a piece of sticky stabilizer a little bigger than my frame. p.s. I buy my sticky stabilizer from sewingmachine.com (commercial backing).

IMG_8200

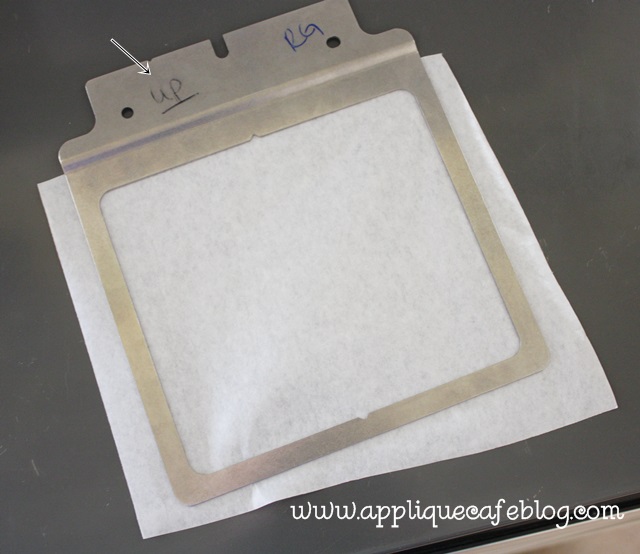
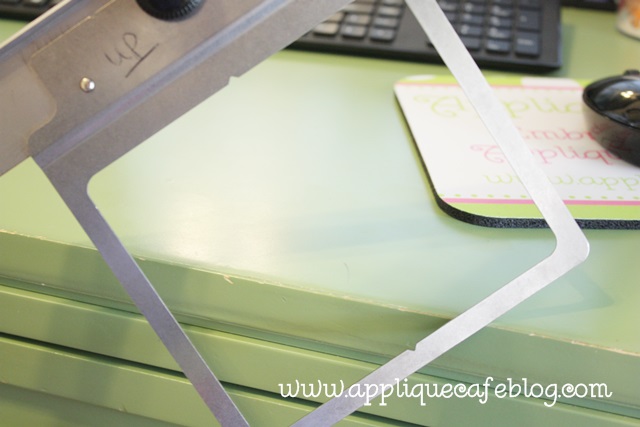
As you can see here, I wrote “UP” on the top of my fast frame. I don’t know about you, but I have to figure out which way is up or down every single time. There is a science to which way is up which you will see later. Here I have also pulled off the paper side of the sticky stabilizer and I’m going to now stick the stabilizer to the frame from the bottom.

IMG_8201

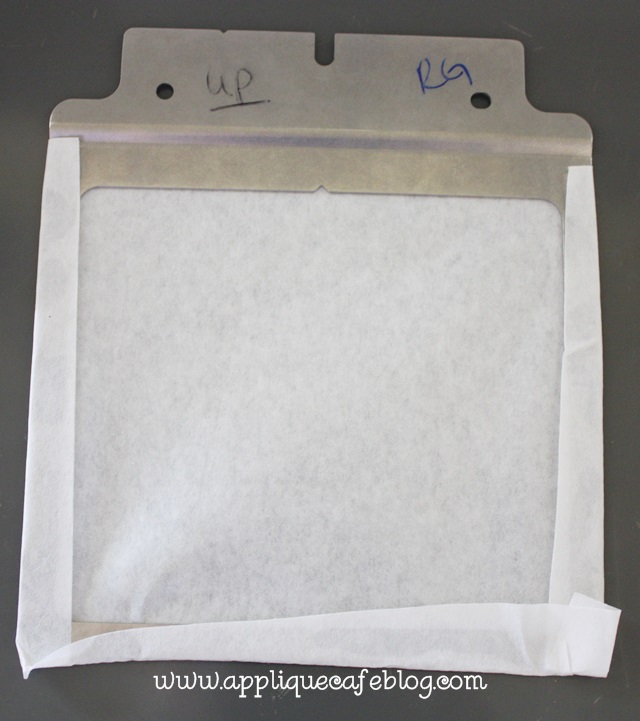
I’ve stuck the stabilizer to the frame and wrapped the excess around the top loosely. No need to smooth it down! Doesn’t have to be perfect or neat either. Don’t worry, it’s not going anywhere! p.s. I put my initials on my frame too so no one steals it from my sewing room. No really I take these to classes sometimes.
IMG_8202

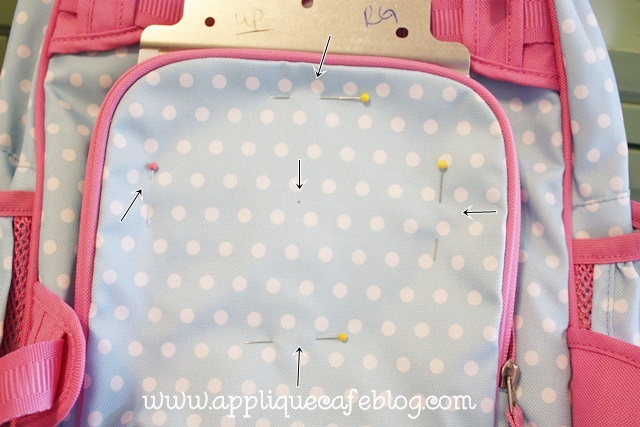
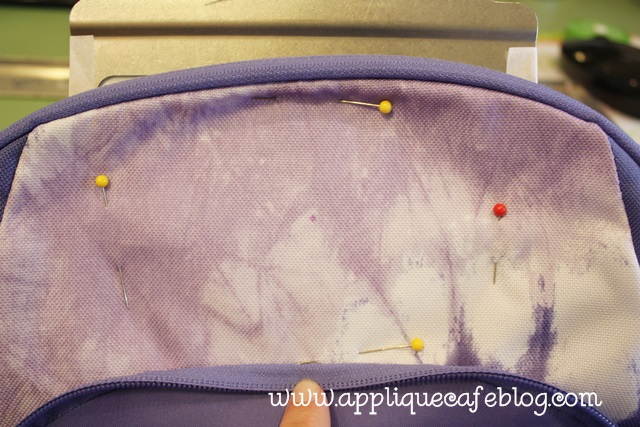
I am now ready to stick my backpack front pocket to the sticky-stabilized-fast-frame. As you can see below, the backpack pocket flap is “stuck” to the sticky stabilizer, but I also pin it in place INSIDE the inner frame of the fast frame. This keeps the backpack in place AND it shows me where my inside borders are. If my monogram goes outside the pins, it is likely to hit the frame which is NOT good. So… stay within the pins! As you can see below my center mark is not exactly in the center of the frame, but it’s close and I will have plenty of room for my monogram. You just need to make sure it’s straight on the frame!

IMG_8203

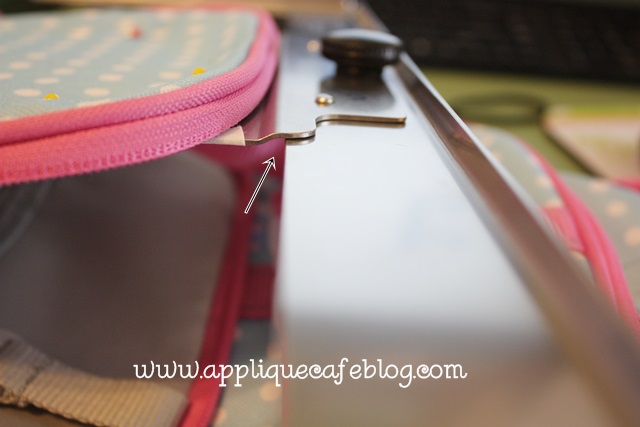
Here is the science behind the frame and how it attaches. As you can see there is a small dip where the frame attaches, therefore everything is level on the machine. If you attach it upside down, the frame will be tilted up and you’ll know it b/c it will bounce around more and it’ll be louder than usual.

IMG_8204

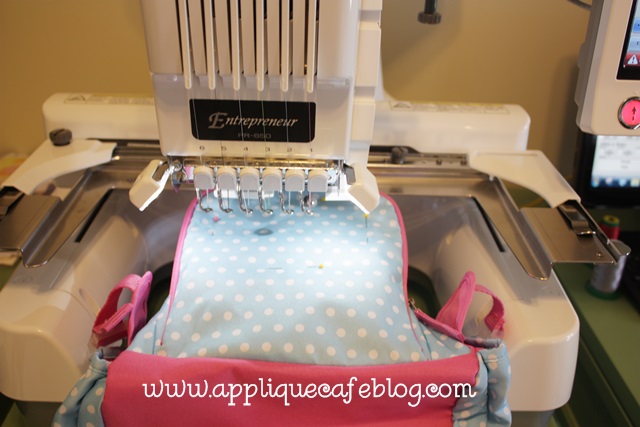
Now… I’ve attached the fast frame on to my machine. My machine thinks this is my largest hoop, so it doesn’t know how much space I have. These machines don’t recognize Durkee hoops or Fast Frames, so it’s up to you to test your boundaries before you sew anything.

IMG_8205

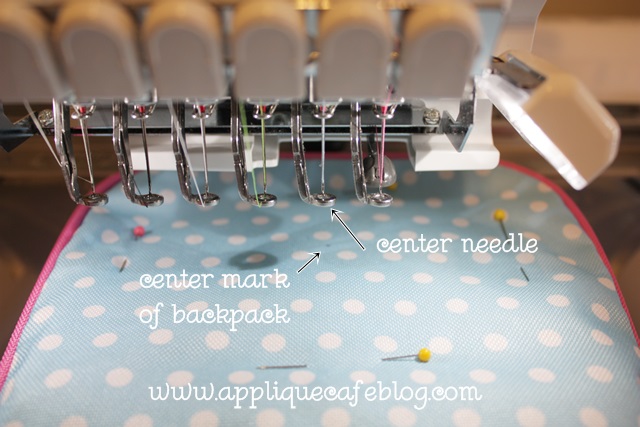
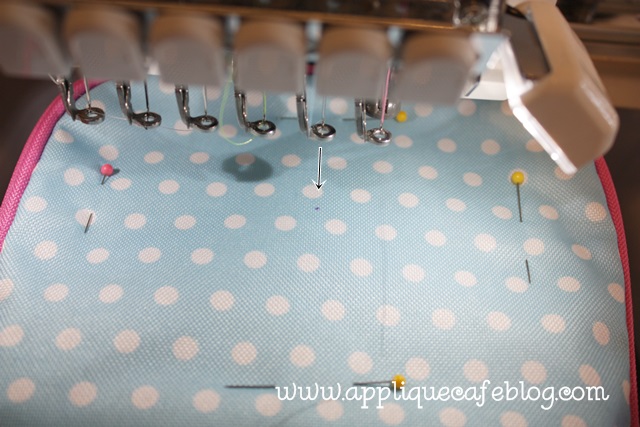
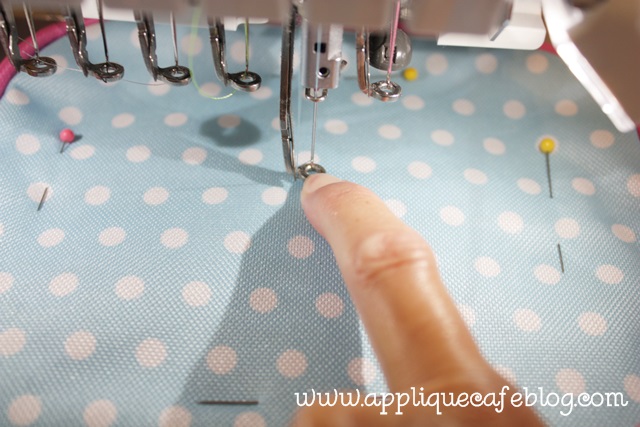
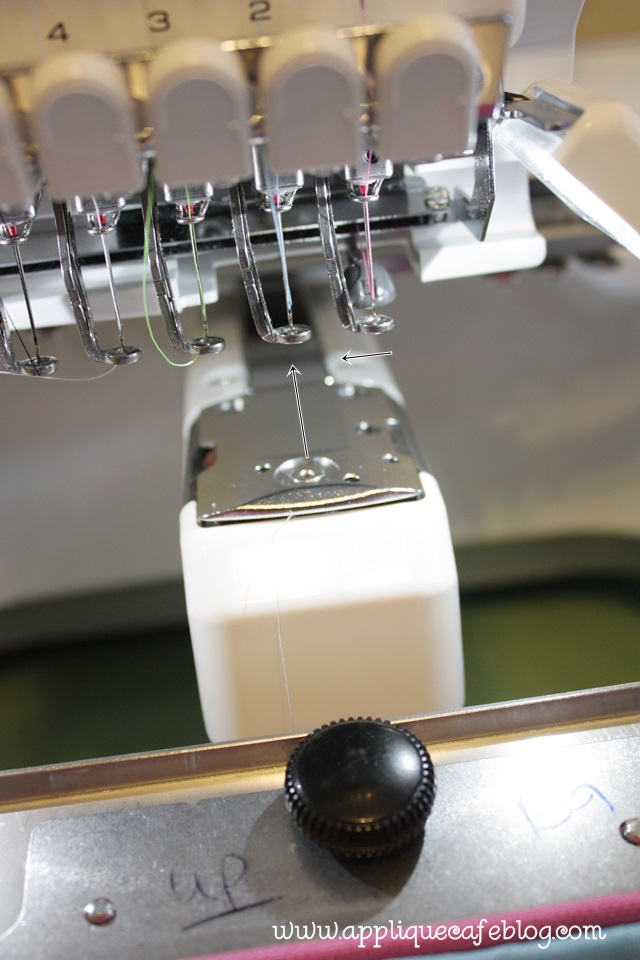
Before I test my boundaries I need to make sure my monogram is going to be centered on my backpack. The way I do that is to line up my CENTER NEEDLE with the center spot (remember the air erasable pen mark) on my backpack. This is confusing to some people! Your center needle is the needle to the LEFT of the needle threader apparatus. It also lines up with the bobbin arm on the machine. After you’ve done your editing (assigning colors, adjusting size, rotating, etc) and you hit EDIT END on the machine, then you will use the arrows to line up your center needle with the center on the item/garment.

IMG_8206

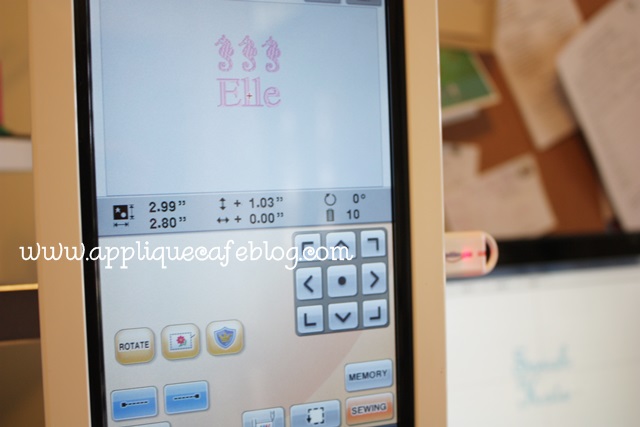
Those arrows are shown below. If you need to start over, just hit the center dot on the machine (in the middle of the arrows). As you can see here, I have moved the design (Elle + 3 Seahorses) up to line the center needle up with the center on the backpack. The red + on the screen is the center of the “hoop”, but don’t think too much about that b/c it’s too confusing.

IMG_8207

Most of the time you can eyeball it to see if it’s centered.

IMG_8208

You can also pull the needle bar down to make sure it’s centered. The needle will only come down so far, BUT, if you turn the knob on the very back of the machine, the needle will come all the way down and you will be able to tell if it’s centered.

IMG_8209

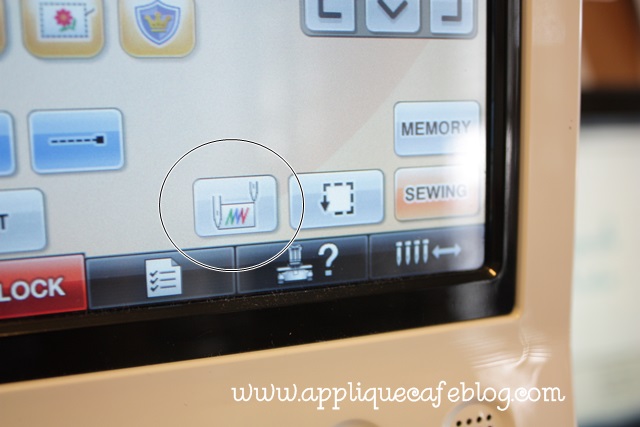
So your needle is centered which will center your design. NOW you need to check your boundaries to be sure that while stitching, the needle is NOT going to hit any of the edges of your fast frame. This is super important!! If your needle hits an edge of your fast frame, it CAN and WILL mess up your machine. Below is the button to check your boundaries.

IMG_8210

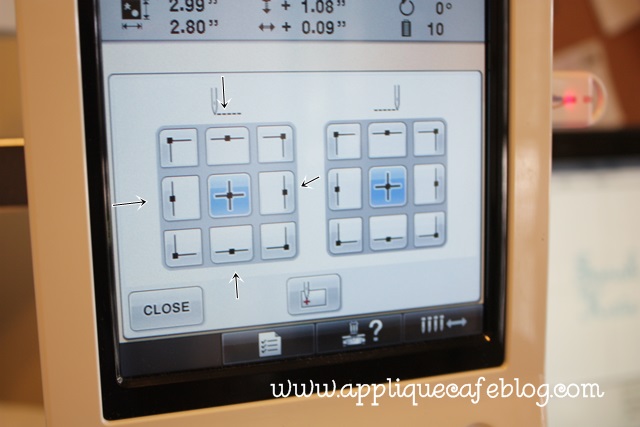
Press the edges and your needle will move around to show you where the edges of the design are. Another option is to press the button (up above) to the right of the check-your-boundaries button. It will trace the design for you and you can see where the needle will hit. Either way will work!

IMG_8211

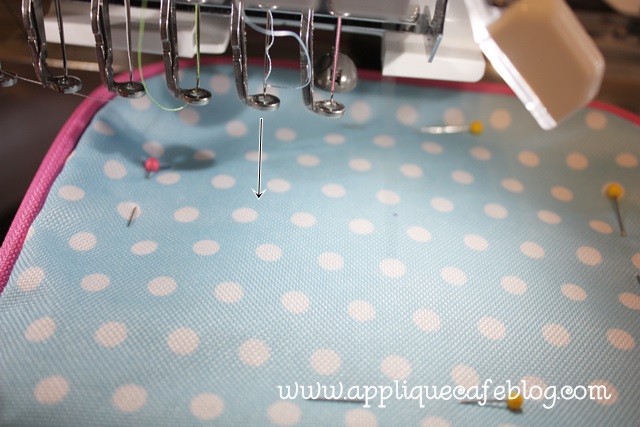
Below I have hit the left side button and it is showing me where the left of my design will hit. I’m within the pins so I’m good. Another reason the pins come in handy! As you can see, I have plenty of room!

IMG_8213

If you are confused as to which needle is the center needle, as I said earlier, your center needle is to the immediate left of the needle threader thing and also it LINES UP WITH THE BOBBIN ARM. I’m sure there is a more technical name for the arm? As you can see below, needle 2 is currently my center needle. This can change to needle 1, 3, and so on and so forth depending on which needle you threaded or used last.

IMG_8214

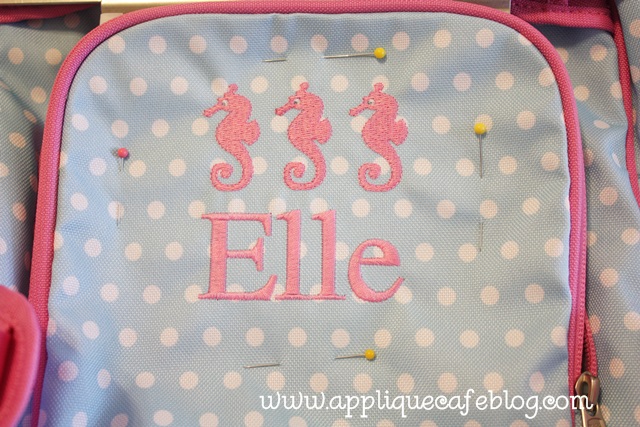
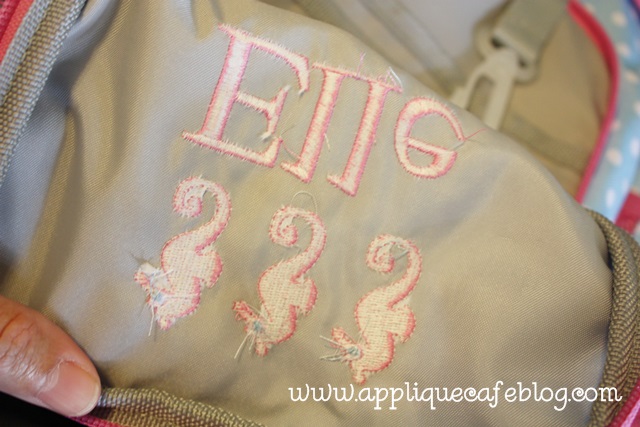
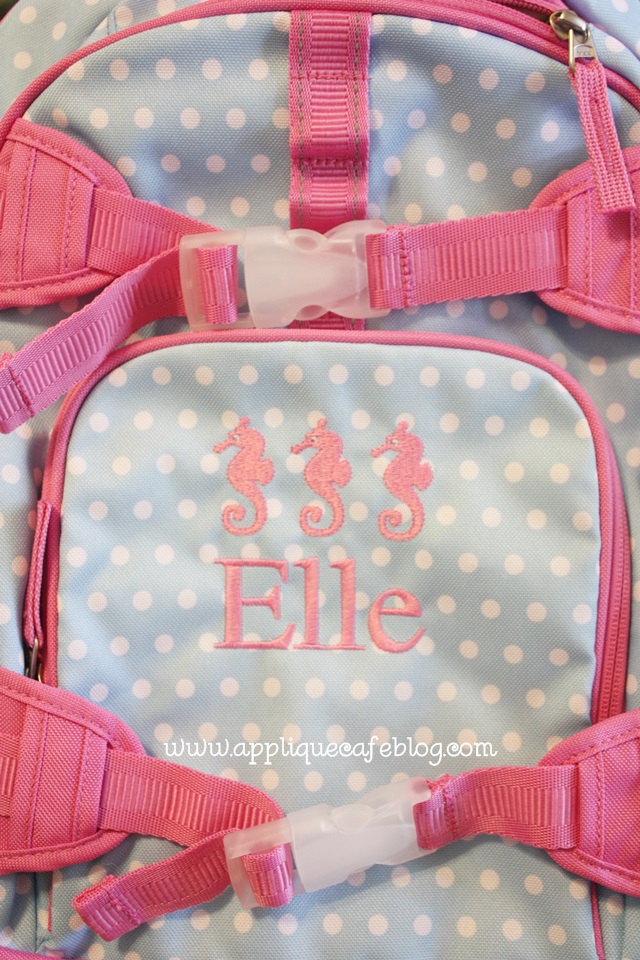
I have sewn my design, which is our Mini Seahorse Embroidery Design X 3 and “Elle” done in Monogram Wizard Plus “Library” font. The design fit well within my pins with room to spare.

IMG_8215

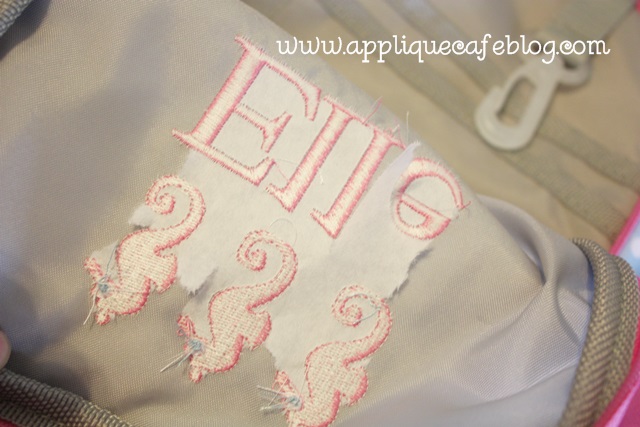
Almost done! Once I remove the straight pins and fast frame with sticky stabilizer from the flap of the backpack, you can see I have a little excess sticky stabilizer. No problem! I peel it all off. Use scissors to get it started inside those holes if you need to. Just be careful not to puncture anything.

IMG_8216

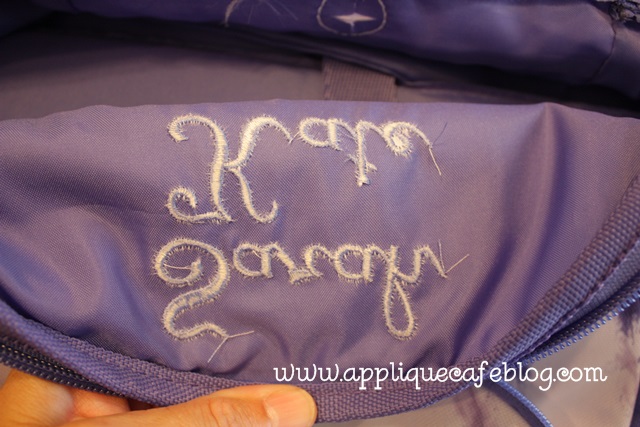
While it’s not necessary to remove all of the stabilizer, I always do and it looks a little neater. Again, I use sticky stabilizer from Sewingmachine.com and it comes off with ease.

IMG_8217

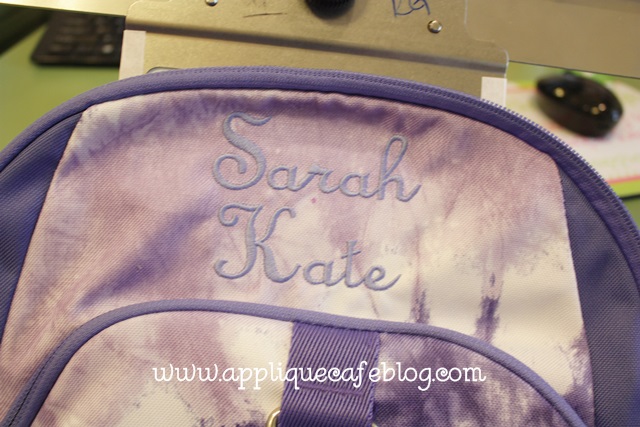
Finished backpack! The pinks don’t appear to match, but they do!

IMG_8218

When you’re done, you also need to remove all the sticky stabilizer from the fast frame. The kind I use is not excessively sticky and peels right off.

IMG_8219

One more quick example! Mark my center.

IMG_8221

Pin it in place on to the sticky-stabilizer-fast-frame.

IMG_8222

Monogram. Remove pins.

IMG_8223

Peel away excess stabilizer.

IMG_8224

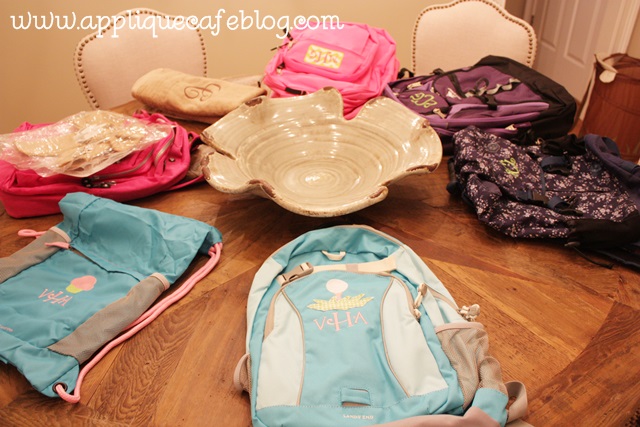
Here is my table-o-backpacks and a few other things! I was busy that week before school started and I think I actually did about 16 backpacks in a matter of a few days! Some were just monogrammed and some were appliqued. Mini embroidery designs are great too!

IMG_8225

Again, sorry this is coming to you AFTER school has started! File it away for next year! Please comment with any questions! Have a great weekend!

Last p.s….. Applique Cafe fans ~ our site is 30% off through Tuesday, September 10th! We will be adding 4 new designs hopefully tomorrow!

Applique Cafe 101

Happy 5th of July! We are going on day 2 of rainy, wet, dreary weather my friends. Yesterday, July 4th, it rained most of the day. We were lazy. Today it hasn’t really rained all day, but it’s been dreary and overcast and is now sprinkling = cabin fever and fussy cooped up kids (and irritable parents). Fireworks were cancelled last night but we did enjoy dinner with some friends! I spent the afternoon cooking potato salad, cole slaw and a corn salad recipe I found on Pinterest. It was pretty yummy!

corn salad

Today I haven’t done much. I’m still in the shirt I slept in + shorts. I did some monogramming this morning and watched a great movie this afternoon ~ Safe Haven. Not sure what the reviews were on this movie but I liked it and was crying at the end! I’m a Josh Duhamel fan too!

Now to this post…. I get asked a.l.o.t. “I’m new to embroidery and I like your designs! How do I order?”, or, “I have X machine and love your designs! How do I get them on my machine?” You get the point. I decided to type up a post about it and then when I get these emails I can quickly drop them the link! So….

Of course our website is www.appliquecafe.com. I’m SURE it’s in your favorites or pinned to your toolbar! A few basics are:

Featured designs on the right are typically our NEW designs. When I load them on to our website, I click a button to “feature” them and that’s where they show up. Also, if you click on ALL DESIGNS, you will find every single design on our website in order from newest to oldest. So, the first designs you see are our newest! They are not in alphabetical order, but rather in order from newest to oldest. The best way to keep up with new designs and sales is to click the SUBSCRIBE TO NEWSLETTER button! I promise we are not like Old Navy or Target and we WILL NOT send you an email every single day. Our newsletter service is paid and we only get so many newsletters a month, so we only send them out when we have new designs to tell you about or a sale going on!

Capture

Under INFO you will see Contact Us, Guest Book (feel free to “sign” it), FAQ, etc. If you are new to our site, read the FAQ! It will only take a minute and I have tried to include all frequently asked questions and answers there. I get countless emails asking “Do you offer PES format?”, etc. and guess what? the answer is in FAQ!

faq

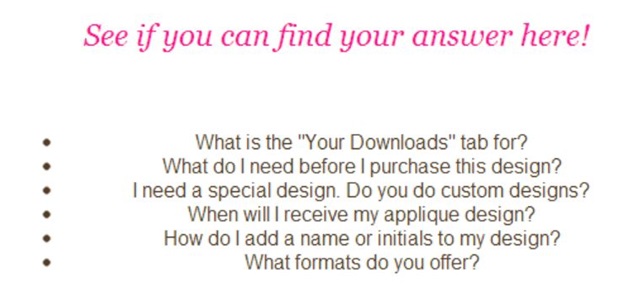
Here are the FA-Questions and if you click on each (on our actual website) you will find the answers. If these answers STILL don’t answer your question, then feel free to use the Contact Us tab. Again, if you take a minute to look over the FAQ you will most likely find your answer!

faq2

On the left is our SHOP tab with all of our categories of designs below. I try to group designs together so that you aren’t having to look through 50 different categories of designs. Designs are also cross referenced so you are sure not to miss anything! You can also use our SEARCH feature if you are looking for something specific. We also use keywords in our listings to help in searching. Check out our DESIGN ON A DIME category. These are great designs to try if you are just starting out!

categories

The Your Downloads tab… this is confusing! In November of 2011 (the 8th to be exact), we installed a program on to our website that stores your purchases under your email address. Applique Cafe was launched in August of 2009 and unfortunately we didn’t store purchases when we first started. That means there are a couple of years (August 2009 – November 8, 2011) where you cannot access your purchases using the Your Downloads feature. Don’t worry! I can still manually look up purchases under your name and access those if need be. As of November 8, 2011, your purchases are stored automatically without you having to create an account or log in before you purchase. So long as you enter your email address correctly, you are good!

dowloads

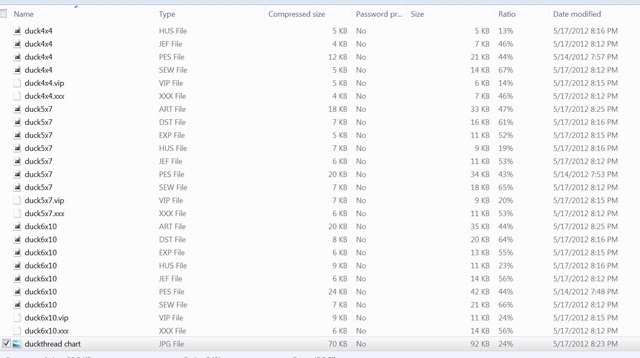
Our designs come in 9 popular formats and when you purchase a design, you will get a ZIP file which contains all 9 formats and a thread chart. Formats included are: PES, ART, DST, VIP, EXP, JEF, XXX, SEW, & HUS. These formats are also listed in FAQ. If you need a format not listed, just contact me!

When you purchase a design or designs, you will go through the checkout process and COMPLETE it. You then have 3 ways to receive your design(s):

1) You will be redirected to a page following checkout (when you click COMPLETE) and it will contain download links. You click on them and the zip files can be saved right then to your computer.

2) You entered your email address when you went through the checkout process. Download links are also emailed to that email address! It’s important to spell your email address correctly, and that’s why you are asked to enter it twice. If you don’t see them in your Inbox, check your spam folder.

3) If you miss the download page following checkout, and you also didn’t receive the email or you accidentally deleted it, you can also log in to Your Downloads and access your purchases there.

Here is what a zip file looks like when you open it. You can save the entire zip file when you purchase and you can also open it and save out the format you need. I use a Brother machine, so I can use either PES or DST files. As you can see the designs are in a list grouped together by size (4×4, 5×7, etc). Most designs come in 3 sizes: 4×4, 5×7 and 6×10.

zip files

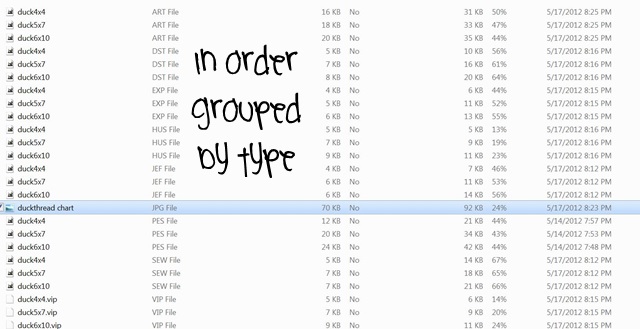
If you click on TYPE above the format column, your computer should rearrange the file list and now each format is grouped together as shown below.

zip files2

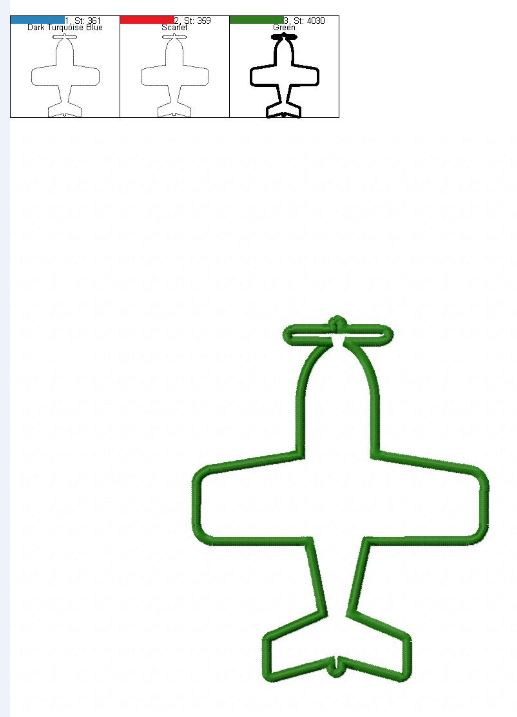
Inside each design zip file you will also find a JPG thread chart. This chart will show you an image of each step in the design. For example, this is a simple 1 fabric Airplane design (found in our Design on a Dime category). This would be a great design to start with if you are new and wanting to try out applique. Always remember, for each fabric you usually have 3 steps:

1. Marking – sews an outline to show you where to place your fabric

2. Tackdown – after the marking stitch, you place your fabric down and this step will sew the fabric down. After this you trim around the design as closely as possible.

3. Satin – this is the finishing stitch around the design. Not all designs are satin stitch. We also sell designs that are zig zag and raggy.

If you want more info on the above, check out this blog post ~ Better Appliques. There are also other posts about stabilizers, etc. on my blog under Helpful Posts.

thread chart

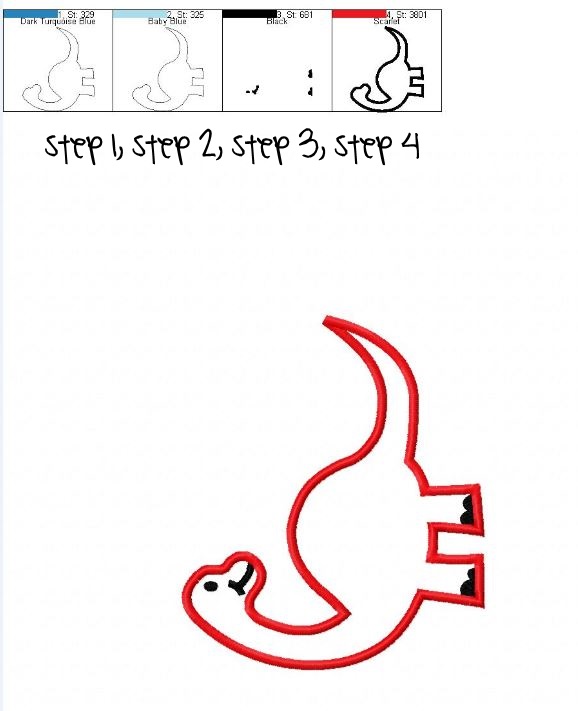
Here we get a tad more detail. Same 1 fabric design, so you have at least 3 steps. This one also has an eye, mouth & “toenails”, so add another step for that. Sometimes these features can be different colors so they would be added steps. For this design they are all the same color so it’s all done in 1 step. This Dinosaur design has 4 steps total.

dinosaur thread chart

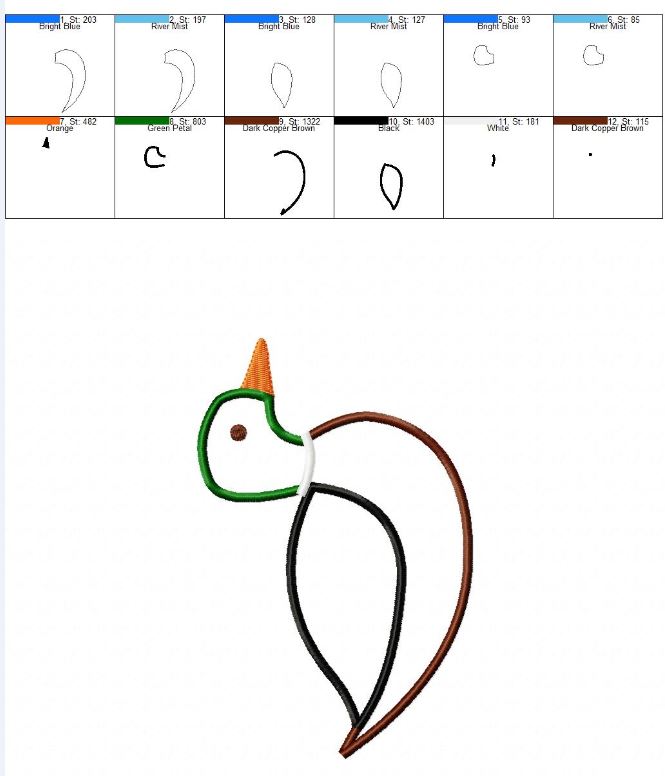
Now an even more complicated design, our Duck! This design has 3 fabrics + a beak + an eye + a “ring” around its’ neck, so a total of 12 steps. Don’t freak out! Again, the thread chart will show you each step. Your machine will probably show you an image of each step on the screen as well.

duck thread chart

Need more help? There is a link on our website to my blog! Check out Helpful Posts, and you can also use the SEARCH feature or scroll down to Categories on the right hand column. There are also blog post TAGS (popular topics) on the same right hand column.

web

Now, you’ve bought the design and saved it to your computer. What next? Most machines have USB cords or cables that connect from your computer to your machine. Other machines have a USB port and you simply save your designs to a thumb drive, then put the thumb drive in to the USB port on the machine. Other machines use card writers and other software is needed to save designs and then put them on your machine. ALL MACHINES ARE DIFFERENT! My machine has a USB cable AND USB thumb drive saving capability. On my computer I save to my E:/ drive for each of those options. Consult your manual or embroidery machine dealer or store for more info!

What software do you need?? I use Monogram Wizard Plus for names & initials, and I use Sew What Pro for merging those names & initials in with applique designs. There are tons of other programs out there! These are just the 2 I use.

I hope this helps! I would love to add to this post if you can think of anything not covered! Just comment below. Thanks!