I had a couple of people ask me what was in my “Favorite Things” giveaway basket at the Everything Applique Conference this past weekend. I hope these are in a somewhat logical order, but if not, you’ll get the idea! I’ll also try to reference where everything came from. First of all, here is a picture of my door prize ~ Applique Cafe’s “Favorite Things” basket. The basket, or Angled White Beverage Tub, came from Target. If I knew how to use my vinyl cutting machine, I would have adorned it with lime and/or pink polka dots! The cellophane basket bag came from Michael’s and the Raffia came from an Etsy store. I also used hot pink crinkle cut paper filler from Caffco Floral Outlet. (I had a lot of fun doing door prizes). The AC stickers came from Zazzle.com!
The winner of my basket, Demonica, posted this photo on Facebook. If you’ll remember my last post, she rode from New Orleans to Birmingham on a TRAIN! I just think that is so awesome and fun! She said it was very relaxing and gave her some quality time away from the family to rest and do a little work on her laptop (in the sleeper car). I honestly had no idea you could ride a train anywhere, so it’s even cooler that she rode a train to come to the Everything Applique Conference!

Now on to the basket… I included my go-to stabilizer, 12×12 and 8×8 2.2 oz precut medium cutaway stabilizer squares. Both of these came from Sewingmachine.com. Check out all of their “commercial backing” and you can narrow down your search by the type of stabilizer you are looking for (cutaway, precut squares, tearaway, etc.). Click HERE for precut squares. They come in a variety of weights, but I like the 2.2 oz, as it is not too thick or heavy. I have used 2.5 oz as well and it’s not too heavy either. Their commercial cutaway also comes on the roll, but the squares are really convenient.

As you can see the 8×8 squares are perfect for the 4×4 hoop. (This is my Brother PR650 4×4 hoop)

The 12×12 squares are great for the Durkee 9×9 hoop and also the 5×7 hoop. Check out this post for more info on the Durkee Hoop, which is compatible with most multi-needle machines.

You can use the entire 12×12 square for your 5×7 hoop, or cut a few inches off before you hoop.

Now on to Sulky KK2000 spray. This is a temporary spray adhesive that I use to “stick” my cutaway stabilizer to the inside of my shirt before hooping. It keeps the stabilizer in place so I am able to hoop my shirt. I also use the 99 cent tape measurer from Hobby Lobby! I keep one in my purse as well ~ you never know when you’ll need to measure something. When I do a shirt, I measure from armpit seam to armpit seam and mark my center. This distance is usually a good even measurement (14″, 12.5″ etc).

Spray adhesive can build up and make things sticky, so I recommend spraying it OUTSIDE. My sewing room is right by our front door, so I walk out on the porch and spray my stabilizer over the bushes. My bushes might be sticky, but at least my carpet isn’t!

My shirt is inside out, I’ve sprayed my stabilizer with spray adhesive, and now I stick the stabilizer to the shirt. Turn it right side out and I am ready to hoop! The Sulky KK2000 spray is temporary, so when I am finished appliqueing my shirt, it pulls right off so that I can trim the excess stabilizer around the design. See this post for more info on hooping.

Also in my basket: Schmetz Embroidery Needles (75/11) and an air erasable pen. I use the air erasable pen (from Joann or any sewing store) to mark the center of my shirt (or bib, or towel, etc). It disappears with a little time, or you can also squirt water on the dot and it’ll go away. A wet Q-tip works as well. If I am marking the center of a dark item, such as a navy blue t-shirt or a fluffy blanket, I use a straight pen. Chalk would work as well. You may notice the lint buildup in the clip on my pen. I have had this pen since I started doing applique about 5 years ago!
As far as embroidery needles, I use 75/11 needles for everything. Some people use ballpoint needles and some people change out their needles for various projects. 99% of the time I am doing samples or tshirts so this is the type of needle I use. You can get Schmetz needles from Sewingmachine.com, Joann (I stock up when notions are 50% off) or most any sewing store. Steve (Sewingmachine.com) recommends Schmetz, as they are the oldest needle company around. Basically they have been making needles for a long long, long long long, time!

Bobbins ~ for my Brother PR650, I use the Fil-Tec Magnetic Core Bobbin. A box of 100 is $28, again at sewingmachine.com. I recommend any prewound bobbin, as the tension is consistent and it’s fast and easy to change out your bobbin. These were not in my basket since I didn’t know what kind of machine the winner would have, but I’m including them in my favorite things!

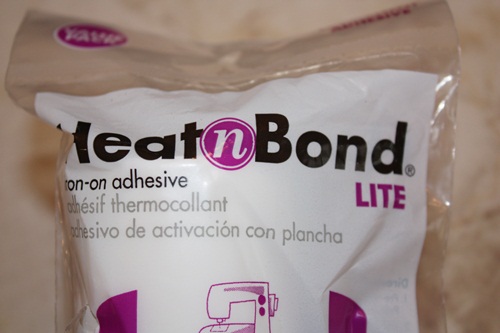
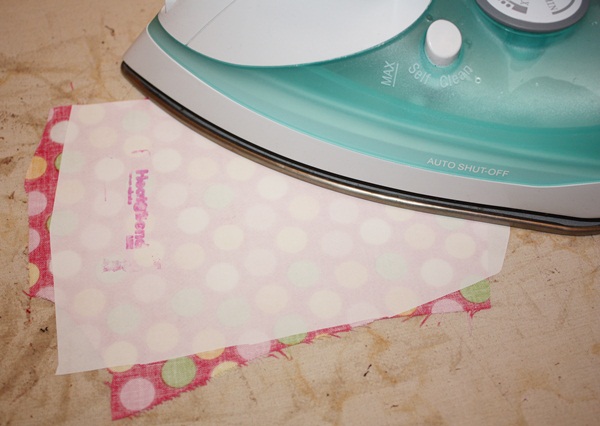
Heat. N. Bond. Lite ~ check out this post on why I love this product!! You can buy HNBL by the bolt, in a box, on a small 3 yard roll, 15 yard roll, etc. Some people buy it at their local Walmart, but I have not seen it in Montgomery. You can buy small packages at places like Joann or Hobby Lobby. Sewingmachine.com sells it as well. I used to stock up at Joann when notions were 50% off, but lately I have not been able to find any there. Wonder Under is another fusible product you can use, but I use and recommend HNBL.

Instructions ~ very easy to use!

Another item NOT in my basket, but still one of my favorite things (and a necessity in applique). The iron is your friend! I have a Shark iron. It’s not fancy and yes, it leaks water sometimes. Iron your shirts, iron your bibs, use the iron for your HNBL, iron when you’re done. IRON!! Do you get hoop burn? Squirt with water from your iron, iron over the hoop burns. They are gone! I see photos on Facebook a lot and it looks like someone took a picture of a t-shirt from the dirty clothes basket. Ironing can make all the difference in your appliques, your pictures, etc! I hate to iron my own clothes, but ironing is so important when doing embroidery and applique.

Scissors ~ I did include 4″ curved Gingher scissors in my basket, as well as a 2-pack of Fiskars fabric-cutting scissors. I use the Ginghers in the applique process only to trim the fabric around the tackdown stitch. I use regular fabric-cutting scissors to cut fabric, to cut stabilizer, to cut ribbon, etc. You can never have enough scissors! p.s. I got my Ginghers at Joann and you can usually catch them on sale or use a coupon.

The Ginghers are great for trimming closely around your applique! The curved end helps you to NOT cut a hole in your shirt (been there, done that, got the t-shirt)!

As you can see here, I trim very closely. I do this with the help of a) the scissors and b) the HNBL on my fabric makes trimming easy and CLEAN! This design is ready for the satin stitch!

There were also a few fabrics in my basket. I typically buy 1/4 yards of fabric since a little goes a long way when doing applique. I LOVE polka dots, ginghams, stripes and small florals and prints for applique! These are all my GO-TO fabrics, as you can probably see in my design sample photos.

You can’t beat good ginghams, and try to avoid the cheap thin ones. Fabric Finder brand ginghams are great!


One more item that I should have included in my basket but didn’t have time to get… a REAL thread chart! This is the Isacord real thread sample thread chart. I also have the Exquisite (formerly Poly-X from Kens Sewing Center) thread chart and use them both. We all know the color print charts are impossible to match as well as the color square on your computer screen. These charts are usually $10 each and are well worth every dollar when you are searching for thread to match that funny colored peach dress.

Another tip that I NEED to do ~ mark, circle or underline the colors you have on the chart. That way if the sticker comes off of the top of your spool of thread (which happens to me all the time), you have a record on your chart of which colors you have and like!

I did include a few spools of thread in my basket ~ Isacord 5830 is my favorite lime (it’s hard to find and only comes in 1000M as far as I have found)! I also included a hot pink, yellow and turquoise. Demonica also got an Applique Cafe Gift Certificate in her basket! (Hint Hint: Mother’s Day is 2 weeks away)
There are probably a few more things I consider my favorite things, but that was about all I could fit in the basket! If you have any questions please comment or email me ~ rosemarygulledge@appliquecafe.com! A lot of these things were discussed in our class, Applique the Right Way!


Recent Comments