More on Fast Frames

Yay another post! Today has been a crazy day! Some days I get sucked in to Facebook and then it takes me all day to keep up with all the comments and replies. Today has been one of those days. I managed to monogram a backpack (not the one in this post) and edit these pics for a new blog post on Fast Frames. I also have a great new post on Monogram Wizard Plus but will save that one for tomorrow or another day this week.

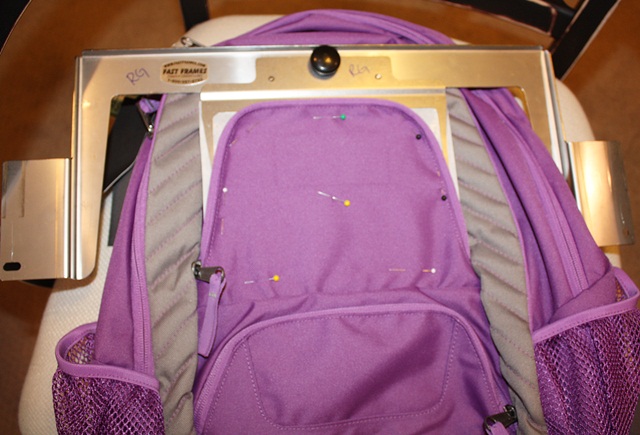
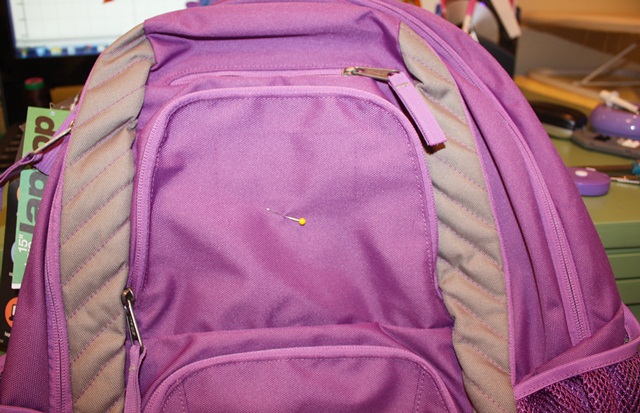
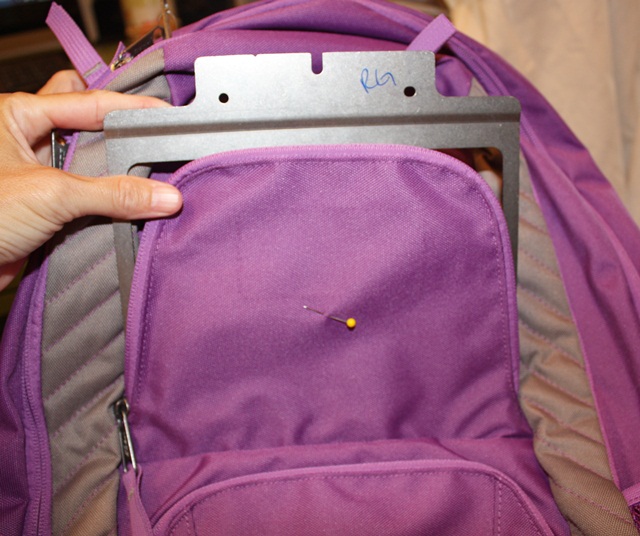
This, my friends, is a backpack (duh). You may be able to tell that my friend who sent this to me to monogram took the tag off (right above my straight pin). Her daughter is going in to 4th grade (I think??) so she said do her name, and that she’s in to peace signs! Sounds like a call for MINI DESIGNS! First I pinned my center of the top part of the front pocket (flap, we’ll call it). 
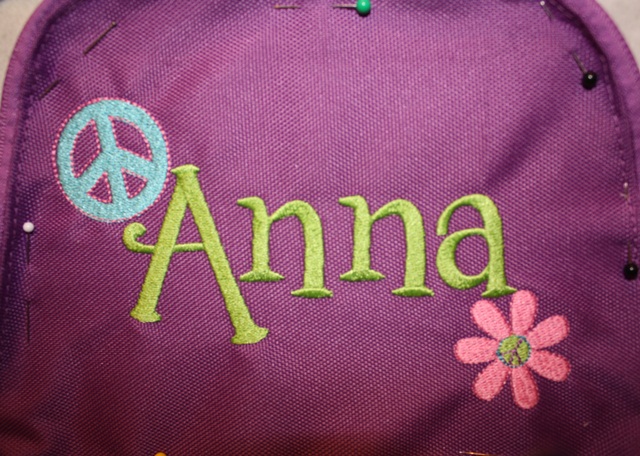
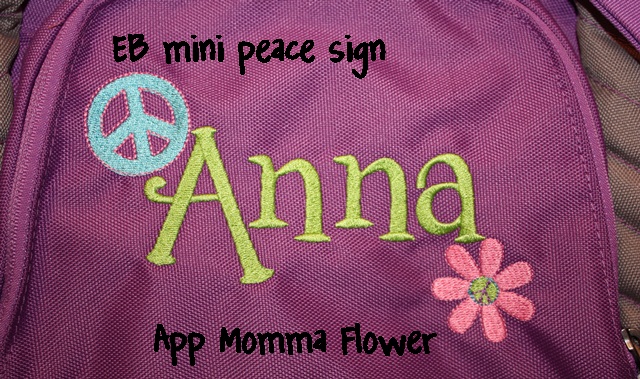
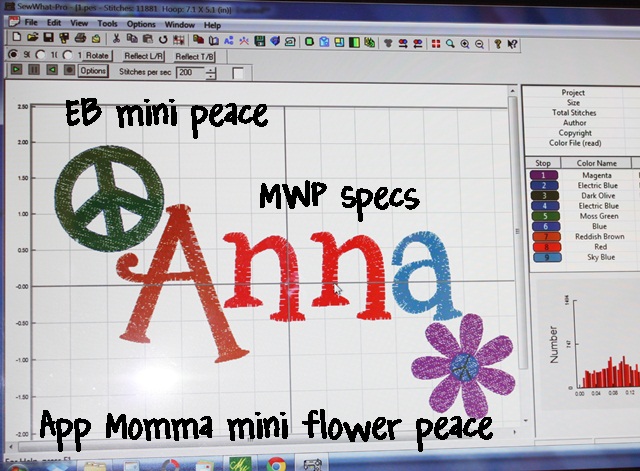
 I got my name together merged with a couple of cute mini designs. The peace sign is from Embroidery-Boutique and the Flower is from Applique Momma (it also has a peace sign in the middle). I used Monogram Wizard Plus Specs font. I love the font and it’s great for initials, but names are tricky. It spaces out rather strangely. I will explain all that in my next MWP post this week, but in the meantime you can see that I layered this name together IN Monogram Wizard Plus so that it all lined up and/or was spaced correctly. Layer 1 – A, Layer 2 – nn, Layer 3 – a. I then saved it and merged it in to my Sew What Pro. I added the mini designs, centered the whole thing and then saved it to my machine. I saved this in a 5×7 hoop space but will use my Fast Frames.

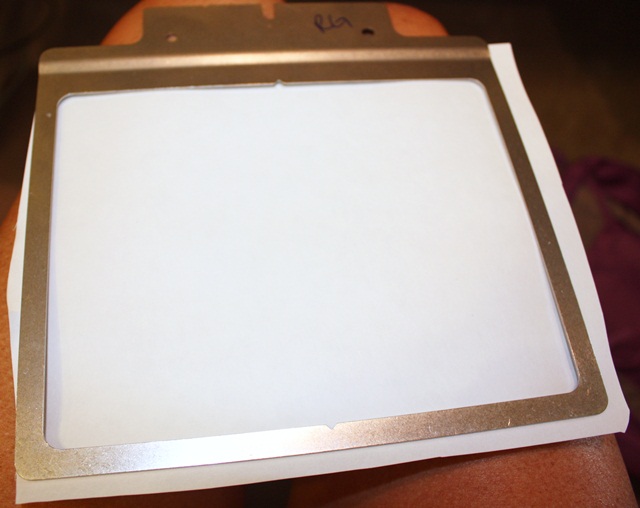
Now it’s time to pick out the right sized Fast Frame. This one measures 7″ x 8″.

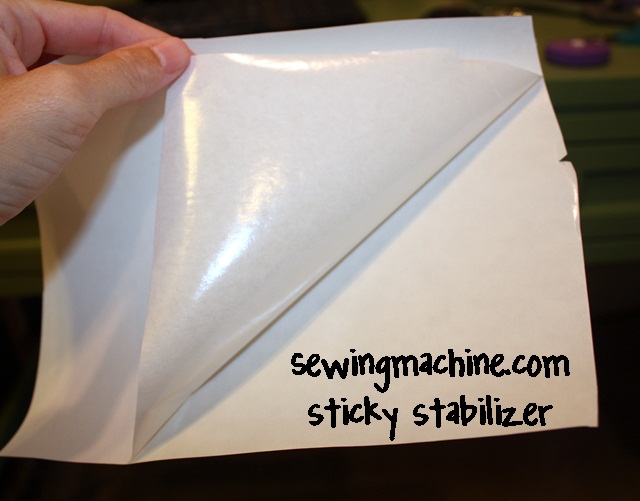
I very loosely cut my sticky stabilizer (from Sewingmachine.com). You want to cut it bigger than your frame so that it’ll overlap the edges of your frame.

Peel the paper side off to reveal the sticky side.

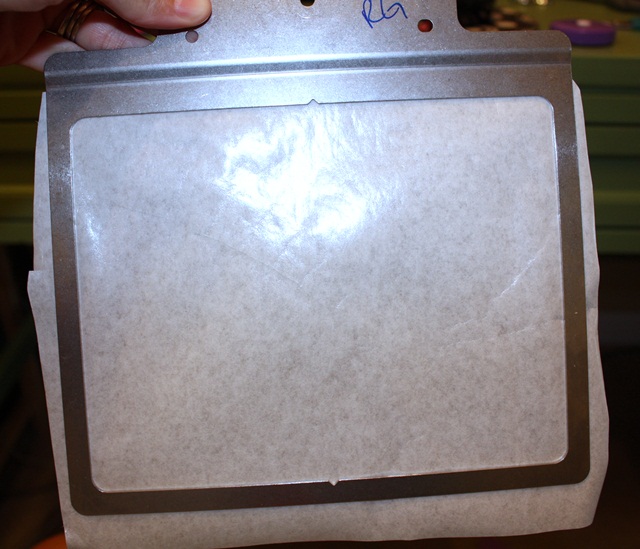
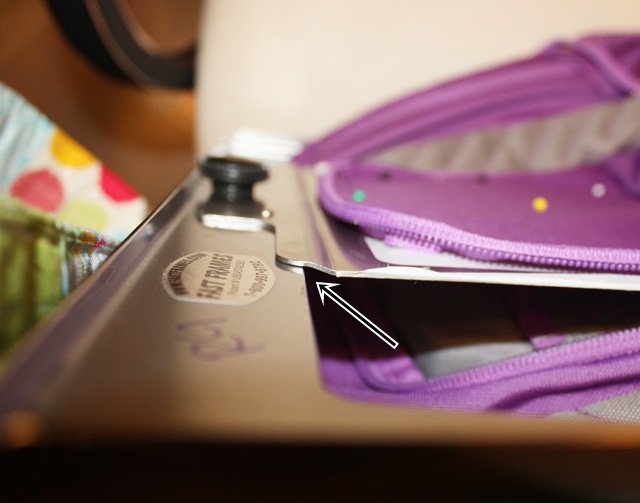
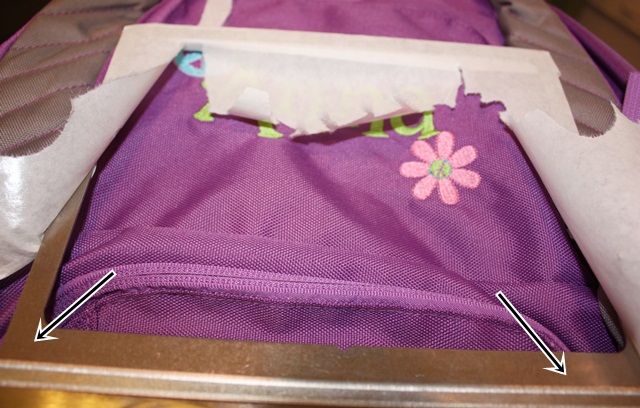
 Stick it to the bottom side of your frame (see photo down below which illustrates a little better what the “bottom” is). Hint: Your frame should slope down from where you attach it.

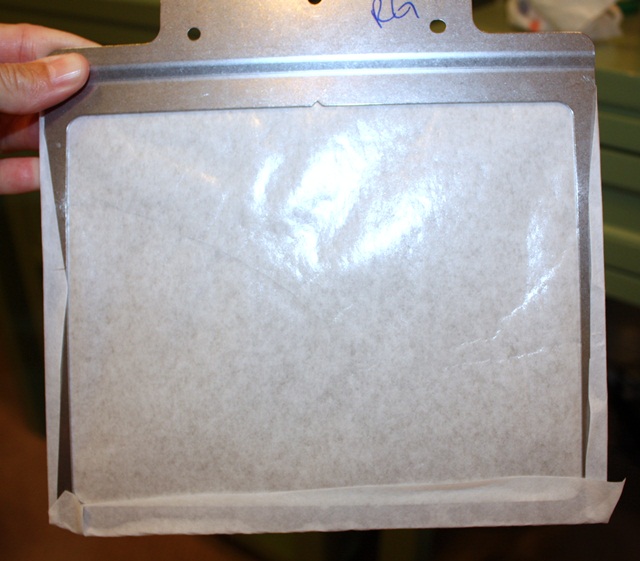
Wrap the edges around the frame. Doesn’t have to be all neat and perfect.

I then “stick” the backpack flap to the sticky paper on my fast frame. I usually line the top of the flap up with the top of the frame and then pin it in place with straight pins. This also shows me my borders. Since multi needle machines don’t technically recognize fast frames, you have to check the outer border of your design to make sure the needle won’t hit the edges of your frame.

Here is how your fast frame should attach to the frame ~ it slopes down. That’s how you know what the bottom of your fast frame is to attach the sticky paper (believe me, I have stuck it on there upside down and backwards).

 Blah blah blah sew the design AFTER testing your borders and here’s the outcome! I use FILL STITCH instead of satin stitch. Since this is a backpack I wouldn’t want the satin stitch to get snagged or pulled.

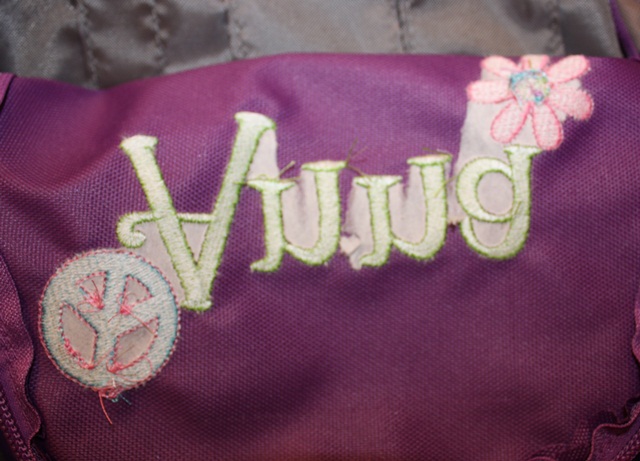
 I peel the sticky stabilizer/fast frame off the flap and as you can see it leaves a little inside the letters. You can peel that away easily. Get under it w/ scissors if need be. The sewingmachine.com sticky stabilizer is just sticky enough and comes off great!

I then peel the sticky paper off my frame. As you can see it comes off very easily with no residue left on the frame.

Here is my finished backpack!

Again, stay tuned for my next post on another Monogram Wizard Plus trick.

Followup to my last post on MWP ~ here is a link to the Facebook Page – click HERE. As far as the Yahoo Group I mentioned… I am not a member of it. I just heard about it on the Facebook page. Evidently it’s a private closed group and they are currently not accepting new members! Check out the Facebook page! So far I’ve seen a few great tips on there!

We are celebrating 3 years of Applique Cafe, so all designs are 1/2 off through next Wednesday, August 15th!


Monogram Wizard Plus

mwp

Happy-less-than-2-weeks-til-school-starts! 2 weeks from yesterday we’ll be up again by 6:30 and on the interstate by 7:15! I have to say I really enjoy the laziness of summer. I LOVE to sleep in! Today when I got up I found Mallory eating a wonderful breakfast she had prepared all by her 4 year old self (yogurt and “granilla” as she calls it). I must admit…yesterday there was a small teeny tiny part of me that was ready for school to start back. I will retract that statement come August 16th and it was just a fleeting thought as my kids were bugging about going outside in the 95 degree heat or doing something for the 28th time. I unpacked the school uniforms a little while ago to see what of Browder’s might fit G-man for Kindergarten. I can’t believe I will have 2 in “real school”!!! SCHOOL!!!!

Monogram Wizard Plus ~ you all probably know I have it, love it, encourage it, etc. When I bought my machine back in 2007, I quickly learned that the 5 fonts that come on your standard embroidery machine are simply not enough. I chose Monogram Wizard Plus and have never looked back! It comes with like 55 or more fonts and I purchased several of the extra Alpha Paks along the way. Now they have the online store where you can purchase and download fonts to use in MWP instantly (they also have sales so don’t let the prices scare you). There are LOTS of programs out there. I’m not saying MWP is the only way to go. All I can say is that I love it and I suggest you take advantage of the trial offer if you are considering it, THEN you can decide! Check out Needleheads for any and all MWP info. p.s. Master Circle is a must have MWP font!

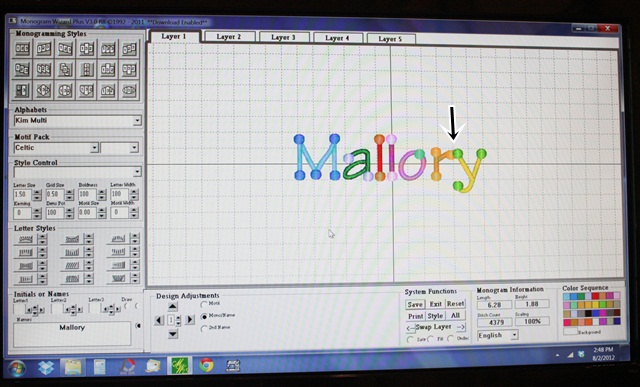
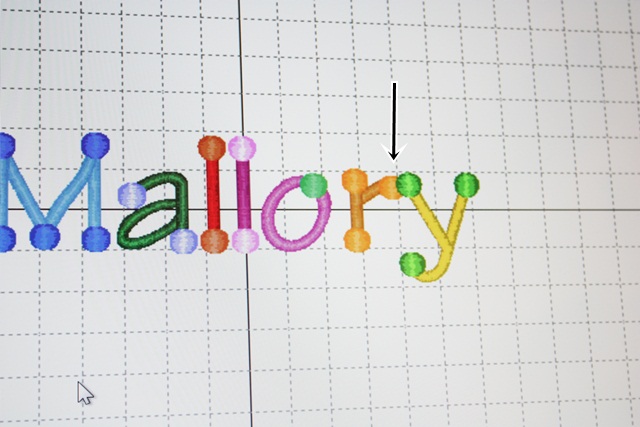
Now….. I’m in several “groups” on Facebook and one is for MWP users. One of the members of the group shared the neatest trick so I had to pass the tip along! If you have MWP, then you may have experienced this with certain names/letters/fonts. You type your name in, and say the first letter is 1″ from the rest of the name (like M  allory). Or, as you can see below, for some reason the “r” and “y” overlap for no apparent reason. There is a trick!!!!!! I used to try to break the name in to layers so that I could control how it all lines up, but not anymore!!

 ?? Not sure what makes this happen??

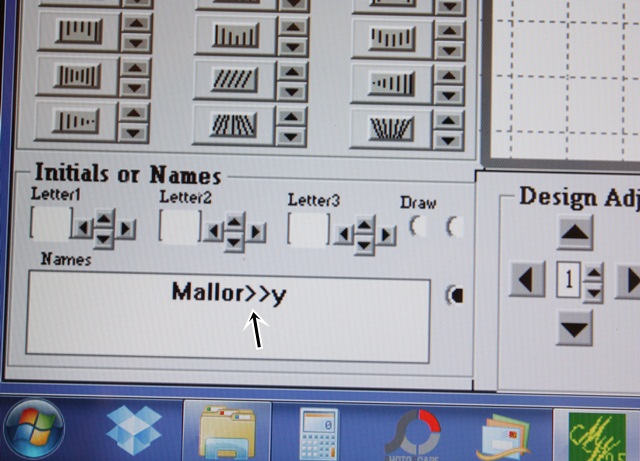
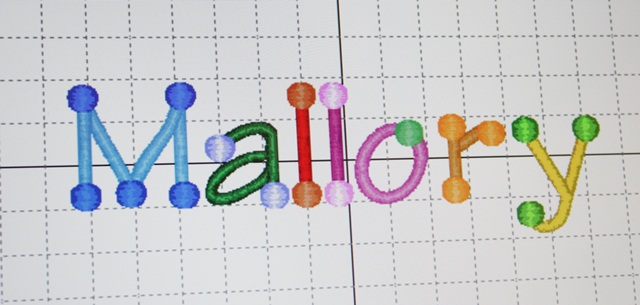
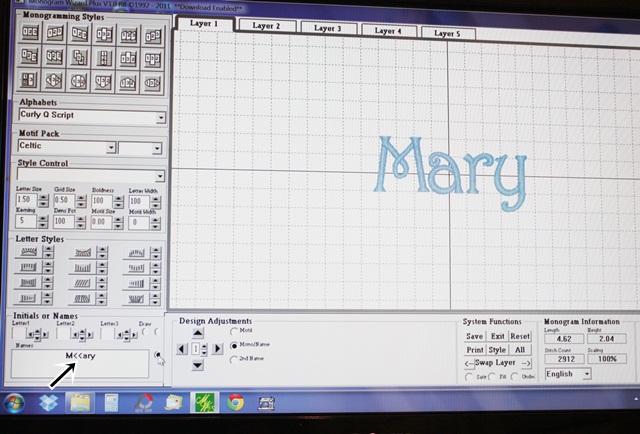
 You can use the Kerning feature to move ALL of the letters closer together or farther apart from one another. BUT, if it’s just 2 letters that aren’t coming out right or if your first letter (of the name) is too far from the rest of the name, then simply type in “>”, “>>”, “>>>” (however many you need ~ play around w/ it) or “<“, “<<“, “<<<” etc. and then “draw” the name again. So I entered in a couple of “>>” (right above your right ALT key) in my name between the r and y.

As you can see it spaced the r and y correctly!

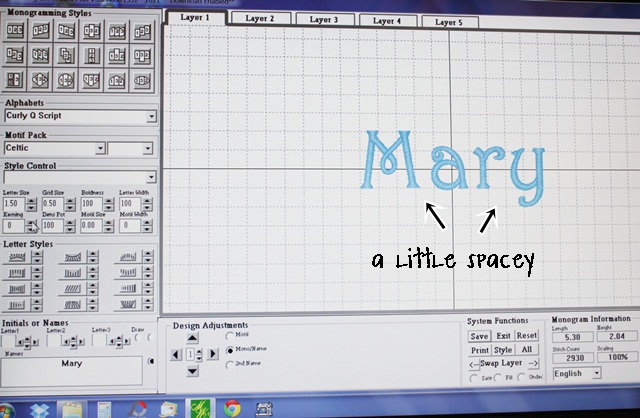
 I tried to find a better example of how sometimes, for example, the M in Mary is spaced too much away from the “ary” (M  ary). I couldn’t find an example of course. This is regular “Mary” ~ Letter Size 1.50″ – everything is default and normal. It’s a little spacey, so in this case I changed my Kerning to move ALL of the letters closer together.

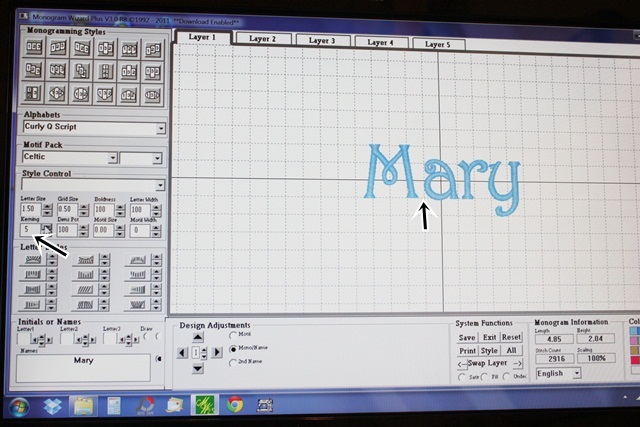
 This is after setting my Kerning to 5.  (Kerning is the process of adjusting the spacing between characters in a font. Kerning adjusts the space between individual letters.) As you can see all of the letters are closer together. I can also move the M a little closer to the ary with my “<<” trick.

 As you can see below it is spaced just about right. I could have increased my Kerning another point or two, but most likely the a, r and y would be overlapping or too close together. So, using the < trick worked in this case.

 I hope this makes sense!! It’s a great trick for names. As far as initials, you can move them around with the arrows beside each letter (on top of where I entered my name) (see Letter1, Letter2, Letter3 for initials – to the right of each are arrows to adjust your initials as needed).

Again, if you are interested in Monogram Wizard Plus, download the 30 day trial and try it out. Also, check out FAQ on their website and do your research. There are also groups on Yahoo and Facebook.

Thank you again to AWB for posting this tip on the Facebook Group!