Crab Legs

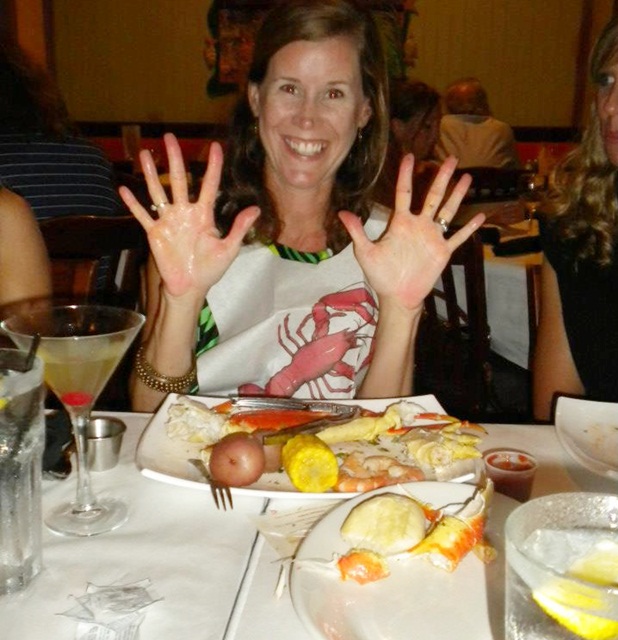
Happy Tuesday! I’m feeling much less stressed since my last post. I was able to leave town Friday morning and head south for a party-of-8 weekend beach trip with my bunko gals. I have been playing bunko with a group of girls for the past 14 or so years. A lot of girls have come and gone, but there’s a core group of us who have gotten married together and had kids, all while meeting once a month to roll some dice! We went to Destin this year and had a great time and the weather was outstanding! Saturday night I decided to order “Shrimp & Crab Legs” because it sounded good and I didn’t want fried shrimp and french fries. Oh my! When they brought out the bib I realized I might be in trouble. I did wear the bib (since I burned a hole in my dress earlier that night with an iron and wore it anyway) and my poor friends sitting next to me needed bibs too! I did have to pick crab meat out of Amy’s hair at one point. Anyway it was really yummy even though I had no idea what I was doing. A trip to the bathroom afterwards was in order (to wash hands)… BTW we ate at Poppy’s in Baytowne Wharf. This photo doesn’t show the plate of crab legs 5″ high when they brought it out to me.


 We came back Sunday afternoon and that’s when I kicked in to high gear and cleaned/organized/did laundry so that I could start the week Monday without a mess. To me, having a clean house and being organized means less stress. I’m trying to work on a “schedule” so I can work 2-3 days a week, still get my errands done and not have my head spin every afternoon after school. It’s a work in progress! I’ve been doing this since 2007 and still haven’t figured it out… I’m making lists and just trying to get everything done! I won’t mention that the sink is full of dishes and the counter is full of the days errands….

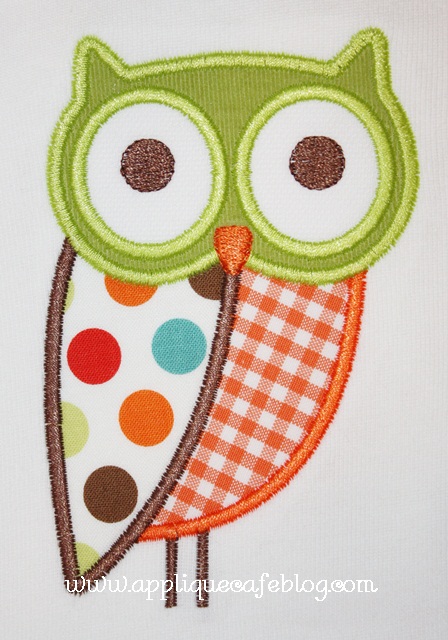
Here are some AC designs I did last week on onesies that were sent to me by a customer. This is our Owl 2 design which I love! I love all owls! The dot is a Riley Blake fabric (Multi Good Dots – great colors) and the gingham is Fabric Finders (1/8″ I think). The cord is just a good celery “baby whale” cord (I think??).

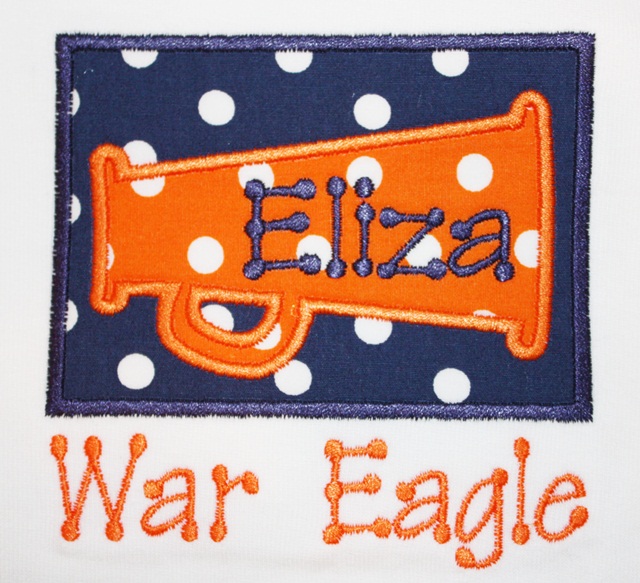
This is where Sew What Pro comes in handy! This is the patch from the Football Patch design and the megaphone from the Megaphone Square Patch design. These are both Robert Kaufman dot fabrics I’ve had forever (and use a ton). Font – Monogram Wizard Plus “Kim Single”.

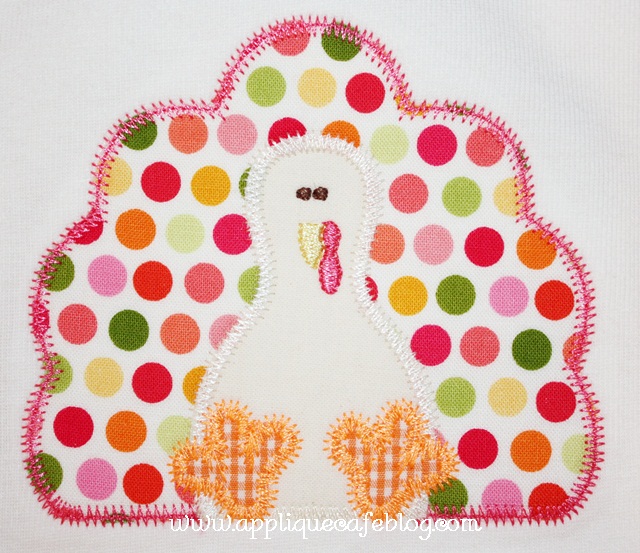
 Here’s the Zig Zag Turkey design. I’m not sure what this fabric is? I want to say Riley Blake but I might be wrong! Zig Zag designs are super easy and a little faster than satin. I recommend you use Heat N Bond Lite when doing ZZ designs so your fabric doesn’t fray.

 I get told a lot “I’m new to embroidery/I just got my machine/What do I do?/Where do I start?” While I would love to take time to walk each and every newbie through the process on 28 different machines, it’s just not possible. The best thing I can tell someone who is new to this is a) there is a thread chart in each zip file that shows you each step in the design. It’s that simple. b) put a super simple 1 fabric design on your machine (there are several in our Design on a Dime category), hoop a scrap piece of fabric or some cutaway stabilizer and just try it out. You’ll be amazed at how fast it will *click* in your brain and all make sense! If you mess up, I’d be willing to bet you will learn from it. Get another scrap or piece of stabilizer and try it again! c) read my blog, specifically Helpful Posts. When I started out, I had my machine and it’s manual. There were no blogs and I didn’t have anyone to email or call for help. I bought a font applique alphabet, put a letter on my machine and figured it out! I promise it will click in your head. Just remember that for each fabric there are 3 steps:

marking (shows you where the fabric should go)

tackdown (tacks that fabric down, then you trim)

satin (finishing stitch around the fabric – could be satin, zig zag, etc)

So 3 steps for each fabric in the design. Then factor in eyes, mouth, feet, etc. that might be just thread! Some designs sew marking, tackdown, satin all in that order for each fabric. Some sew marking and tackdown for all fabrics, then satin for all at the end. Both ways can be right so just look at the thread chart and figure it out! OR, try Sew What Pro. I pull up each and every design in SWP so that I can *SEE* it. I can click on each step to see what’s next! Check out Helpful Posts for some posts on SWP and what the screen looks like.

Have a great week!
Monogram Wizard Plus and Sew What Pro

mwp

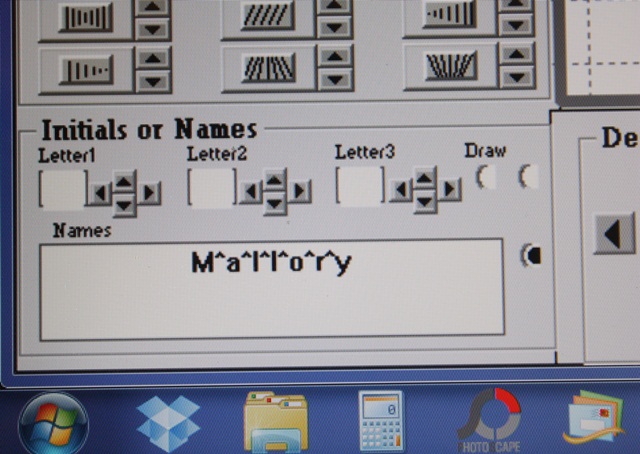
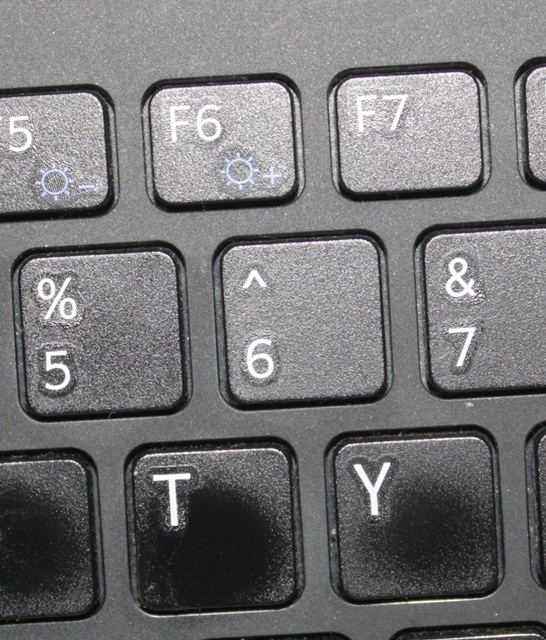
As promised, I have another trick I learned on the Monogram Wizard Plus Facebook Page. This is great in 2 instances that I can think of off the top of my head. 1) You’re doing a name in Monogram Wizard Plus and you or your customer wants each letter a different color thread. You can do one of a few things ~ if it’s a name with 5 letters or less, you can do it in layers in MWP. You could also manually stop your machine as it’s sewing in between each letter and change your thread color (if you are using a single needle machine). OR….. here is a neat trick! Between each letter, type in the “^” symbol, which is located on your 6 key. Another instance where this comes in handy is 2) You’re using “Specs” font (MWP) and if you have Specs, you know it is spaced all crazy so your name may or may not line up the way you want it too. I LOVE Specs and it’s great for monograms (3 letter monograms). Names are another story. Anyway, you can use this trick to rearrange the letters IF you have Sew What Pro or other editing software. First you will save it this way (there are more pictures below) and then you would bring it up in SWP to edit. 

 Here is the key!

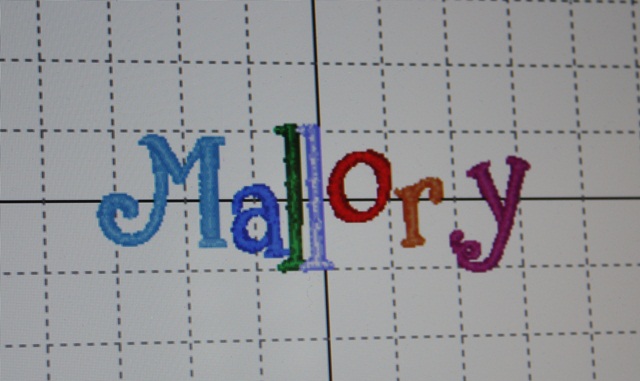
 Here is my name with the ^’s in between each letter and this is Specs font. As you can see it’s all crazy! But, when you put the ^ in between each letter, it makes each letter a different thread color. Normally in MWP your name or initials are all the same color UNLESS you layer. So I’m going to save this on my computer in a folder where I can find it in a minute to edit in SWP.

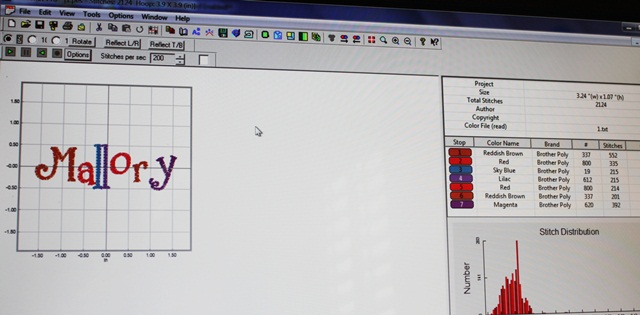
 Here it is in Sew What Pro. If you look at the thread chart on the right you can see all 7 letters are a different color and a different step. If you click on each thread color, you can then move the letter around. It’s a little tricky since when you select a letter it only shows you that letter to move, but I was able to line the letters all up on the middle line pretty easily. There may be another way to do this, but I’m not sure what it is. If you know, comment and let us all know!

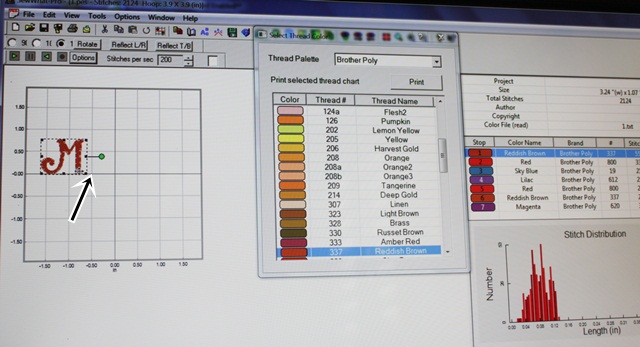
 As you can see here I clicked on thread color 1 on the thread chart which shows me my “M”. If you click on the name on the left part of your screen, it will select the whole name, so you have to click on each thread color to select each letter. What I did was line up the M on the middle horizontal line on my grid. I then clicked on step 2, the “a”, and lined it up on the middle line next to the M, then 3, 4, 5 and so on until all the letters were sitting on the line. I did have to go back and adjust them a little to the left and right, but it didn’t take me long at all.

 Here is the name after I’m done and I’ve clicked the “CENTER” button to center the name in my hoop. I will then save the name to my machine and it’s ready to sew. Again, since each letter is a different color it’ll stop in between each letter if you want to sew the name with different color threads. If you don’t, you can change each letter to the same thread color and JOIN THREADS to have the name sew all the same color. Or, you could just keep sewing after each stop using the same color thread. I did not take pictures of the joining threads part but will try to do so later. I didn’t want to get too confusing!

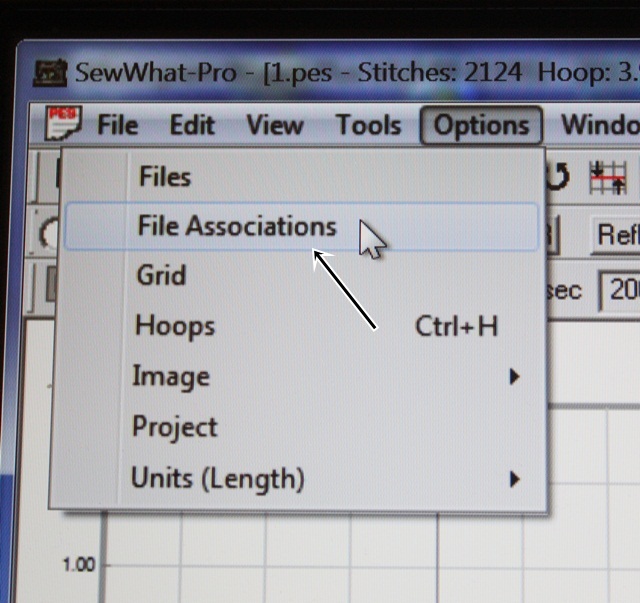
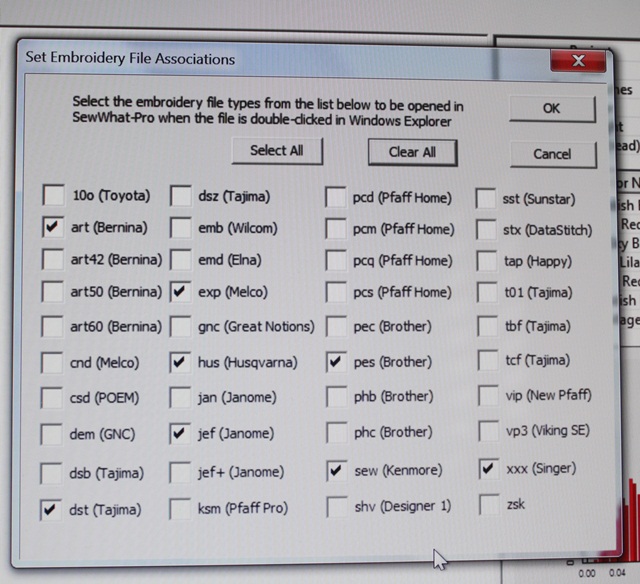
 I also found a couple of neat features in Sew What Pro that I don’t really use but I thought I’d share. If you click Options, then File Associations, you can select all the different type of embroidery files you might open on your computer. That will allow you to double click on those embroidery files and Sew What Pro will automatically open them. Otherwise, your computer might ask you what to use to open the file.

 I clicked most of the embroidery file types we offer, so now I can open any of those files in SWP automatically! I like to SEE what I’m working on, so I use SWP whether I am merging or editing or not. My machine uses PES and DST, but we often have to look at other file types so this is great! It’s also a great little cheat sheet as to what formats the different brands of machines use!

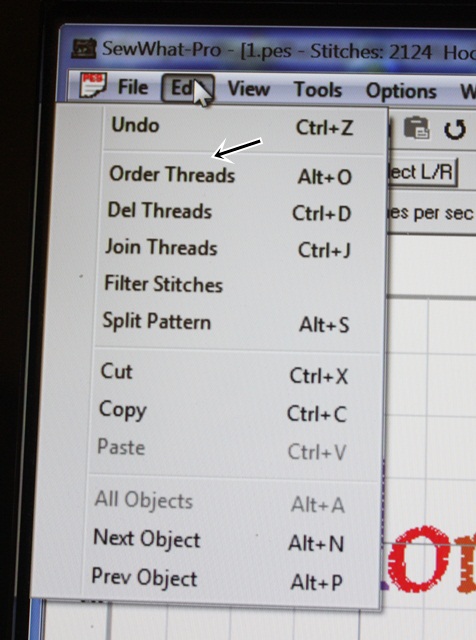
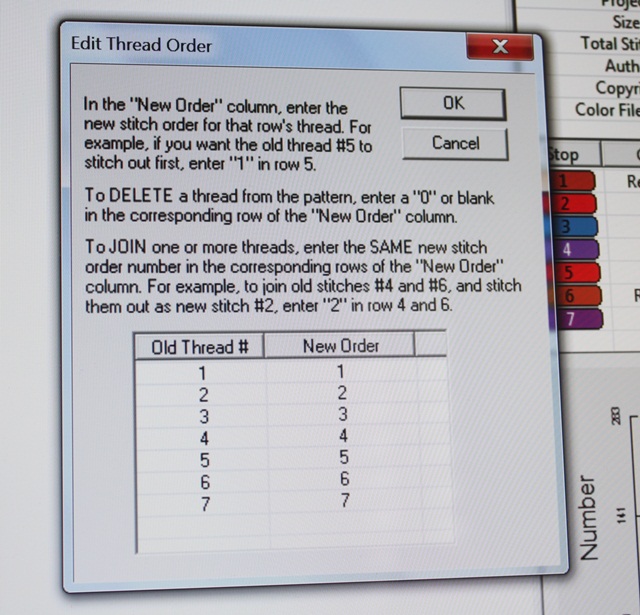
 Another feature I have never used is Edit, Order Threads. (And you can see Join Threads down below that). You can switch around the order of whatever you are sewing with this feature. I would be careful in doing this, but it may be you have a design with a name and maybe you want to sew the name (underneath?) first and maybe the way you saved it it was at the end.

 Again, I’ve never used this feature but it might come in handy one day! We like to order our designs in a logical order, but sometimes on single needle machines you can switch the steps around to make sewing it easier if you are using the same thread colors. Again, I’d be careful with this since most designs are ordered in a logical manner!

I get emails a lot asking “how do you do this?” in MWP and SWP. My suggestions is to open them up and just play around! When I started there was no Facebook Group (or Facebook for that matter) so I learned through the manuals and just experimenting and TRIAL AND ERROR! See Helpful Posts for more posts on MWP and SWP.

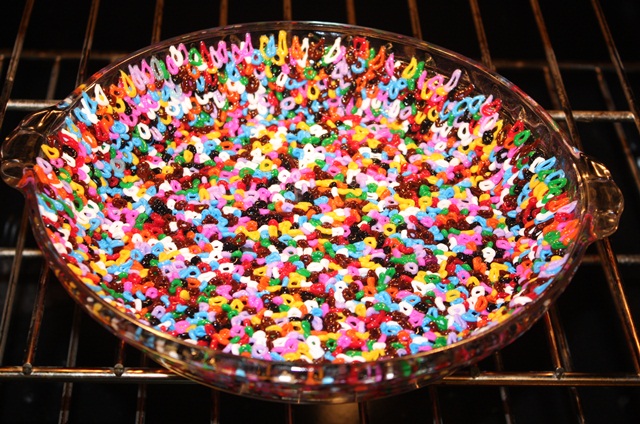
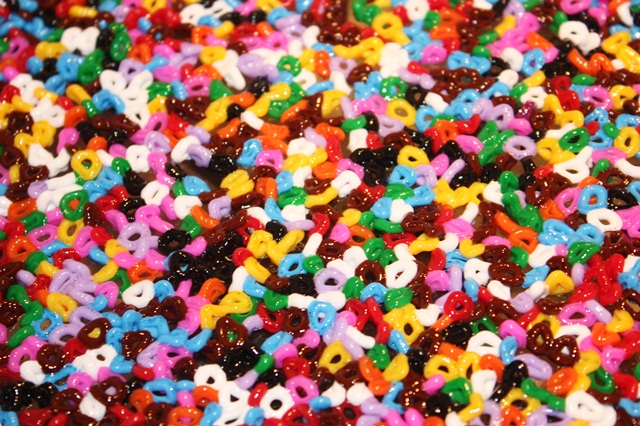
 Now on to the craft section of my post thank-you-Pinterest! My kids have a vat of Perler Beads I got at Ikea. We usually keep them hidden because they get them all over the floor and Jeff gets all crazy. I saw this on Pinterest last night so we had to try it out! This is an oven proof Pyrex pie dish. First I sprayed it with Pam (oil would work) and then wiped most of it off with a paper towel. We then layered the Perler beads on the bottom and on the sides in the best single layer we could come up with. They actually stacked on the sides pretty well thanks to the light grease! We put it in the oven at 350 degrees first for 10 minutes, then another 5 minutes. This is what it looked like after it cooked.Pretty cool!


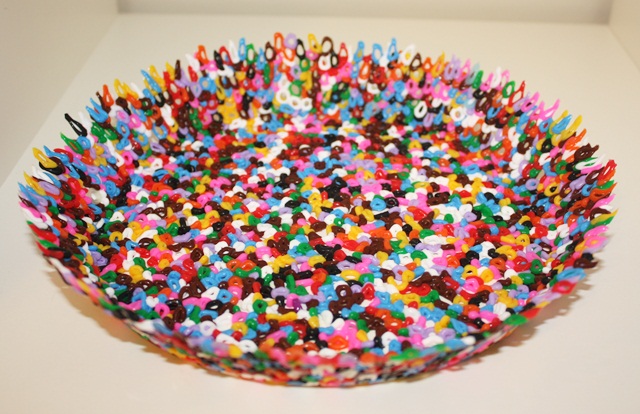
 I then took it out of the oven and let it cool. I’d say 10-20 minutes. On this first one we put it in the freezer for 5 minutes or so and then the “bowl” came right out of the dish. We did 2 more later and skipped the freezer step and they came right out.

Pretty neat! I’ve also seen metal cookie cutters (put the beads inside and cook) and muffin tins. I’m sure we’ll be doing this again with every oven safe dish we can find!!

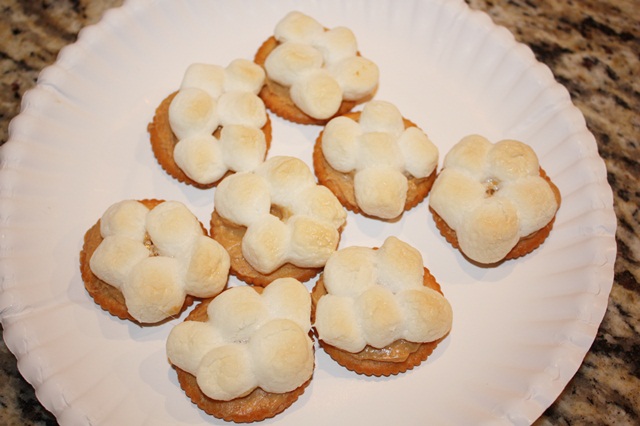
 Now on to a snack my grandmother used to make when I was little. It came to mind this week so I made some last night. You might think this looks funny but I promise it’s good! These are Ritz crackers with peanut butter (thin layer) and mini marshmallows on top.

I bake/toast them in the toaster oven until the marshmallows begin to brown.

Let them cool and then eat up!! Try them! They are really good!! I will always remember my grandmother when I make these!

The sale continues at Applique Cafe, and we’ll be listing 6 new designs probably in the morning!