EAC 2012

OK friends, here is my post-Everything Applique Conference blog post! For those of you who have no idea what I’m talking about, a (1st ever) Everything Applique Conference was held this weekend in Birmingham, AL (at the BJCC). 7 digitizer applique website owners like myself assisted 1 digitizer/website owner (Kathy [and her hubs Jeffrey] the host and brain child of this event) in planning the event and we were all “presenters” and were able to teach the classes.

I first want to say how overwhelmed I was at the amount of people I met at the conference who said they read my blog, had been following for years, asked about my kitchen, etc. Honestly there are times where I wonder if anyone is reading, or if I am just blabbering my heart out to my 3 friends and long lost cousin. So, I left the conference this weekend re-energized about blogging and I promise to do a better job at it from now on. I think I am still on a Conference high. It was so exciting and fun and I told someone at church yesterday it felt like an out-of-body experience. Did I mention there were over 700 women (and a few men) there?

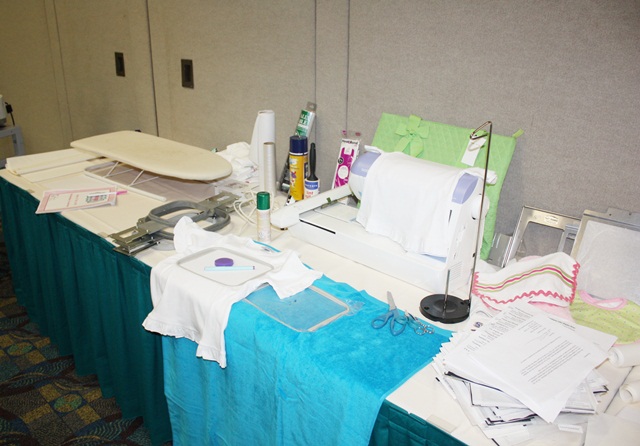
Friday night a couple of hundred women came for a “Meet & Greet”, which was a lot of fun and I think it ‘broke the ice’ and calmed our nerves a little! Each of us had a table for our door prizes and samples. (sorry some of these photos aren’t fabulous – some were taken from my phone). Here is my table, and next year I hope it’ll be a little snazzier! This was kind of a last minute “bring some samples” thrown-together kind of thing.

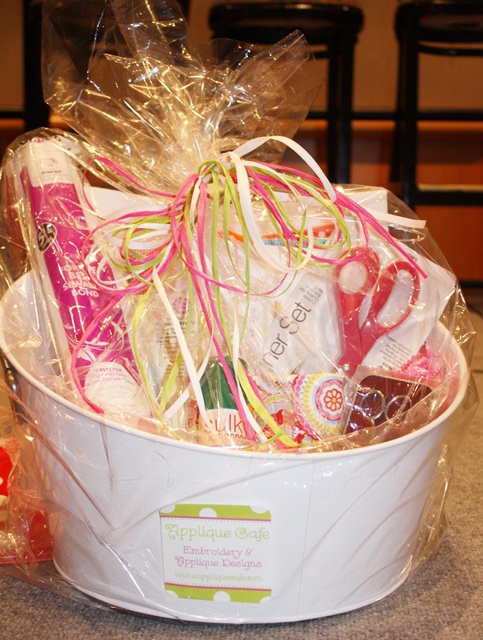
Each digitizer did a basket of “favorite things” as well as other various door prizes (gift certificates, fabric, thread, etc.)

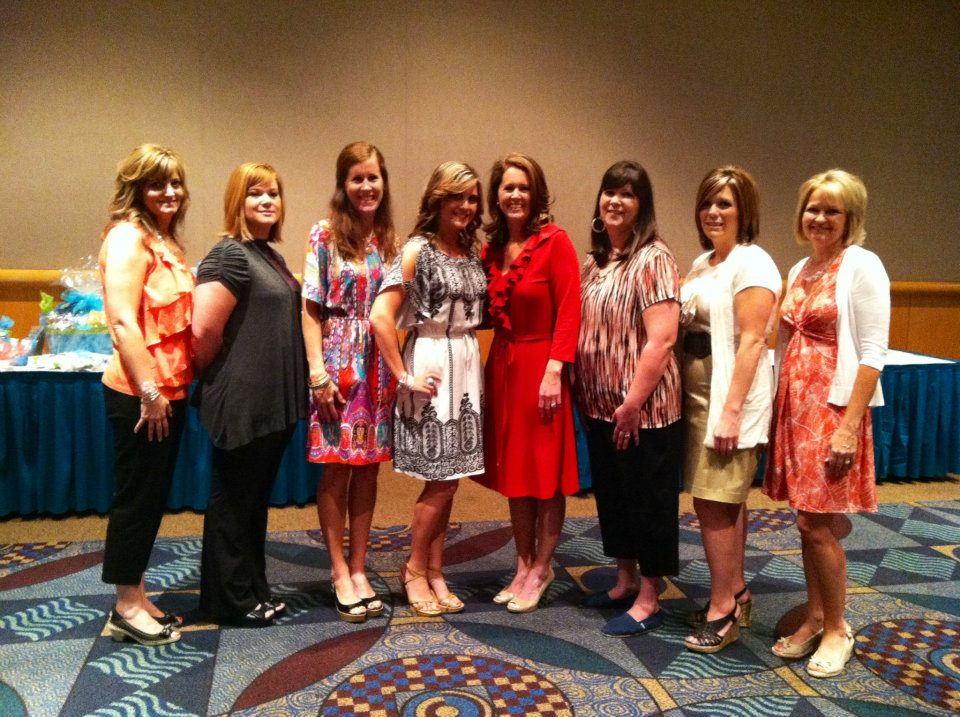
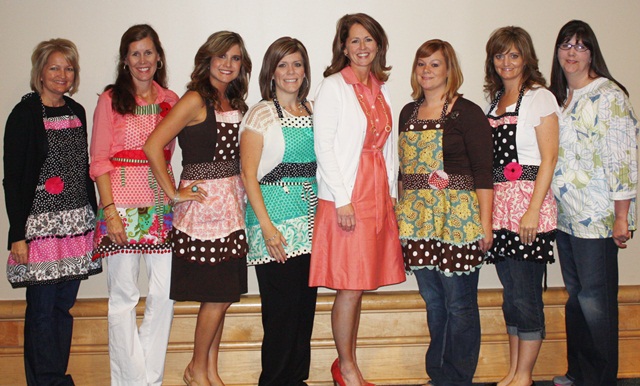
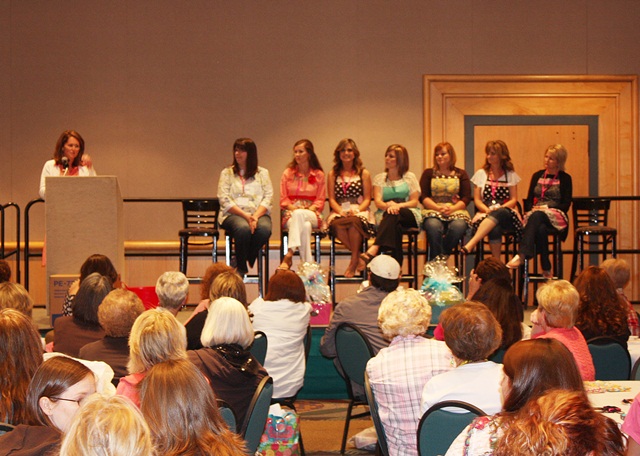
Here we are on Friday night ~ L to R: Cristy from Itch 2 Stitch, Brandy from Applique Momma, ME from Applique Cafe, Emily from Applique Alley, Kathy from Applique Corner (she is the one who put this whole shindig together), Holly from Applique Junkie, Rachel from Embroidery Boutique and Karen from Applique Market. We are all competitors, and after talking on Facebook, email, messaging 24/7 for 2 weeks straight, we all met for the first time this weekend. It was SO MUCH FUN! A few of these ladies I have “known” for a long long time, and it was so much fun to hang out w/ them!

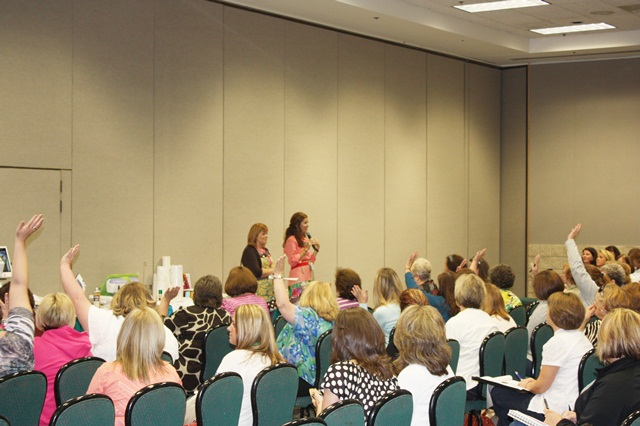
 I, along with Brandy from Applique Momma, taught 4 classes on “Applique the Right Way” and I just hope what we said and did made sense! Our first class was a group of advanced women (hello nervousness), but overall I think they walked away maybe learning SOMETHING?? Some weren’t familiar with Heat N Bond Lite and they were great to ask and answer questions, so it was a great 1st class. After advanced we had 2 packed-out classes of Intermediate folks (200+ people), followed by our last class of beginners.

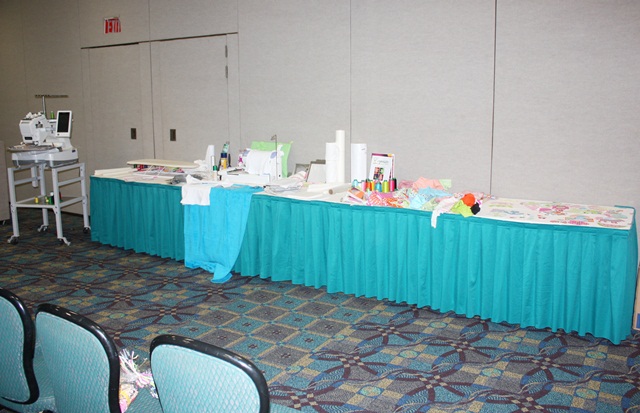
Here is our class presentation table!

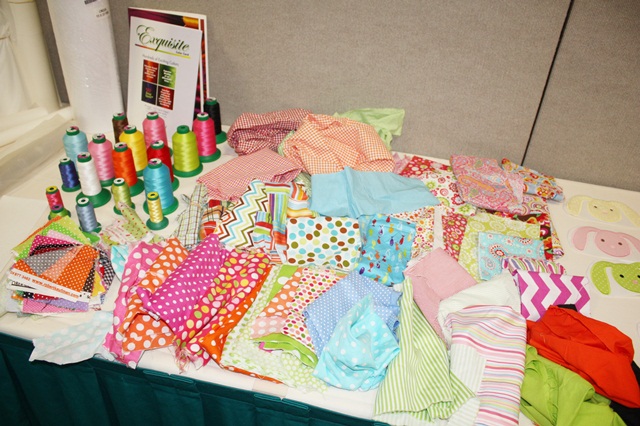
We discussed designs (satin, zig zag, raggy, etc). I am excited to report that I took all of those cut out samples of our AC test designs and USED THEM!!!! We were able to pass them around the room for each class so everyone could see the different types of designs (satin, raggy, zig zag, mini). We also discussed fabric, thread, stabilizer, scissors, and Brandy demonstrated the applique process on a shirt for each class. She did a great job!

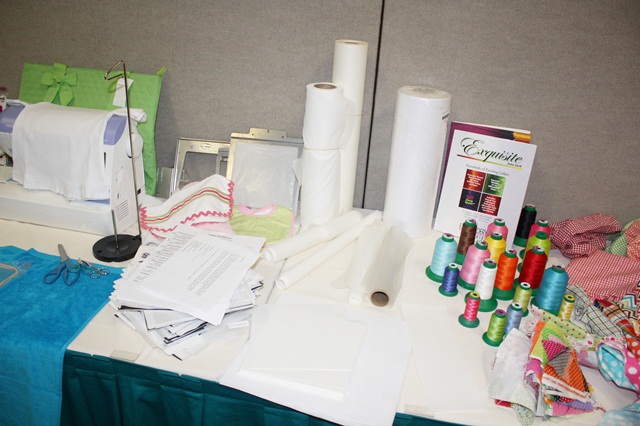
 We discussed all the different types of stabilizer, most of which came from Sewingmachine.com. They were vendors at the conference and I think they were a big hit ~ most of the people in our classes were shocked when I told them the large roll of medium cutaway stabilizer (on the right by the Exquisite thread chart) costs $12.99! Look for their commercial backing on their website, and I recommend the 2.2 oz! We also discussed thread, and as you can see I use both Exquisite (Ken’s Sewing Center) and Isacord (Sewingmachine.com). I love them both! Exquisite has some colors that Isacord doesn’t have, and vice versa, so I use both.

We had a Brother PE770 machine in the room as well as a PR650 6-needle. The PE is a great starter machine!

Here’s another shot of my “favorite things” door prize! After the conference I met the sweet girl (for the 2nd time) who won my basket. First of all, when they called out a ticket number for my basket, no one stood up. I wish I could remember her name, but the girl who eventually won told me she prayed “Lord, please let me win!!!”. Her number was THEN CALLED!!!!!!! How fun!!!! She then told me that she rode to the Conference on a TRAIN all the way from New Orleans! How AWESOME is that!?!?!??!! Had I known she would have gotten a prize for mode of transportation, for sure!! It was fun to talk to her and I hope she will message me! I met so many women that I’ve “known” from Facebook! I met one lady who I’ve ‘known’ for years, and it didn’t hit me until my ride home who she was. We also signed a couple of autographs (ba haaaaaa haaa) which was fun!!

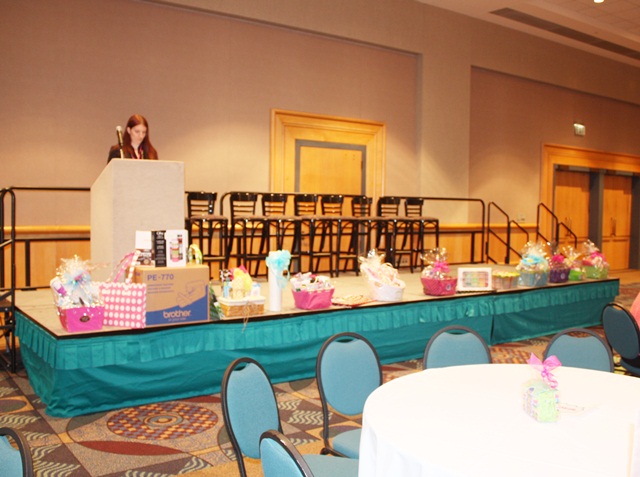
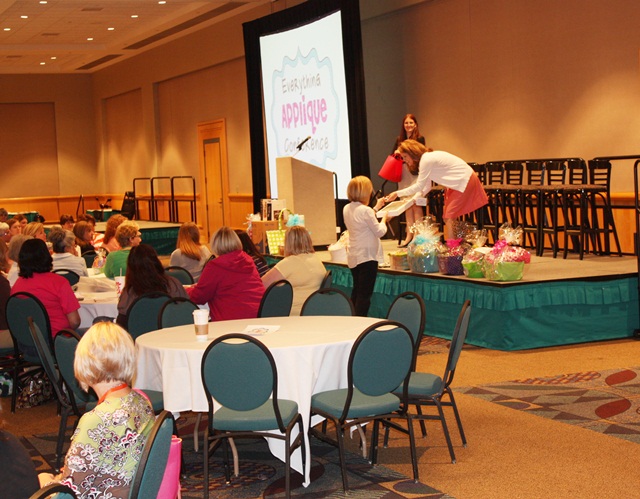
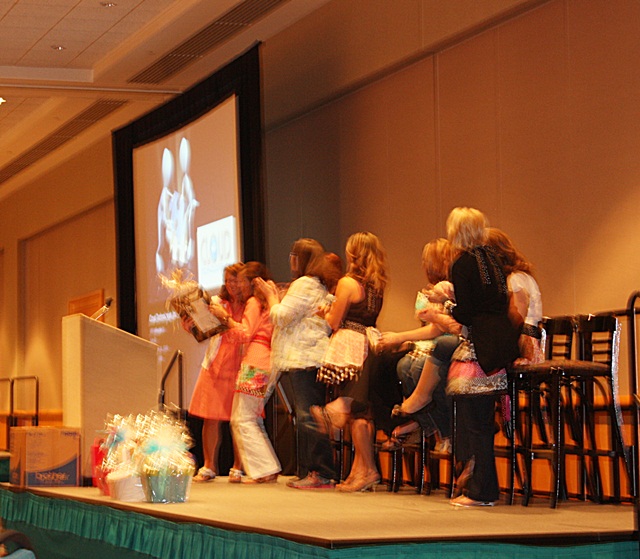
Here is picture of the stage and our master conference planner, Koral! She kept us in line and on our toes all weekend! The items on stage were just a portion of the many door prizes that were given away (including a PE770 machine!!!!!)


Here is an attendee winning the thread collection from Ken’s Sewing Center!

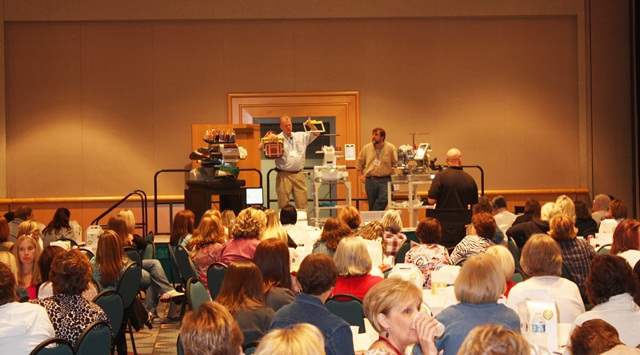
Here is Steve from Sewingmachine.com – he demonstrated some great machines and hoop options during lunch! Even the table of digitizers were in awe as he demonstrated the Mighty Hoop!

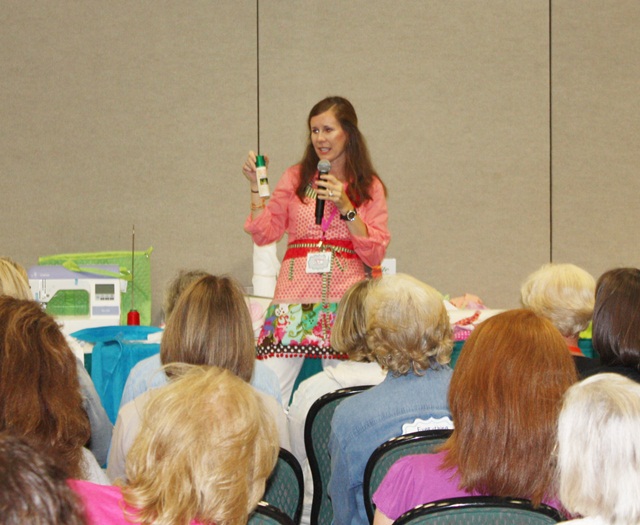
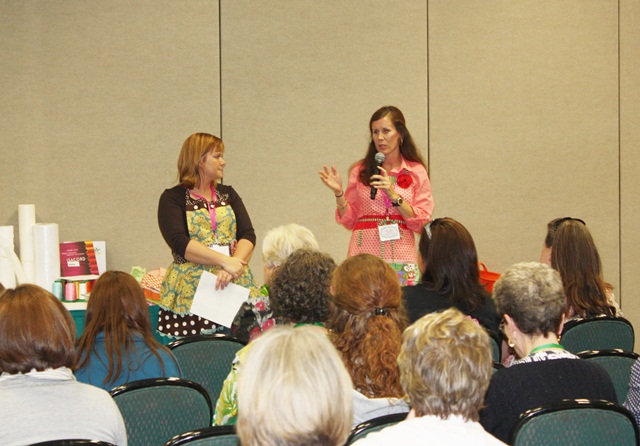
The only thing about the conference that I would change is that I would have LOVED to sit in on the other classes! I’ve heard such great reviews on the Photography and Marketing class! We all know I could use some help on photography!!  Here are some pics from our class (Applique the Right Way). First of all, please notice I am holding a m-i-c-r-o-p-h-o-n-e. Those of you who know me know that I am relatively quiet and this is so out of character for me. But, we were forced to use it by the first class. We taught 4 classes total ~ the intermediate classes were over 200 folks each. Here I am discussing spray adhesive.

Brandy is demonstrating sewing a shirt on a PR-650. Notice how a lot of people are taking notes (or writing down out their grocery list for next week).

Lots of people asked lots of great questions, thank goodness!


Here are the digitizers again. Our aprons are from 4Retro Sisters on Etsy! Aren’t they cute??

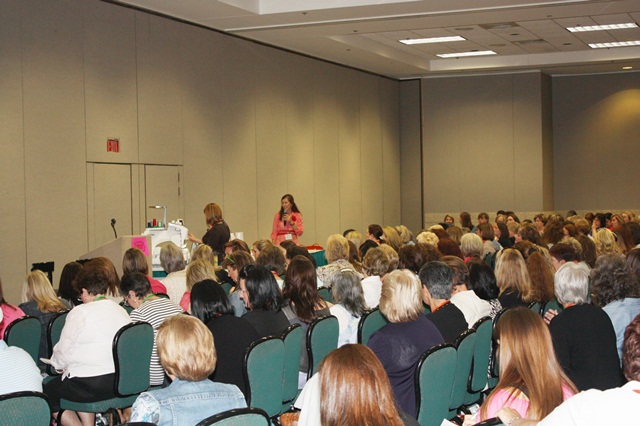
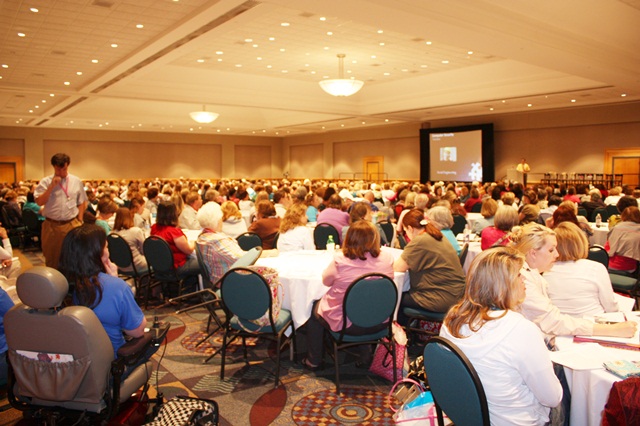
This is the view from the back of the room where we all met. That’s Jeff walking on the left. It was an amazing turnout!

At the end we all got up on stage for a Panel Q & A!

This photo is blurry, but we presented Kathy with a beautiful framed painting from Donnie Sasser. Kathy and her husband were FABULOUS to work with and we were all so honored to be able to help with this event!!

 It sounds like Kathy is already planning for next year! She is considering making it a 2 day conference which would give more time for classes and vendor shopping. This year was wonderful (and the planning was done in a matter of 2 to 3 months). I can’t imagine how awesome it’ll be when she has a whole year to plan! Lastly here is a picture of Jeff and Jim. Jim is Karen from Applique Market’s hubby and he & Jeff hung out all weekend and had a great time. They were put to work during lunch!

Sewing Room Update # 879

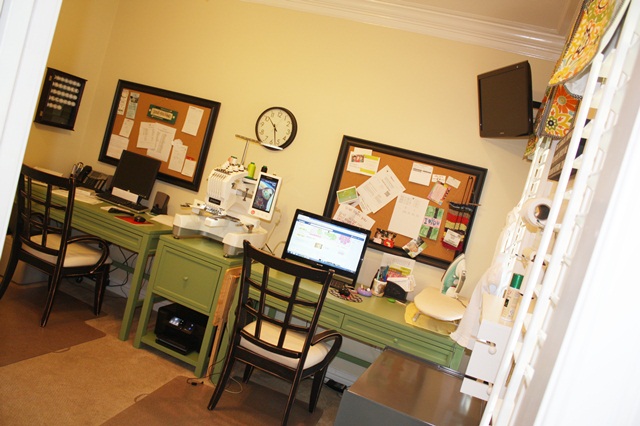
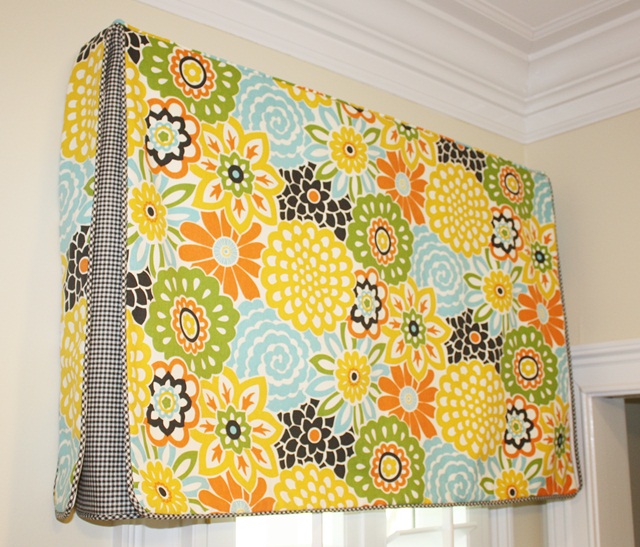
I hope everyone had a good Easter! It was such a beautiful weekend here in Montgomery! On Friday I got my valances back that I had made for our office/sewing room. YAY!! Since we hosted the family Easter lunch and egg hunt yesterday (32 folks), I was so glad they were ready in time and we hung them Saturday afternoon. These pictures are not great. While our office/sewing room has these 2 windows (see below), I can’t take a decent picture in here for the life of me. Outside of these windows is our (covered) front porch, so I don’t get great sunlight (and I am not a professional photographer!!) Trust me – it looks a TON better than white walls and no window treatments! I love the new wall color and the bright valances tie in the green desks. And you’ll see below, the black gingham-ish trim and pleats tie in all the black (chairs, bulletin boards, etc). This is Jeff’s office too, hence the TV mounted on the wall obstructing partial view of my pretty valances. 😉

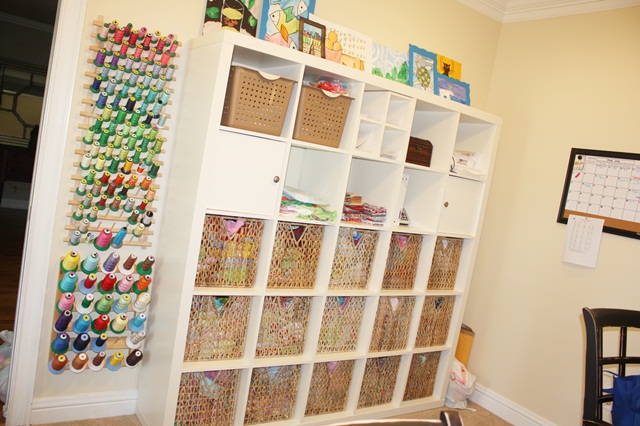
 I still have my thread stands and Expedit cubbies. Those are several of Browder’s paintings and such from his art classes on top. 2 calendars on the other wall – we keep 2 months pretty full. Side note: I recently asked Steve (Sewingmachine.com) about my thread and the threat of dust. He told me that dust CAN accumulate on your thread if it’s stored out in the open. Such dust CAN get in to your machine too. But, if your thread is not directly under an air vent you should be fine. He saw my set-up and seemed to think mine was OK. I have started dusting mine off before I use it just in case. If you are like me and use your thread daily, it’s not reasonable to keep it stored covered up somewhere. If you store your thread on stands like me, just check to be sure it’s not directly under an air vent. If you see dust on the thread or the spool, wipe it off before using it!

Same setup w/ desks and machine. I had several people suggest me moving things around, but the way it is now I can sit at my desk and everything is within reach (except for fabric and thread). I have my iron, machine, hoops, etc. all within reach, so this is the best possible setup of our furniture. I do share this space w/ Jeff, so it’s not like I can completely take over! 😉

Closeup of the valances. This is Waverly Modern Essentials from Joann.com. The black gingham I got at King Cotton here in town. I love the colors!

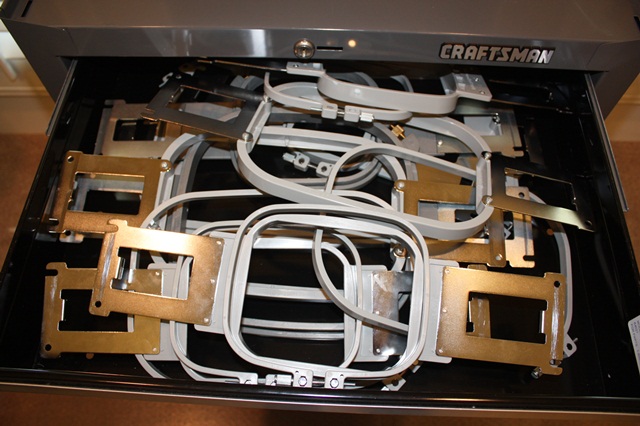
 I have posted before that my machine used to be on a Craftsman tool chest from Sears. My machine is now on a file cabinet “desk” from Home Decorators, but I still use (and love) my tool chest. It’s where I store all of my hoops, stabilizers and “junk”. The top is a GREAT surface for hooping as well! I would recommend either of these pieces as a machine stand. Both are sturdy and I have never had my machine vibrate or move AT ALL. p.s. The “real” machine stands are great too!

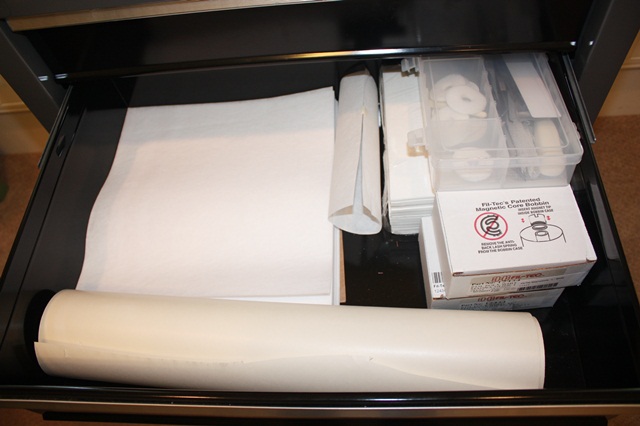
 Precut 12″ squares from sewingmachine.com on the left, 8″ squares on the right under my machine toolbox. Fil-Tec Magna bobbins and my big roll of sticky stabilizer. All of this is from www.sewingmachine.com! The other 2 drawers were too messy to show you! 🙂

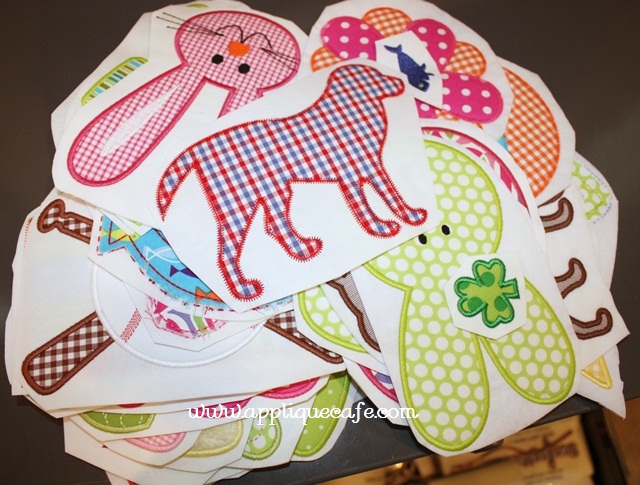
And… I posted a while back about throwing away my samples. Several of you got on to me 😉 for throwing them away, so since then I’ve kept them. They are done usually on stabilizer if I don’t have a t-shirt to do them on. OK folks… here is my pile of samples. What am I supposed to do with them? Any ideas??

Reminder: Our current 35% off sale at www.appliquecafe.com ends this Wednesday, April 11th! We are also gearing up for the upcoming Everything Applique Conference in Birmingham, AL on April 28th! There is still time to register ~ the deadline is Monday, April 16th at midnight. Check out the EAC link to register or for more info! As of right now there are over 600 folks signed up to attend! I’m really looking forward to a fun time and getting to meet so many people I *know* on Facebook and through my blog. SIGN UP!!
Brother PR650 II

Here is my first followup to my PR650 post. I did Applique Cafe samples Wednesday and took like 50+ pictures doing a 5 step logo and 2 simple applique designs. I’ll try to work on the applique post over the weekend and will also do one on the logo since it is a non-stopping embroidery design. I planned to do it yesterday but had carpool at 7:30, got my niece at 7:35, carpool again at 9:00, then recess duty (with Mallory and said niece) from 10-10:30, lunch and “killing-time” with those 2 til 12:30, carpool again, drop 2 friends’ kids off, carpool again to get G and his friend, then for the remainder of the afternoon I had 6 or so kids running around. Needless to say I needed almost had a glass of wine before Browder’s program at (church) school last night.

Here is a super fast post on changing thread colors on your PR650. If you have one, certainly you know this! But, if you don’t, you may wonder how long it will take you to change thread colors on this machine with all the guides and knobs all over the place. Here is a pic from my other post showing you the setup of the machine. There are lots of holes and guides to stick the thread through, but don’t fret… there is a shortcut to changing your thread colors.

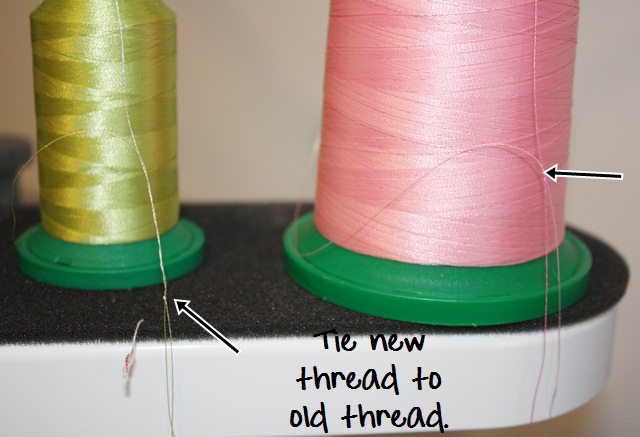
 When you take the “old” thread off that you no longer wish to use, tear it (or cut it) right where it hits the spool. Next, put your “new” thread spool on the machine that you wish to use for your next project. Tie the old thread to the new. A simple knot will do!

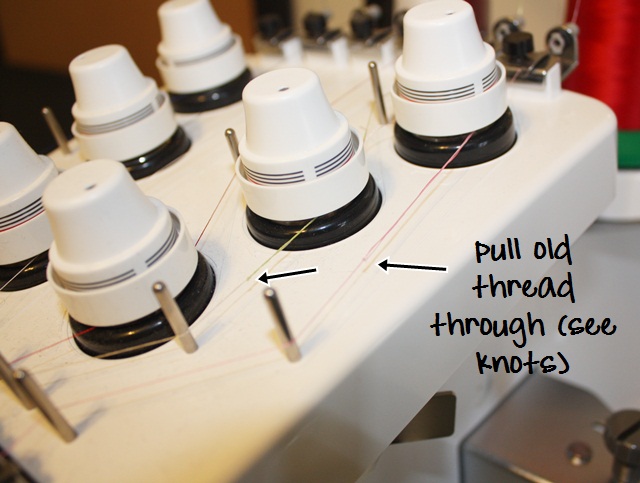
 Now you just un-thread those needles (the ones you are changing thread colors on) and pull the old thread (from way down by the needle). Pulling the old thread will also pull and guide the new thread through all of the holes, around the tension knobs and guides, etc. since they are tied together.

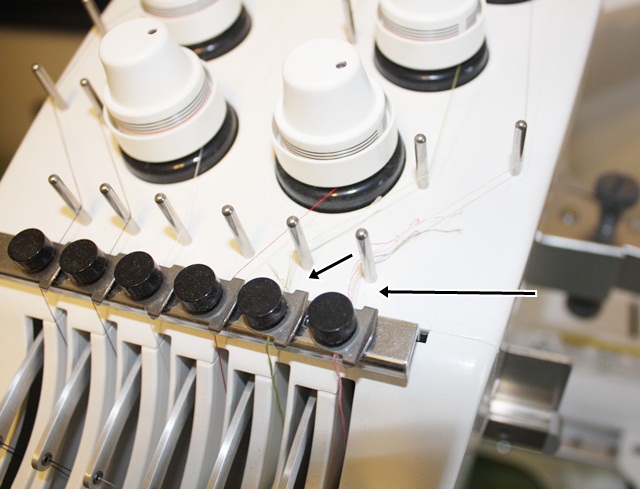
The teeny knot will pull that new thread all the way through down to the needle (but not through the needle hole).

Don’t try to pull it through the needle hole. The knot, however tiny, is too big to go through that hole. Again, I UN-THREAD the needle before I start pulling.

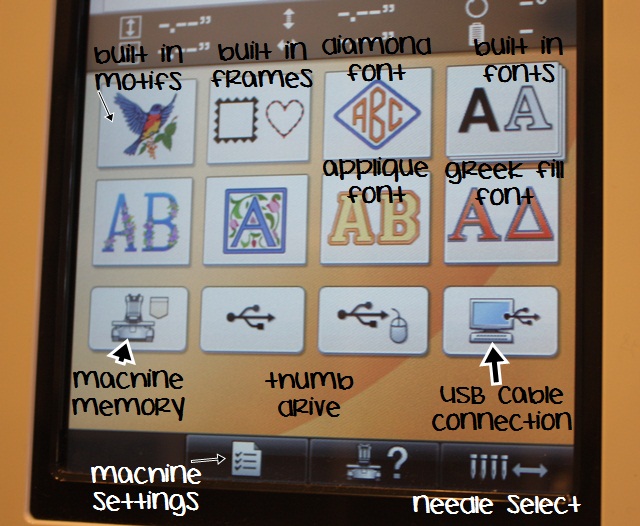
This is when you press that NEEDLE SELECT button in the lower right corner of your screen.

 It will pull up this screen, which shows you your needles. The numbers are backwards because needle 1 is actually the far right thread on the top of your machine and the far right needle on your needle bar. If you are changing out the thread colors on needle 2 and 3 only, then just select 2 and your machine will move needle 2 to the center of the machine.

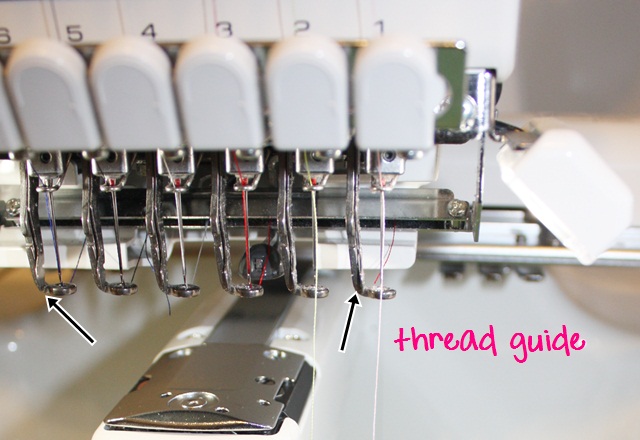
 This photo is blurry, but there is a guide (see next photo) that you wrap the thread around, and then you wrap the thread up and to the right around the white button with the curved arrow on it (below). This will also cut the excess thread off (including the previous color thread hanging down). You then press the THREAD NEEDLE BUTTON (see ABOVE photo) and it will thread your needle. Then you would select needle 3 and your machine will move needle 3 over making it the center needle. Same process ~ wrap the thread around the guide, then up and around the white button which will cut the excess thread off. Then press the thread needle button again.

You may see better the metal guide/clip to the left of the needle. You wrap the thread around it to the left, then up and around the white button.

 The automatic needle threader sweeps down, threads the needle and pulls the excess thread to the silver bar behind the needles.

 Here is another shot of 2 thread colors tied together. Red was the old thread and I’m changing it to yellow.

 I think I mentioned before that I typically KEEP black & white thread on my machine at all times. Since I’m right handed, I also use needles 1,2 and 3 the most. I don’t think I’ve ever done a design in which I needed more than 6 thread colors. If you needed to, you could change out the thread during the sewing process.

I don’t want to get too technical. This is just a quick shortcut in case any of you are thinking of getting this machine! I know when I first looked at it I was thinking it was going to take me all day just to change thread colors!

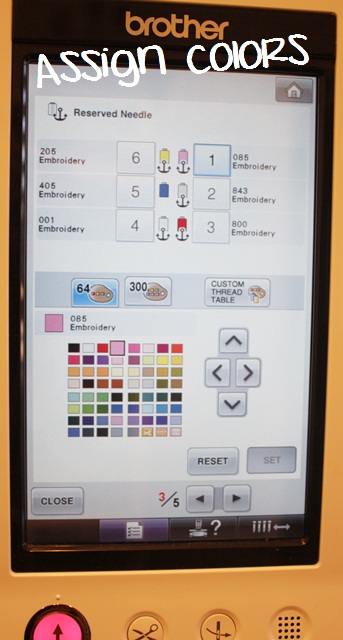
This also goes back to my other post regarding assigning thread colors to my machine. When I change my thread colors, I then “tell” my machine what colors are now on the machine. I had a couple of people comment that they do this differently, but this is how I was taught and seems the most logical to me, so I’m going to stick with it (because it’s also like 2nd nature to me now). There seem to be other shortcuts (magic wand) but this method makes the most sense. There is a video on Sewingmachine.com on assigning colors: http://www.youtube.com/watch?v=zElZLt2l3fU&feature=player_embedded. I believe it’s a PR620 so it’s not exactly like my machine and my screens. But, one blog reader said it helped.

I will work on the PR650 applique post this weekend!